> ## Documentation Index
> Fetch the complete documentation index at: https://relevanceai.com/docs/llms.txt
> Use this file to discover all available pages before exploring further.
# Create a Tool
> How to create your first Tool in Relevance AI.
This guide walks you through creating a Tool. For an overview of what Tools are and how they work, see [Tools](/get-started/core-concepts/tools).
## Two ways to create
Describe what you want in plain language and the platform generates a working Tool for you. Great for getting started fast — you make the tweaks.
Full step-by-step control over inputs, steps, and outputs. Ideal when you have a specific workflow in mind or need precision.
## Option 1: Invent a Tool
1. Click **Tools** in the left sidebar
2. Click **+ New Tool**
3. Select **Invent**
4. Describe what the Tool should do — be specific about the input it receives, the action it performs, and the output you expect
5. Review the generated Tool — Inventor will set up the inputs, steps, and outputs for you
6. Test and tweak as needed
## Option 2: Build from scratch
1. Click **Tools** in the left sidebar
2. Click **+ New Tool**
3. Select **Start from scratch**
4. Give your Tool a name and description, then click **Edit agent prompt** to describe how an Agent should use the Tool
5. Add your **inputs** — what data does the Tool need to receive?
6. Add **steps** — what should the Tool do with that data? Steps include LLM prompts, API calls, integrations, code execution, and more
7. Define your **outputs** — what should the Tool return when it's done?
8. Run individual steps to test as you build
9. Give the Tool to an Agent or [share it](/build/tools/share-your-tool) as a standalone form
## The Tool Builder
The Tool Builder has three tabs:
* **Use** — run and test your Tool as a shareable form
* **Build** — create your Tool by defining inputs and chaining steps together
* **Logs** — review past executions and debug issues
## Editing shared tools
When you open a tool that is used by two or more agents, a warning banner appears at the top of the editor. The banner shows how many agents use the tool and warns that your changes will affect all of them.
To edit without affecting other agents, click **Clone this tool** in the banner. This creates an independent copy you can modify and assign to specific agents.
Edit the tool directly when the change should apply across all agents using it — for example, fixing a bug or updating a shared integration. Clone the tool when you need a variation for a specific agent, or want to test changes before applying them broadly.
The banner can be minimized. Your preference is saved per tool, so minimized banners stay minimized on future visits.
## Follow along on YouTube
## What's next?
Once you've created a Tool, explore the rest of the build guides to refine it:
* [Style guide](/build/tools/customize-tool/tool-style-guide) — naming conventions and best practices for making Tools work well with Agents
* [Inputs](/build/tools/customize-tool/inputs) — configure what data your Tool receives
* [Steps](/build/tools/customize-tool/steps) — chain actions together into a workflow
* [Outputs](/build/tools/customize-tool/outputs) — define what your Tool returns
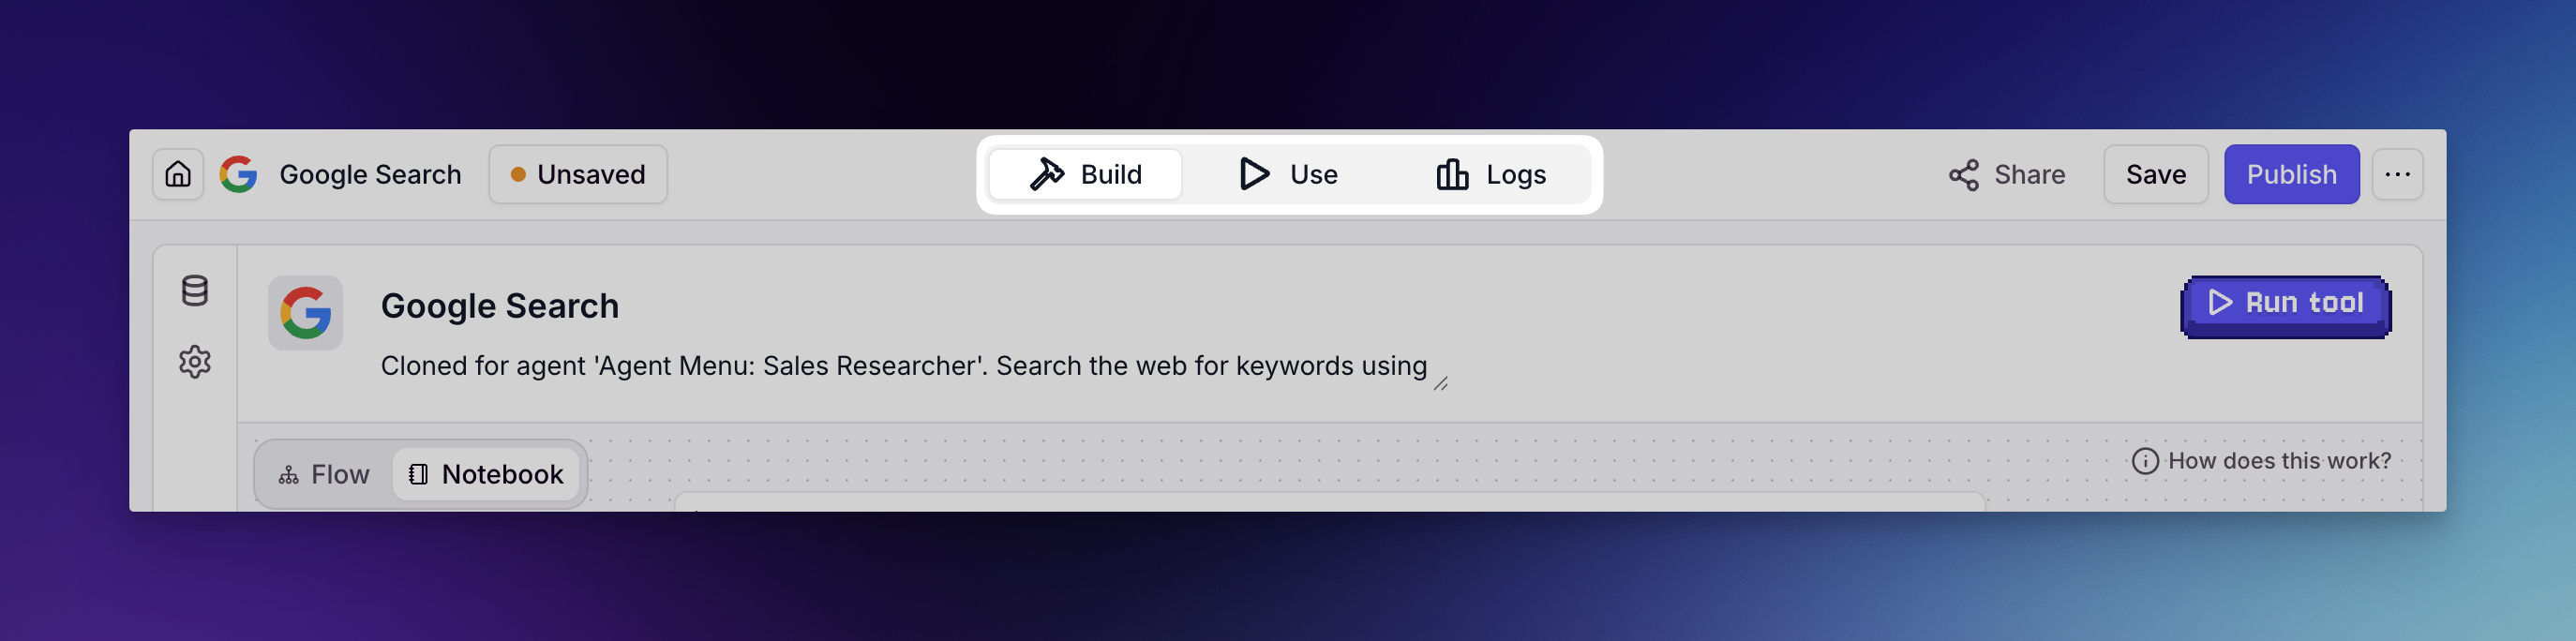 The Tool Builder has three tabs:
* **Use** — run and test your Tool as a shareable form
* **Build** — create your Tool by defining inputs and chaining steps together
* **Logs** — review past executions and debug issues
## Editing shared tools
When you open a tool that is used by two or more agents, a warning banner appears at the top of the editor. The banner shows how many agents use the tool and warns that your changes will affect all of them.
To edit without affecting other agents, click **Clone this tool** in the banner. This creates an independent copy you can modify and assign to specific agents.
Edit the tool directly when the change should apply across all agents using it — for example, fixing a bug or updating a shared integration. Clone the tool when you need a variation for a specific agent, or want to test changes before applying them broadly.
The banner can be minimized. Your preference is saved per tool, so minimized banners stay minimized on future visits.
## Follow along on YouTube
## What's next?
Once you've created a Tool, explore the rest of the build guides to refine it:
* [Style guide](/build/tools/customize-tool/tool-style-guide) — naming conventions and best practices for making Tools work well with Agents
* [Inputs](/build/tools/customize-tool/inputs) — configure what data your Tool receives
* [Steps](/build/tools/customize-tool/steps) — chain actions together into a workflow
* [Outputs](/build/tools/customize-tool/outputs) — define what your Tool returns
The Tool Builder has three tabs:
* **Use** — run and test your Tool as a shareable form
* **Build** — create your Tool by defining inputs and chaining steps together
* **Logs** — review past executions and debug issues
## Editing shared tools
When you open a tool that is used by two or more agents, a warning banner appears at the top of the editor. The banner shows how many agents use the tool and warns that your changes will affect all of them.
To edit without affecting other agents, click **Clone this tool** in the banner. This creates an independent copy you can modify and assign to specific agents.
Edit the tool directly when the change should apply across all agents using it — for example, fixing a bug or updating a shared integration. Clone the tool when you need a variation for a specific agent, or want to test changes before applying them broadly.
The banner can be minimized. Your preference is saved per tool, so minimized banners stay minimized on future visits.
## Follow along on YouTube
## What's next?
Once you've created a Tool, explore the rest of the build guides to refine it:
* [Style guide](/build/tools/customize-tool/tool-style-guide) — naming conventions and best practices for making Tools work well with Agents
* [Inputs](/build/tools/customize-tool/inputs) — configure what data your Tool receives
* [Steps](/build/tools/customize-tool/steps) — chain actions together into a workflow
* [Outputs](/build/tools/customize-tool/outputs) — define what your Tool returns