> ## Documentation Index
> Fetch the complete documentation index at: https://relevanceai.com/docs/llms.txt
> Use this file to discover all available pages before exploring further.
# Clear Rows
> The Clear Rows tool step allows you to clear rows in your Google Sheet
## Add the ‘Clear Rows’ Tool step to your Tool
You can add the ‘Clear Rows’ Tool step to your Tool by:
1. Creating a new Tool, then searching for the ‘Clear Rows’ Tool step
2. Click ‘Expand’ to see the full Tool step
3. Using the dropdown menu:
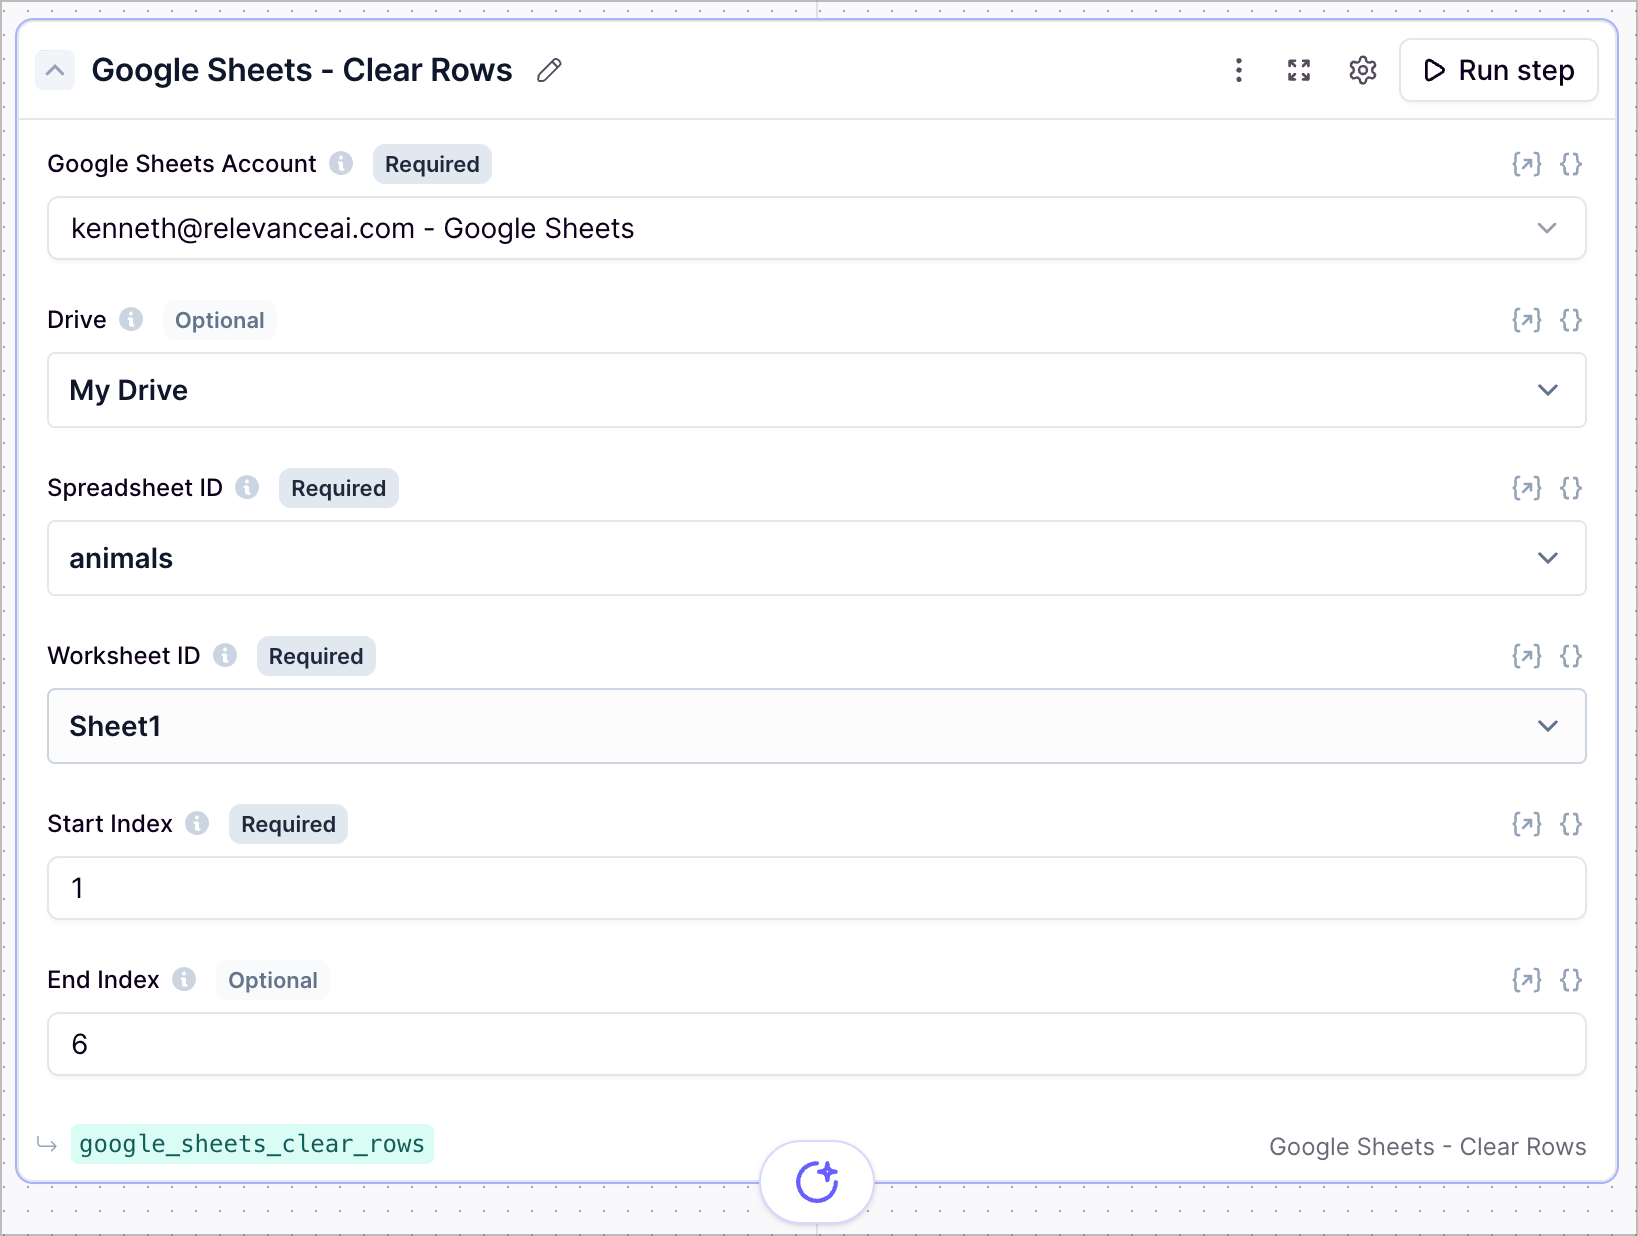
* Select the Google account you would like to use.
* Select the Drive you would like to use (defaults to "My Drive").
* Select the Spreadsheet you would like to clear the rows in.
* Select the worksheet you would like to clear the rows in.
4. Enter the row number you want to start clearing from.
5. Enter the row number you want to stop clearing at.
6. Click 'Run step' to test out the Tool
## Using in an Agent
There are 3 ways to configure the tool step when using in an agent
This is the easiest way to configure the tool step. You can select the Drive, Spreadsheet and Worksheet from a list of options via the dropdown menu.
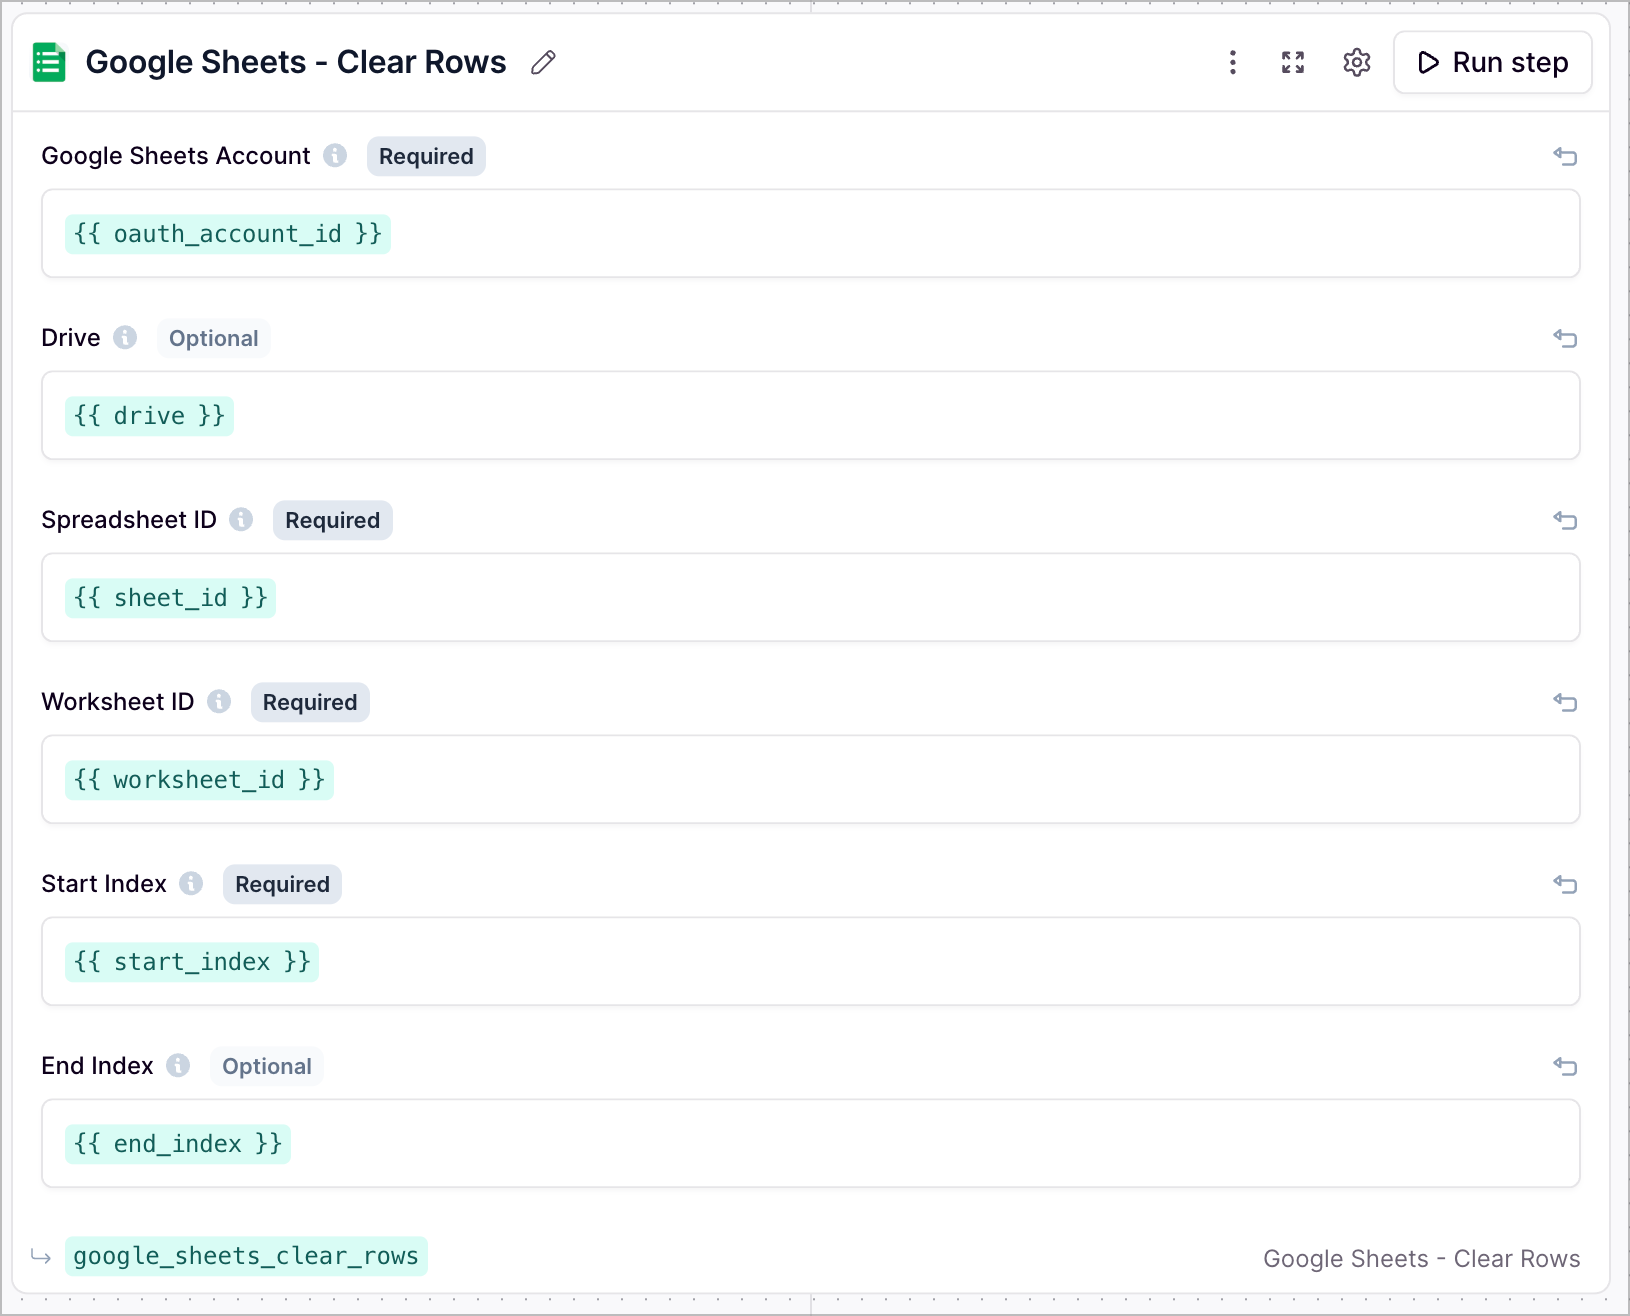
 This option offers the most flexibility - you can use the same tool step for multiple Google Sheets, however you will need to manually provide the necessary Google Sheet IDs.
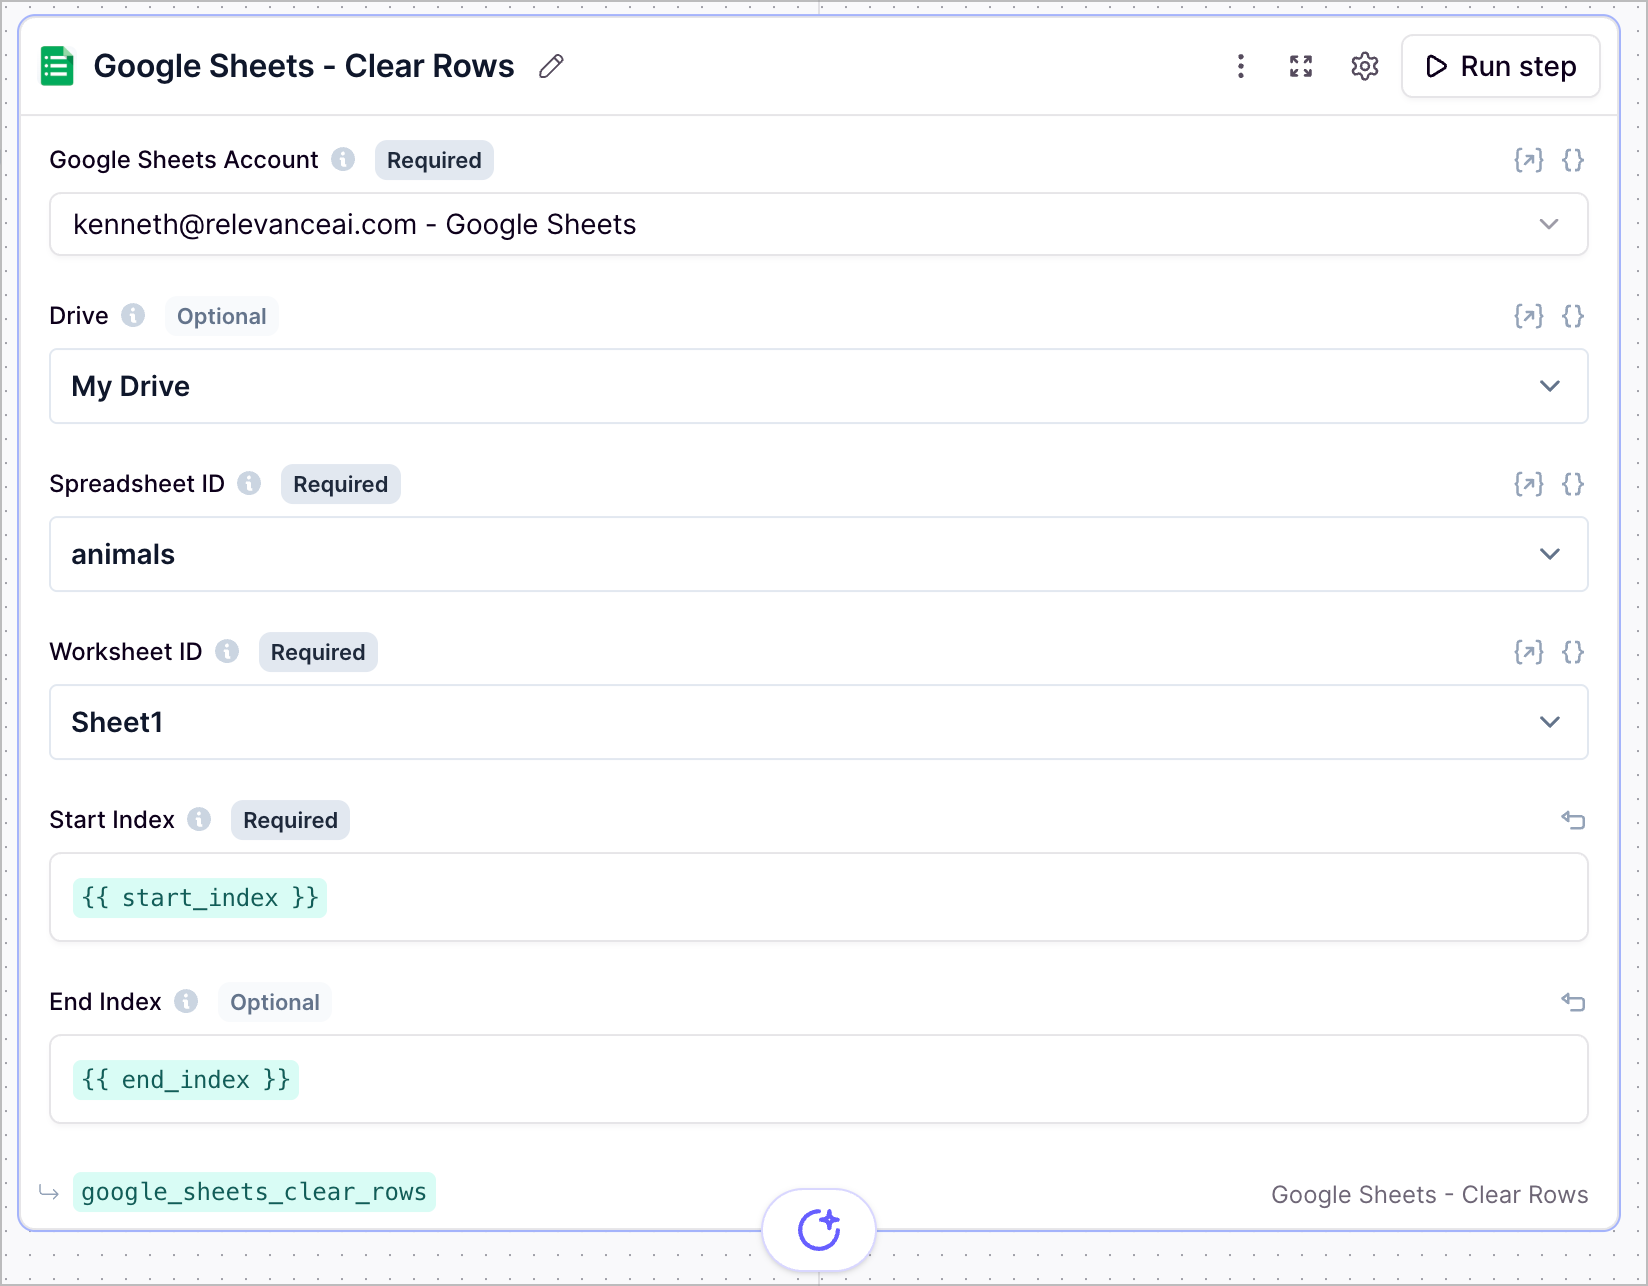
 This option offers the best of both worlds. You can use the dropdown menu to select the Drive, Spreadsheet and Worksheet, and then use an input variable for "Start Index" and "End Index" to give the agent the flexibility to clear different rows.
 ## Parameters
The Drive you want to use. By default, the tool uses "My Drive".
To get the spreadsheet ID, navigate to your Google Sheet and copy the ID from the URL (the long string between `/d/` and `/edit`).
[You can use this tool to parse the worksheet, spreadsheet and drive IDs from a url](https://app.relevanceai.com/notebook/f1db6c/d64db999bc25-4ea0-b926-30b350f69243/01e4918b-6c0a-423d-8daa-a625ced25e23)
To get the worksheet ID, open the specific worksheet you want to use and copy the ID from the URL (appears after `#gid=`).
[You can also use this tool to parse the worksheet, spreadsheet and drive IDs from a url](https://app.relevanceai.com/notebook/f1db6c/d64db999bc25-4ea0-b926-30b350f69243/01e4918b-6c0a-423d-8daa-a625ced25e23)
The row number you want to start clearing from (inclusive).
The row number you want to stop clearing at (exclusive).
Example: If you want to clear rows 1 to 5, you would enter 1 for "Start Index" and 6 for "End Index".
## Frequently asked questions (FAQs)
**The dropdown menu is the easiest way to configure the tool step**. You can select the Drive, Spreadsheet and Worksheet from a list of options via the dropdown menu.
**The input variables offer more flexibility** e.g. you can use the same tool step for multiple Google Sheets, however you will need to manually provide the necessary Google Sheet IDs.
If you are using the tool in an agent, this is the recommended approach. You can use the dropdown menu to select the Drive, Spreadsheet and Worksheet that don't need to change, and then use the green input variables for "Start Index" and "End Index" to allow the agent to dynamically clear different rows in your Google sheet.
If you are only using the input variables, you will need to provide the necessary Google Sheet IDs for the tool step to function properly.
When you use [Delete Rows](/build/tools/tool-steps/google-sheets/delete-rows), the remaining rows shift up to fill the gap. When you use Clear row, the rows are cleared in place (the data is removed, but the rows themselves remain the same).
## Parameters
The Drive you want to use. By default, the tool uses "My Drive".
To get the spreadsheet ID, navigate to your Google Sheet and copy the ID from the URL (the long string between `/d/` and `/edit`).
[You can use this tool to parse the worksheet, spreadsheet and drive IDs from a url](https://app.relevanceai.com/notebook/f1db6c/d64db999bc25-4ea0-b926-30b350f69243/01e4918b-6c0a-423d-8daa-a625ced25e23)
To get the worksheet ID, open the specific worksheet you want to use and copy the ID from the URL (appears after `#gid=`).
[You can also use this tool to parse the worksheet, spreadsheet and drive IDs from a url](https://app.relevanceai.com/notebook/f1db6c/d64db999bc25-4ea0-b926-30b350f69243/01e4918b-6c0a-423d-8daa-a625ced25e23)
The row number you want to start clearing from (inclusive).
The row number you want to stop clearing at (exclusive).
Example: If you want to clear rows 1 to 5, you would enter 1 for "Start Index" and 6 for "End Index".
## Frequently asked questions (FAQs)
**The dropdown menu is the easiest way to configure the tool step**. You can select the Drive, Spreadsheet and Worksheet from a list of options via the dropdown menu.
**The input variables offer more flexibility** e.g. you can use the same tool step for multiple Google Sheets, however you will need to manually provide the necessary Google Sheet IDs.
If you are using the tool in an agent, this is the recommended approach. You can use the dropdown menu to select the Drive, Spreadsheet and Worksheet that don't need to change, and then use the green input variables for "Start Index" and "End Index" to allow the agent to dynamically clear different rows in your Google sheet.
If you are only using the input variables, you will need to provide the necessary Google Sheet IDs for the tool step to function properly.
When you use [Delete Rows](/build/tools/tool-steps/google-sheets/delete-rows), the remaining rows shift up to fill the gap. When you use Clear row, the rows are cleared in place (the data is removed, but the rows themselves remain the same).