> ## Documentation Index
> Fetch the complete documentation index at: https://relevanceai.com/docs/llms.txt
> Use this file to discover all available pages before exploring further.
# Sentiment analysis using large language models
> Use LLMs to label sentiment of entries in a dataset
Large language models can be utilized in various ways, including tasks that might have been previously addressed with more "traditional ML".
One such task is the sentiment analysis of data, determining whether a text is positive, neutral, or negative.
In this page, we'll show you how to use a spreadsheet full of responses and apply LLMs to label each response with its corresponding sentiment.
## What do we need
1. **Prepare data**
Begin with preparing your CSV with the data you wish to classify. Ensure to include a column header for us to reference the correct field.
Your CSV file can have more than one field containing text to be analyzed. In the bulk run flow, you can specify the desired colum using the header.
2. **Sentiment analysis Template**
Use Relevance's [sentiment analysis](/docs/templates/sentiment-analysis) Template that
1. receives an input text
2. outputs a sentiment label
3. **Bulk run**
Apply the sentiment analysis tool not just to one entry (i.e. one row of your CSV file) but to all rows
4. **Export the results**
## Let's run sentiment analysis on our data
1. Upload your CSV file and enable the knowledge.
2. Set up an enrichment for sentiment analysis:
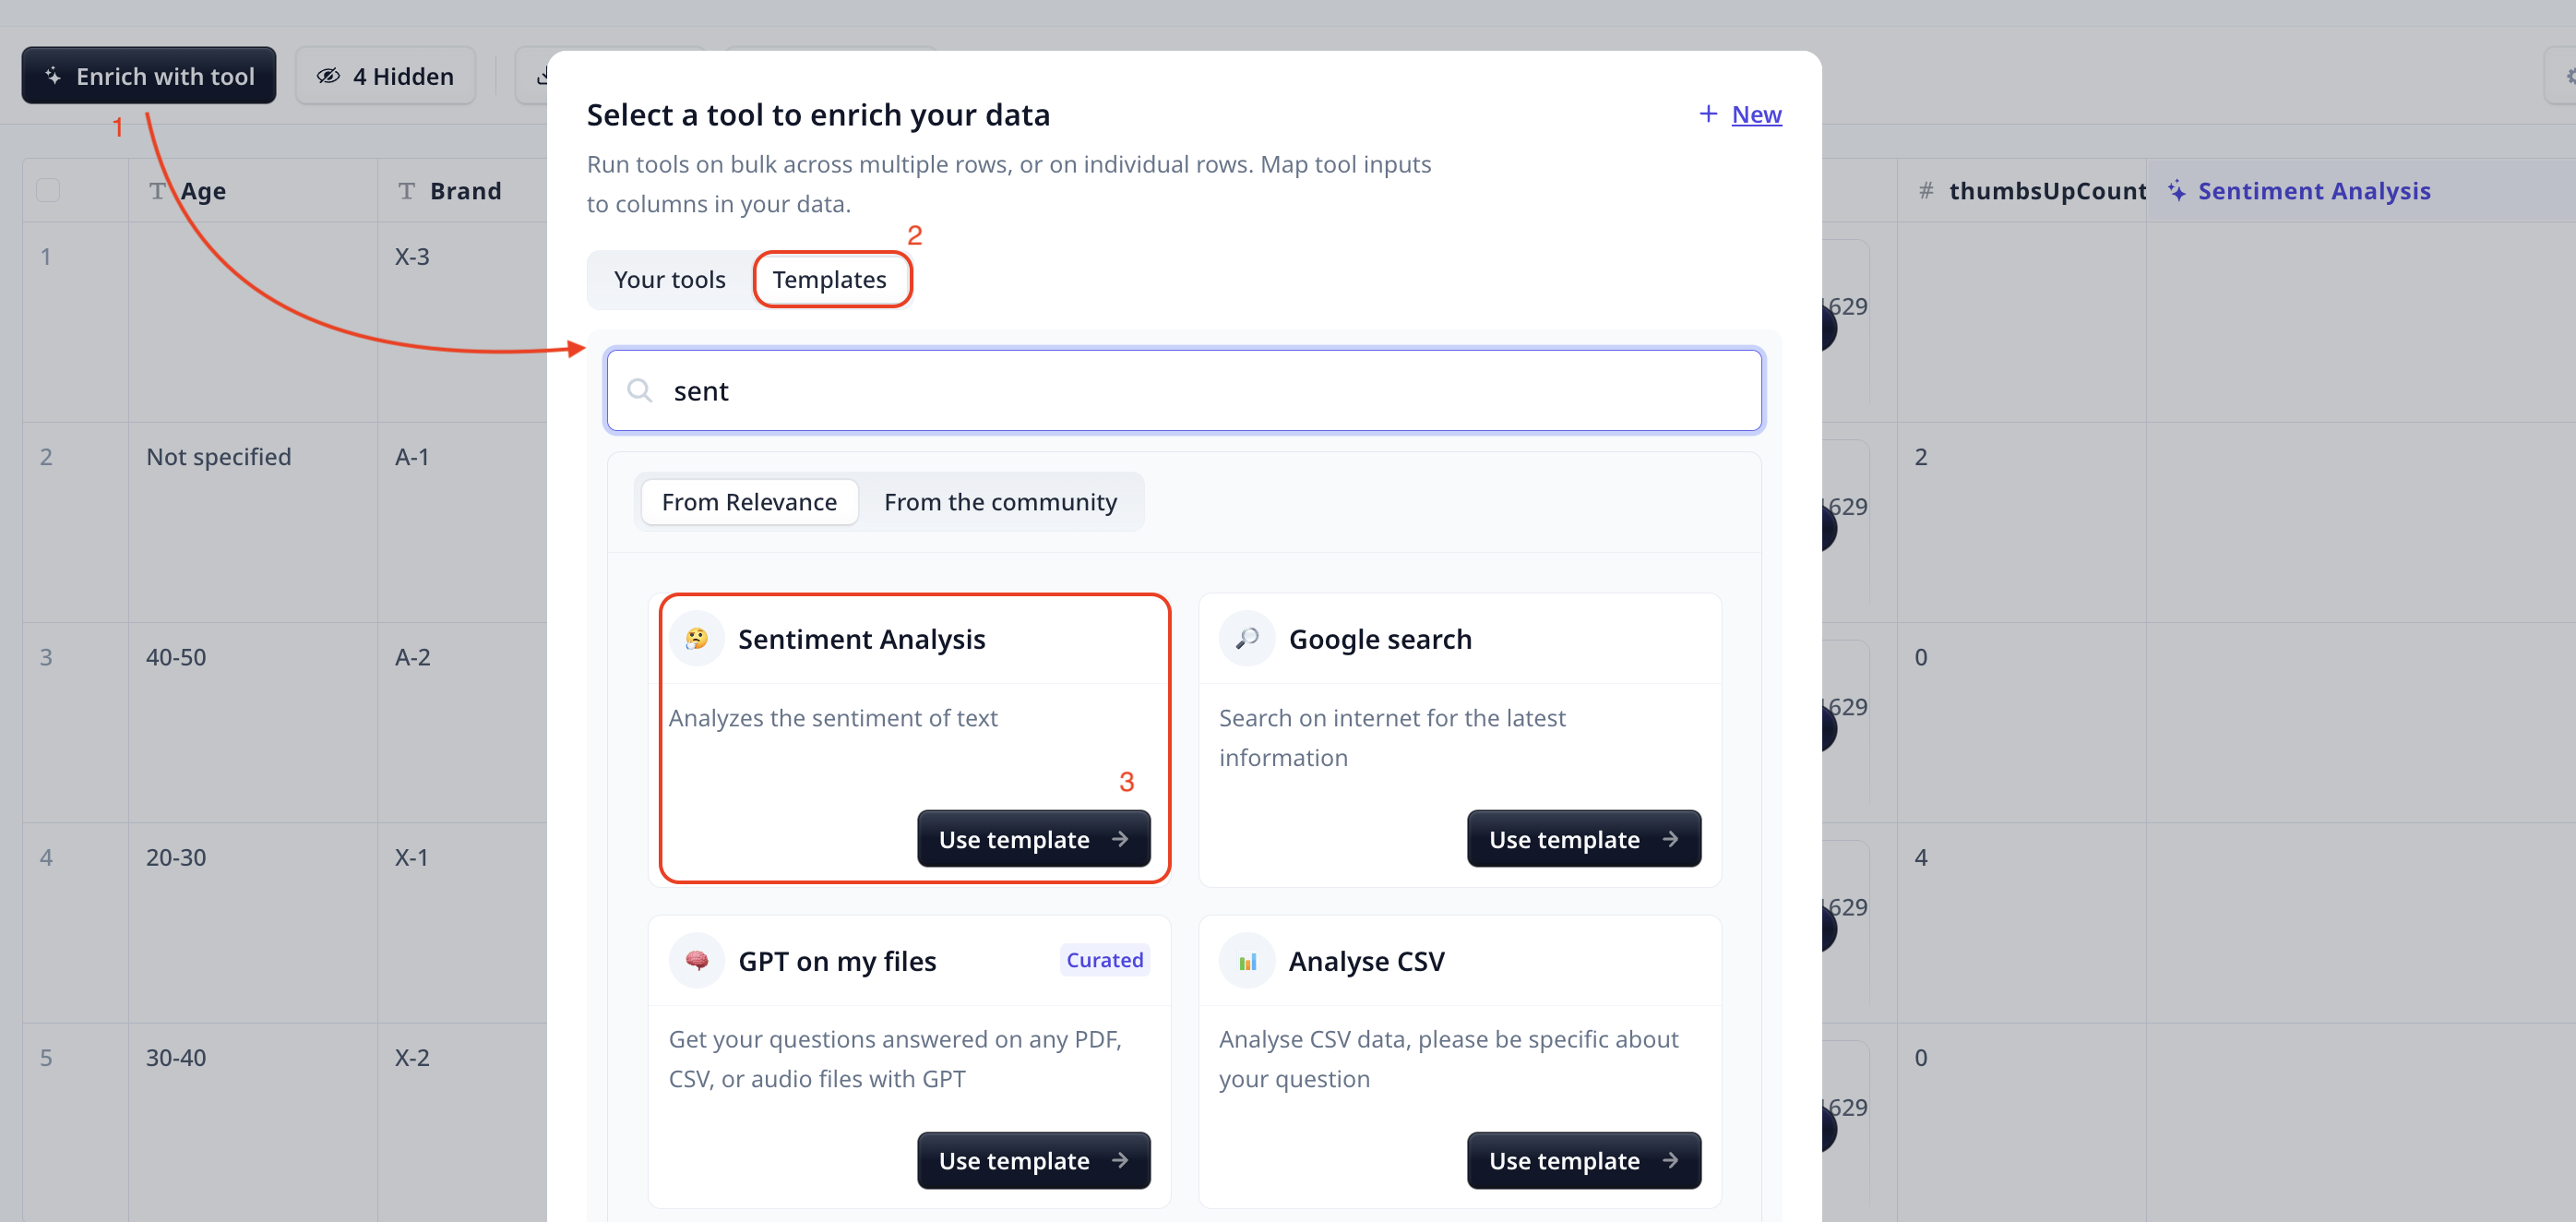
* Select your data table and on the [Data table](/docs/get-started/key-concepts/knowledge) page, click on the `Enrich` button on the top left
* Select sentiment analysis from Relevance Templates or from your own Tools if you have created or cloned one
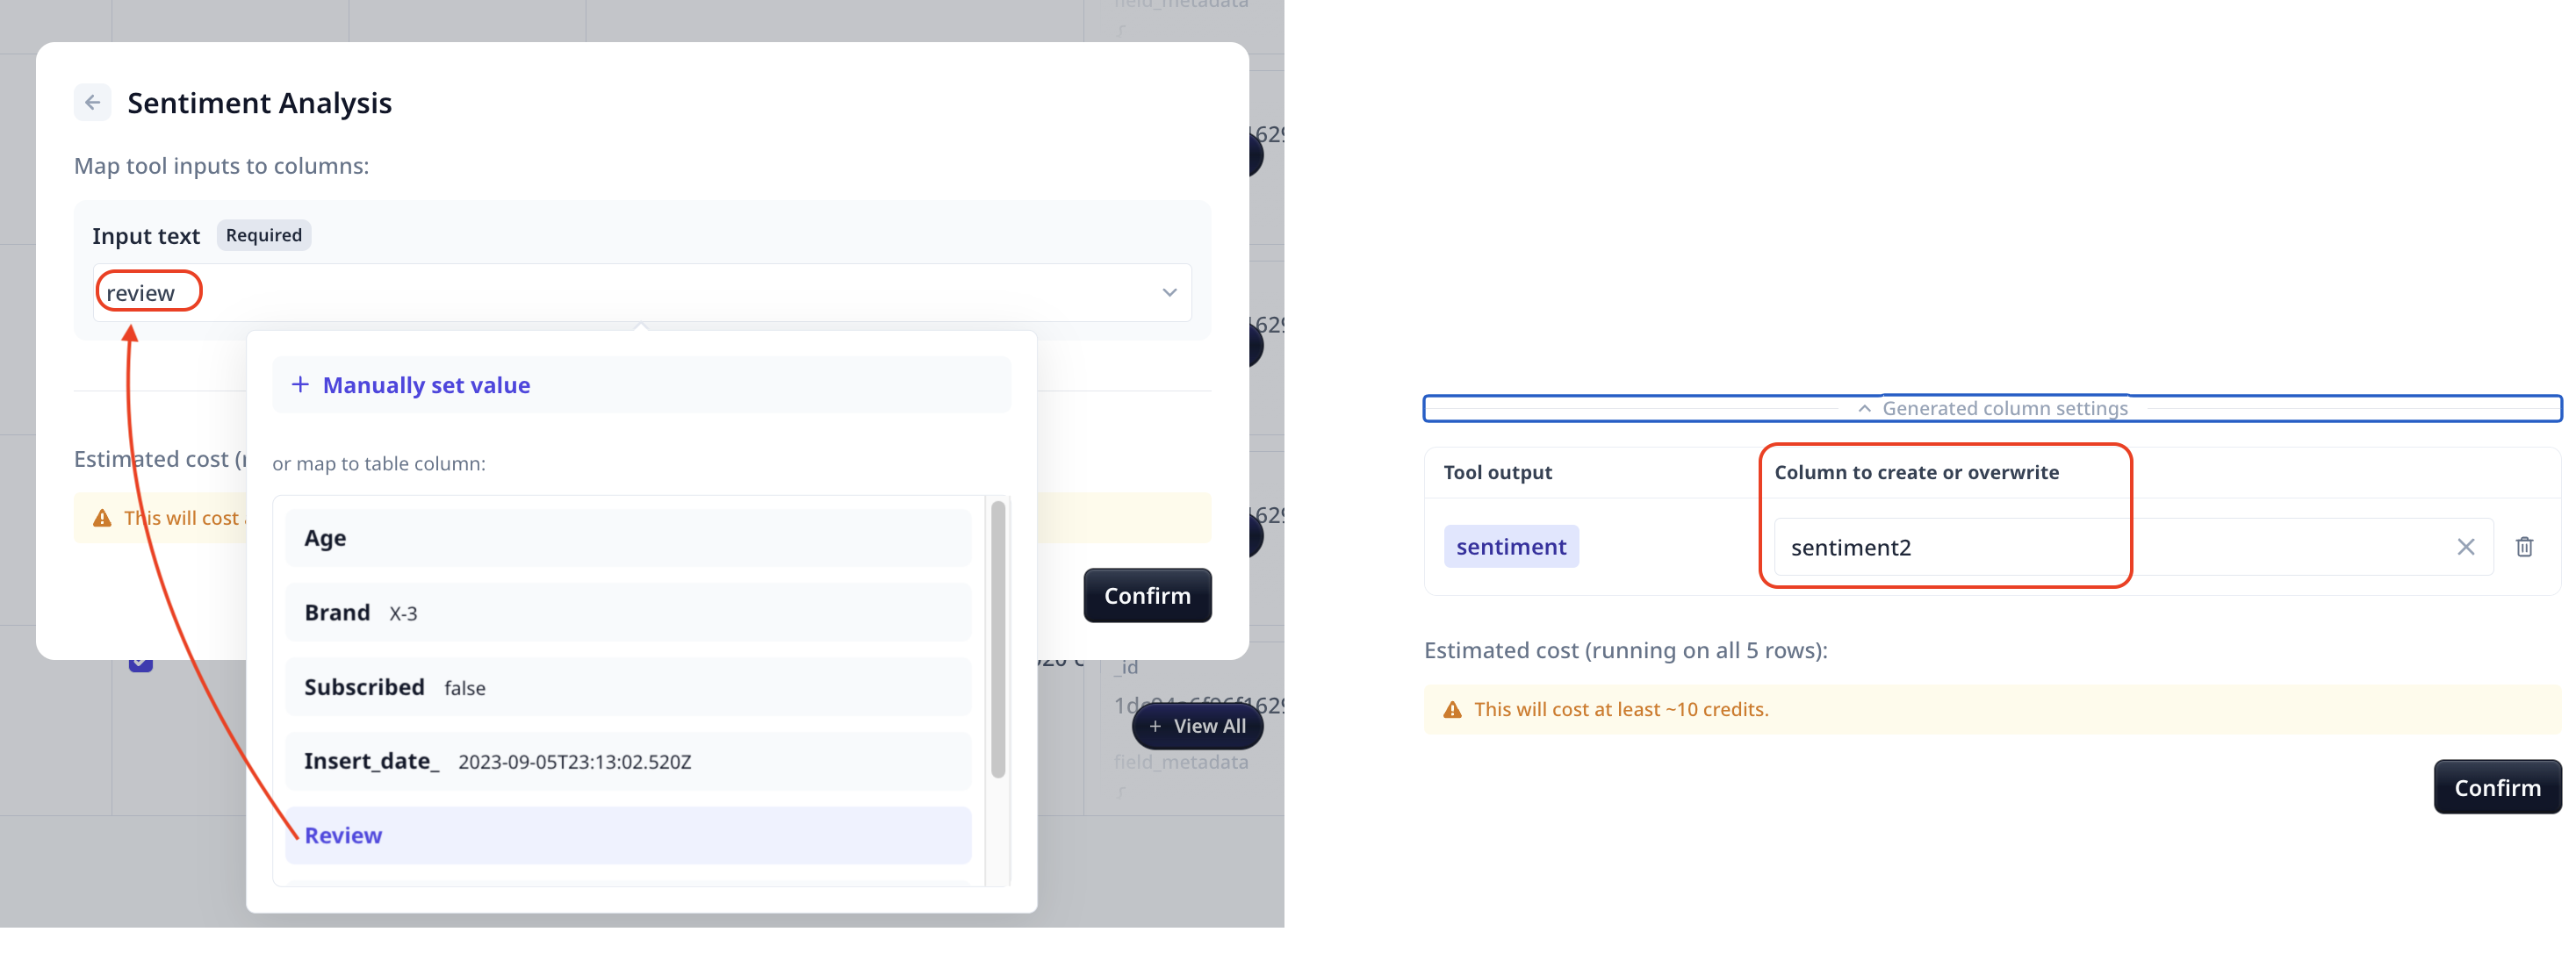
* Configure the enrichment by selecting the targeted column from the menu (i.e. the column to be analyzed) and a name for the output
column
You will see a new column gets added to your data table indicating the configuration has been done.
1. Configure an output column if you wish to run the analysis on multiple input fields. Otherwise, the first outputs will
be overwritten when running the analysis for the second time.
2. If your table is wide and the Enrichment column is not displayed after configuration, scroll to the right side of the table.
* Run the analysis on single entries (e.g. hover over the first row and click on play) or on the whole table by clicking on the
play button on the header.
More detailed explanation about bulk run can be found [here](/docs/build/tools/bulk-run)
3. Export the results by clicking on the `Download` button and continue with the standard format. A CSV copy of the data table will
be downloaded to your computer download folder in a few seconds (more details available at [Export results](/docs/build/tools/export))
Outdated but relevant video
 * Configure the enrichment by selecting the targeted column from the menu (i.e. the column to be analyzed) and a name for the output
column
* Configure the enrichment by selecting the targeted column from the menu (i.e. the column to be analyzed) and a name for the output
column
 You will see a new column gets added to your data table indicating the configuration has been done.