Introduction
Welcome to the documentation for the Sentiment Analysis Tool! This Tool is designed to analyze the sentiment of text and provide valuable insights into the expressed opinions. Whether you’re a marketer, customer service representative, or business owner, this Tool will assist you in understanding the sentiment behind customer feedback, social media posts, and other textual data. With its advanced algorithms and user-friendly interface, this Tool is a quick and easy way for leveraging sentiment analysis.Overview
The Sentiment Analysis Tool leverages state-of-the-art natural language processing to analyze the sentiment of text. It goes beyond simple keyword analysis and provides a nuanced understanding of the expressed sentiment in the text. By analyzing the sentiment, this Tool enables you to gain valuable insights into customer satisfaction, brand perception, and market trends. With its powerful capabilities and intuitive design, it is the perfect solution for unlocking the sentiment behind textual data.This Tool does not break the input text into its composing sentences. The assigned label is the overall
sentiment.
Therefore, if the input is composed of multiple sentences, some positive (e.g. She is really excited) and
some negative (e.g. but she was not successful last time) the overall sentiment is likely to be Neutral.
Key Features
- Accurate Sentiment Analysis: The Sentiment Analysis Tool utilizes large language models to accurately analyze the sentiment of text. This feature ensures that you receive reliable and accurate sentiment analysis results, allowing you to make informed decisions based on the insights gained.
- Fast Analysis: The Sentiment Analysis Tool produces results in the matter of seconds.
How to use the Tool
Locate the Tool in the template page and click onUse template.
You can use the Tool as is or
clone it.
Follow these steps to to analyze the sentiment of your text:
- Input Text: Enter the text you want to analyze into the Tool. This could be customer feedback, social media posts, product reviews, or any other textual data.
-
Run the Tool: Once you have uploaded the file and entered your question, click the “Run Tool” button (on the App page) or use
the run options on your data table (bulk/single run) to initiate the the analysis process. The Tool will analyze the text and provide
sentiment analysis results.
Tool execution at Relevance
Tools and templates can be- tested on individually provided inputs:
- set to fetch the data from a dataset and apply the analysis on the whole dataset:
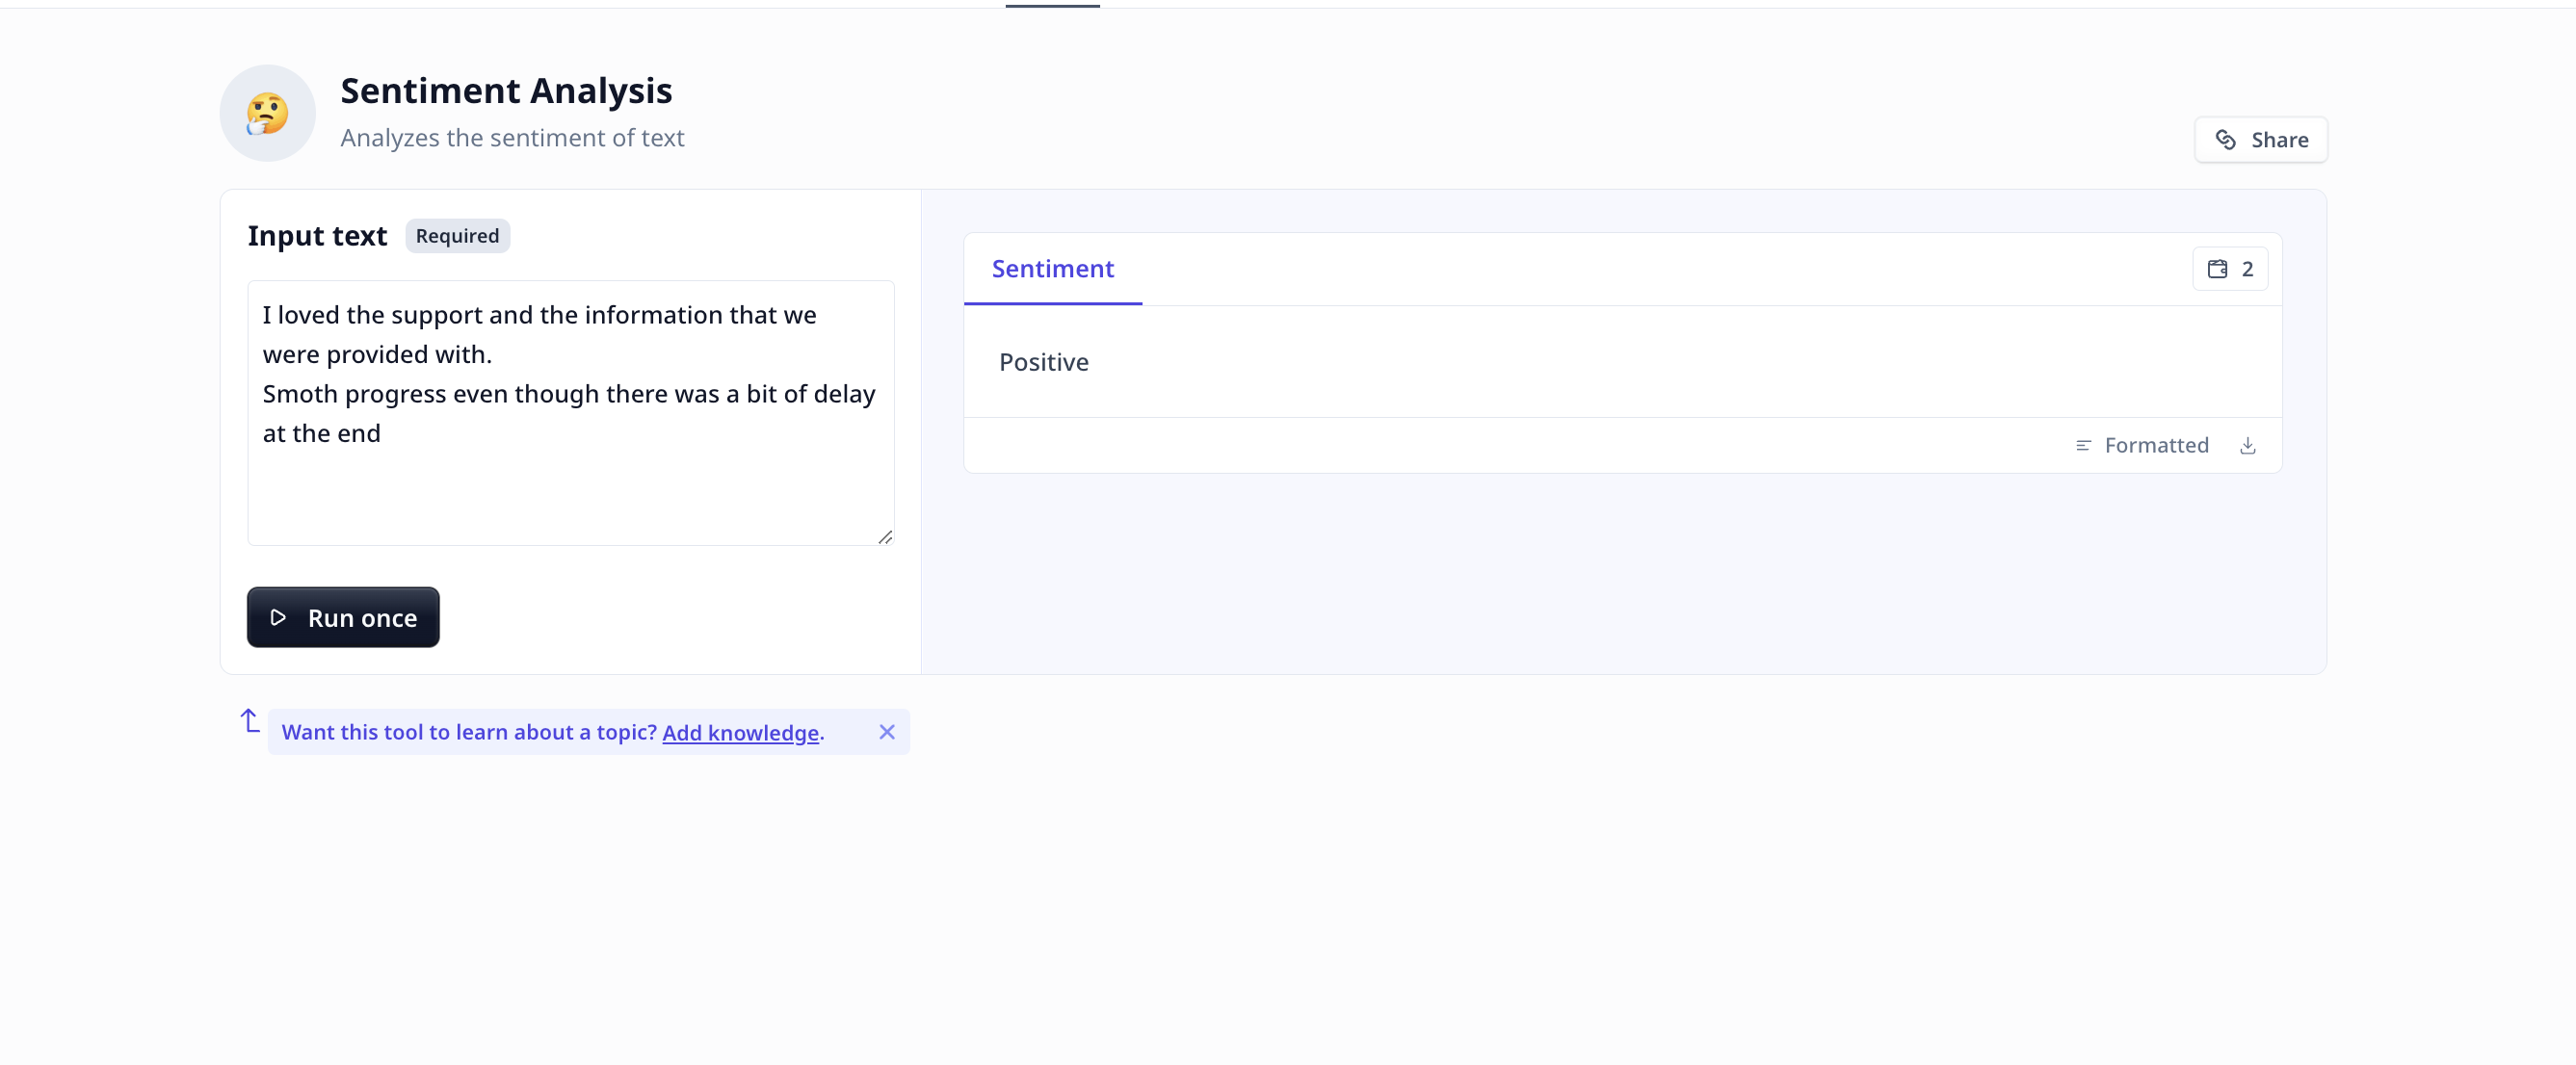
- View Results: The Tool will display the sentiment analysis results under one of (Positive, Negative or Neutral) labels.
Deep dive in the Tool
Tool components
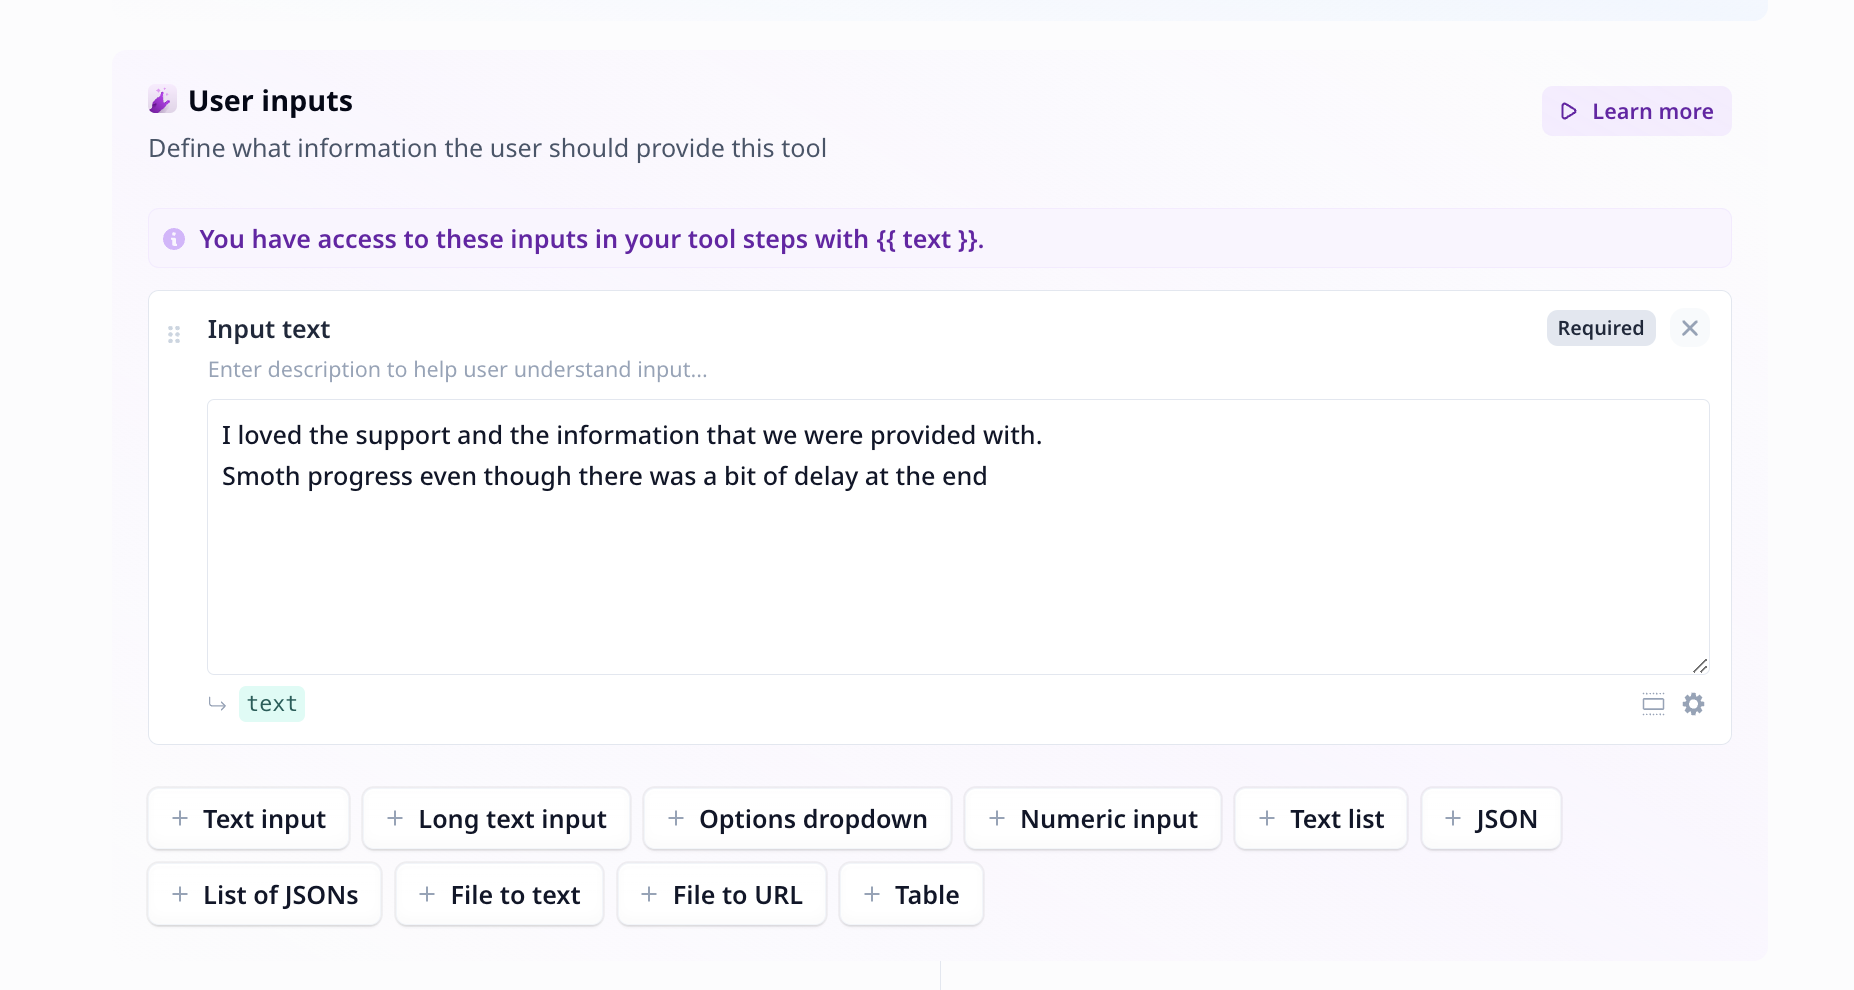
If you clone a template, or make a Tool from scratch, you will have access to the Build tab. Build is where one put together different components to build a Tool suitable for their needs.User inputs
Tool steps
There is only 1 LLM component under the Tool steps in this analysis flow.Large Language Model (LLM)
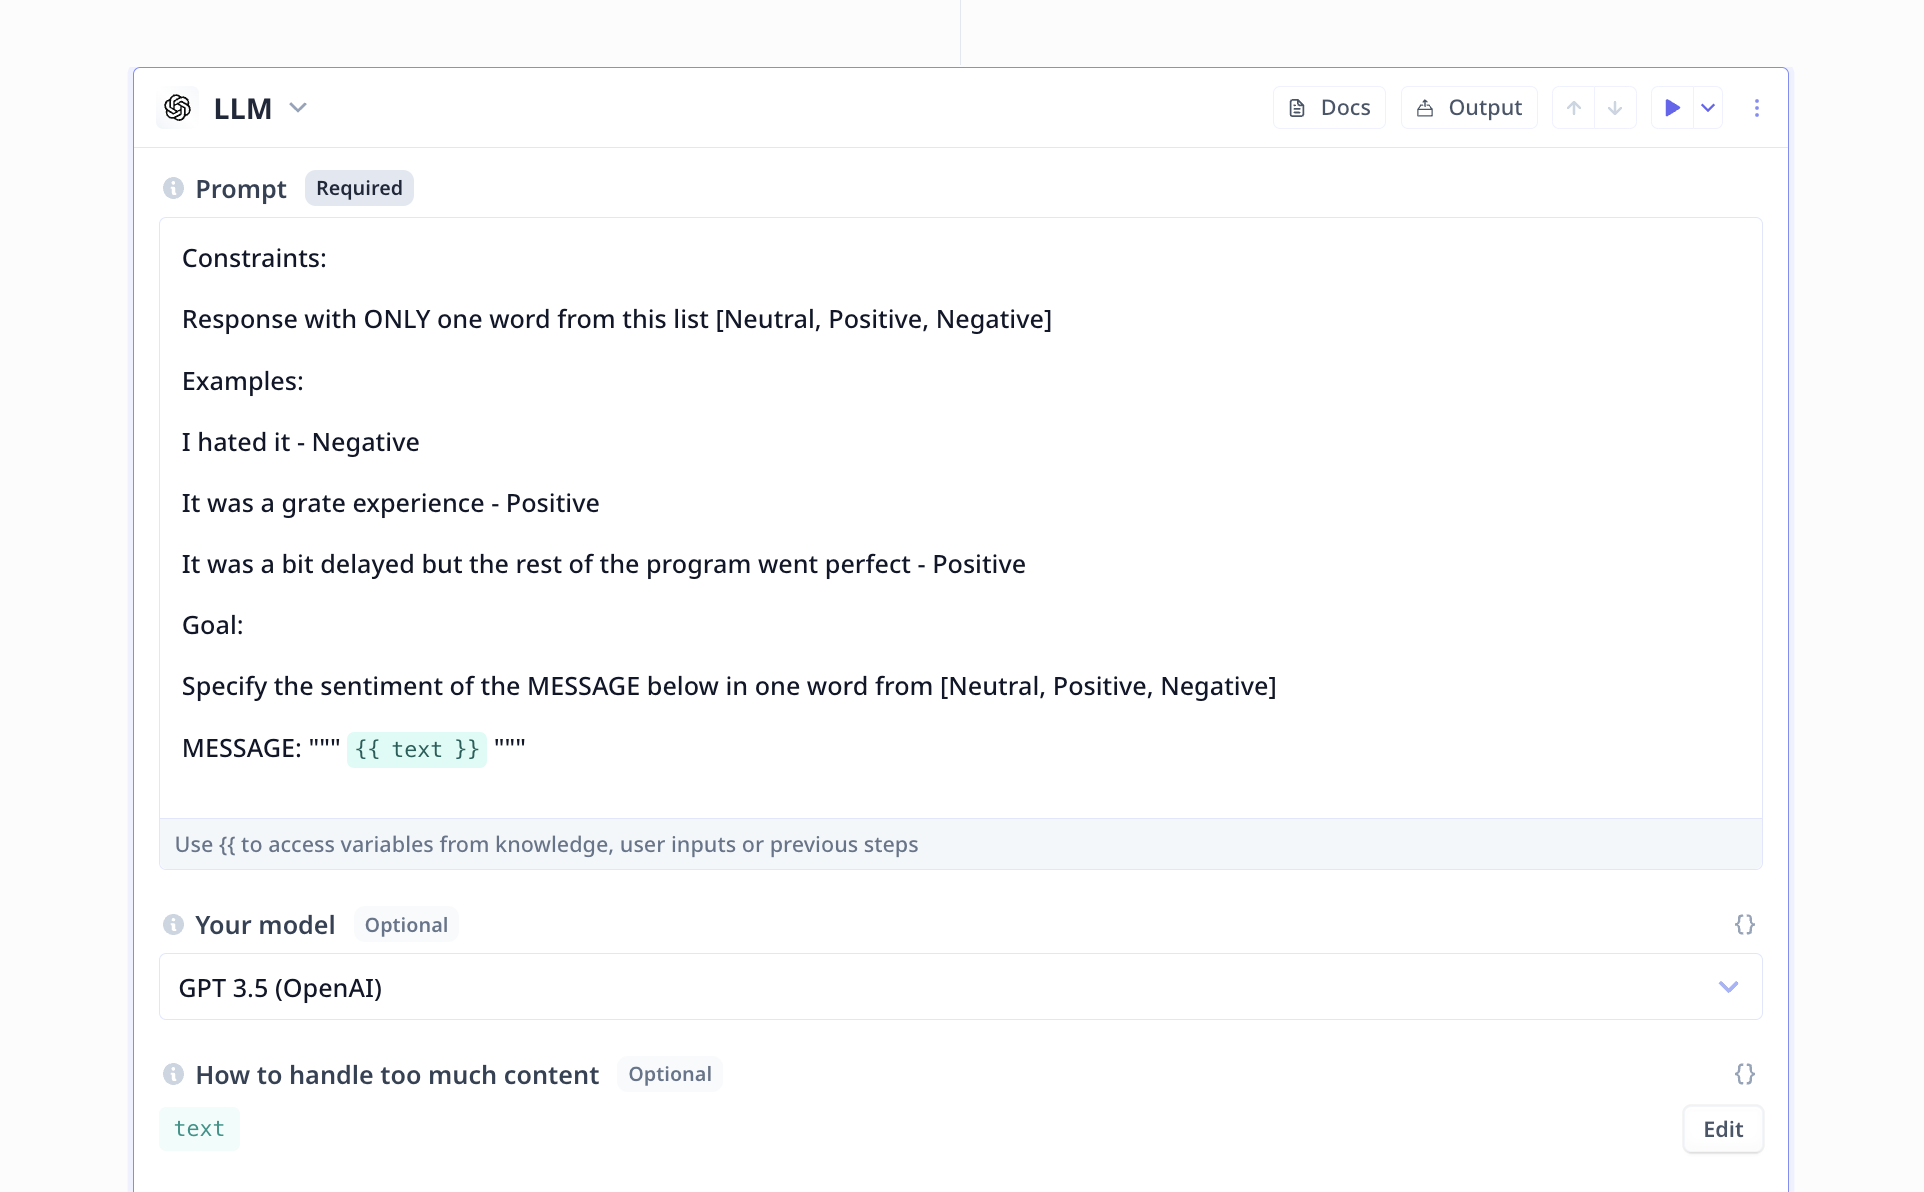
- Be short and precise with your instruction/request from the LLM
- Explicitly note constraints and goals
- Include a few examples when possible
Modify the Tool: Extracting the reason behind the given sentiment
The existing Tool conducts sentiment analysis using large language models. You might want to modify the Tool to receive other analysis results. This can be easily achieved by cloning the existing tool and customizing it in your account. In this tutorial, we’re going to enhance the existing sentiment analyzer by configuring multiple outputs to our Tool and adding them back to our original spreadsheet as two new columns - we’re extracting the reason behind the given sentiment as well. You’ll learn how you can have a single LLM prompt produces multiple pieces of information.Copy the existing Tool
Clone the Tool creates a copy of the Tool in your account and enables you to modify the components. After cloning the Tool, select it from the Tools page and go to the Build tab.Extracting Sentiment and Reason Simultaneously
We’re going to layer on multiple pieces of functionality within the same Tool to give us the desired output. Modify the LLM Prompt To obtain the explanation for the sentiment score, we could either introduce a separate LLM prompt or simply modify our existing prompt and then transform the output into a JSON. We’ll proceed with the latter. To accomplish this, we adjust our prompt:You are an expert sentiment classifier. Only ever respond with JSON in the format "{ sentiment, reason }". Do not say anything else.
After we’ve adjusted our prompt, we can proceed to try the Tool on one data sample (i.e. simply copy one of the messages from our dataset
and then hit run). We can now observe that this has provided us with a JSON-like output that includes a reason and the sentiment.

LLM the output is accessible via {{llm.answer}}.

Configure on the output component (i.e. last component of the page) and add the output fields.
