In our previous tutorial, we’ve examined different aspects of using examples and few-shot prompting to make Language Learning Models (LLMs) imitate your style and even automate sales responses.
Today, we’re going to explore the process of uploading and vectorizing datasets to LLMs, which will act as a knowledge base. This step-by-step guide will help you add knowledge to LLMs effectively and efficiently.
Prepare the dataset
The quality of your data significantly impacts the results you’ll get from your LLM therefore it’s important to properly prepare your dataset.
You can manually generate your data or pull it from your CRM or any other source. The process of creating the dataset remains the same, regardless of the data source.
Clean your dataset
In this tutorial we’re utilizing a spreadsheet. It’s important to create header columns for every field you want to use.
Moreover, avoid using spaces or special characters in the headers. Stick to lowercase letters and use dashes instead of spaces.
Proper naming conventions in header columns are crucial. Without a header column for each field, you won’t be able to reference the field later on.
Upload dataset to Relevance AI
Once you’ve decided on the data, it’s time to create a dataset. This is the first step to upload data to your LLM.
- Download the spreadsheet as a CSV file. This file will be used to upload data to the LLM.
- With your CSV file ready, it’s time to navigate to the Relevance AI Dashboard.
- Go to the ‘Knowledge’ section and create a new dataset.
- Next, upload the CSV file you’ve prepared. Name the dataset as per your preference.

- After uploading, preview your dataset. Ensure that the header columns align with your data. Once everything looks good, confirm the upload.
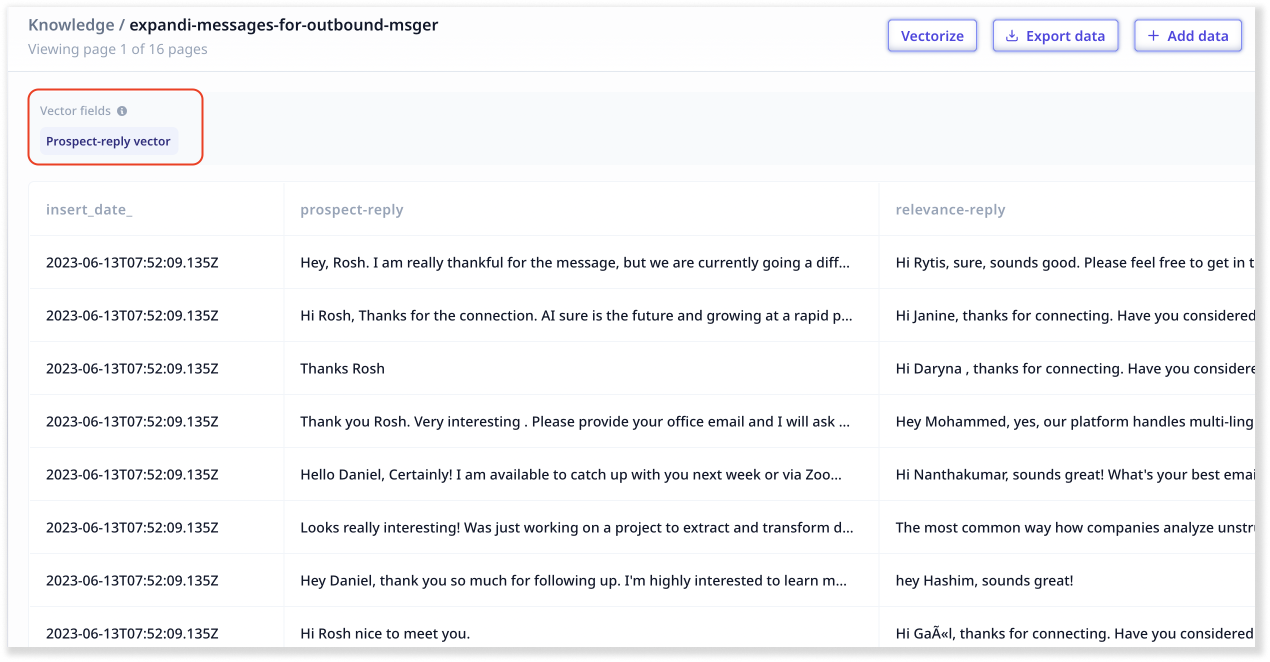
 Vectorize your dataset
Now we need to turn our data into a format that the AI can understand. Vectors (also referred to as embeddings) encode the meaning of information, therefore we want to vectorize our dataset as it’ll allow us to search through the dataset semantically to pull out the most relevant responses.
After the data upload is complete, choose the text fields you want to vectorize. For us, we’re vectorizing the ‘prospect reply’ field.
Vectorize your dataset
Now we need to turn our data into a format that the AI can understand. Vectors (also referred to as embeddings) encode the meaning of information, therefore we want to vectorize our dataset as it’ll allow us to search through the dataset semantically to pull out the most relevant responses.
After the data upload is complete, choose the text fields you want to vectorize. For us, we’re vectorizing the ‘prospect reply’ field.
Vectorizing text is a crucial step when you upload data to LLM. It allows you to perform semantic searches on your dataset later on. It helps match up a query with the most similar set of information from your dataset - in this case the most similar responses from the past.
 Set up ‘Vector search’
Once your text is vectorized, you can use it in a vector similarity search. Simply copy the vector name and paste it into the vector field in the ‘Vector search’ step of your chain. This is the field that contains the vector.
Set up ‘Vector search’
Once your text is vectorized, you can use it in a vector similarity search. Simply copy the vector name and paste it into the vector field in the ‘Vector search’ step of your chain. This is the field that contains the vector.
 Go to the chain where you want to use the vectorized dataset and add a ‘Vector search’ step for vector similarity search. Select the dataset you’ve created and set the ‘search query’. This will be the user input you want to match with the most similar examples in your dataset.
Then choose the model. It should correspond with the one we used to vectorize the data.
Go to the chain where you want to use the vectorized dataset and add a ‘Vector search’ step for vector similarity search. Select the dataset you’ve created and set the ‘search query’. This will be the user input you want to match with the most similar examples in your dataset.
Then choose the model. It should correspond with the one we used to vectorize the data.
 Wrapping up
In this tutorial, we covered how to create a data set for vector search, enabling you to compile a list of results based on the input you’ve received.
This can be used for tasks such as few-shot prompting. In the next tutorial, we’ll delve into more details on constructing four apps that can be deployed and shared with your team for use once created.
Wrapping up
In this tutorial, we covered how to create a data set for vector search, enabling you to compile a list of results based on the input you’ve received.
This can be used for tasks such as few-shot prompting. In the next tutorial, we’ll delve into more details on constructing four apps that can be deployed and shared with your team for use once created.