In this guide we’ll explore how you can enhance your LLM’s performance and teach it to mimic your style.
We’re diving into the world of few-shot prompting with large language models (LLMs), sharing a technique that allows LLMs to
mimic your style based on large datasets. Let’s get started!
Few-shot prompting basics
Few-shot prompting is a technique that feeds an LLM with some example data on how you want the response to be made.
The LLM then generates a response that mimics the given examples. This technique can significantly enhance the performance of your LLM.
Few-shot prompting can help you adapt your LLM’s responses to different environments, ensuring that your messages are always on point.
A real-life example: sales response automation
Suppose you want to create a sales automation Tool that can respond to emails and LinkedIn messages automatically.
You can use few-shot prompting to train your LLM to generate responses that align with your style and meet your specific rules and objectives.
For instance, LinkedIn messages tend to be shorter and more specific.
To start, create a new tool.
Add a long text input, to present the message to which we want to respond. Next, add an
LLM component.
Don’t forget to hit “Save” on the top right to save your Tool.
Don’t take system prompts for grantedCustomizing the prompts and including examples specific to your data context can enhance performance.
At Relevance, you can access “system prompt” under “advanced options” in an LLM component. In our example, a system prompt can be:You are a sales representative for relevant AI. Your goal is to reply to emails being professional while trying to book a meeting.
2. Add examples to your LLM prompt
We aim to incorporate messages that some of our prospects have previously sent us, along with our responses to them.
These will constitute the prospect-Relevance AI LinkedIn message pairs, serving as examples.
The more examples we include, the better performance we can anticipate from the LLM.
Enter a few cases of messages and your corresponding responses while using identifiers such as “Message and Response” or “Received and Reply”.
In our example, we used “Response” and “Relevance AI reply”. The pattern shows the LLM that what the expected task is.
At the end use {{}} to enter the response from the input component and then the respondent identifier. A sample is shown in the image below.
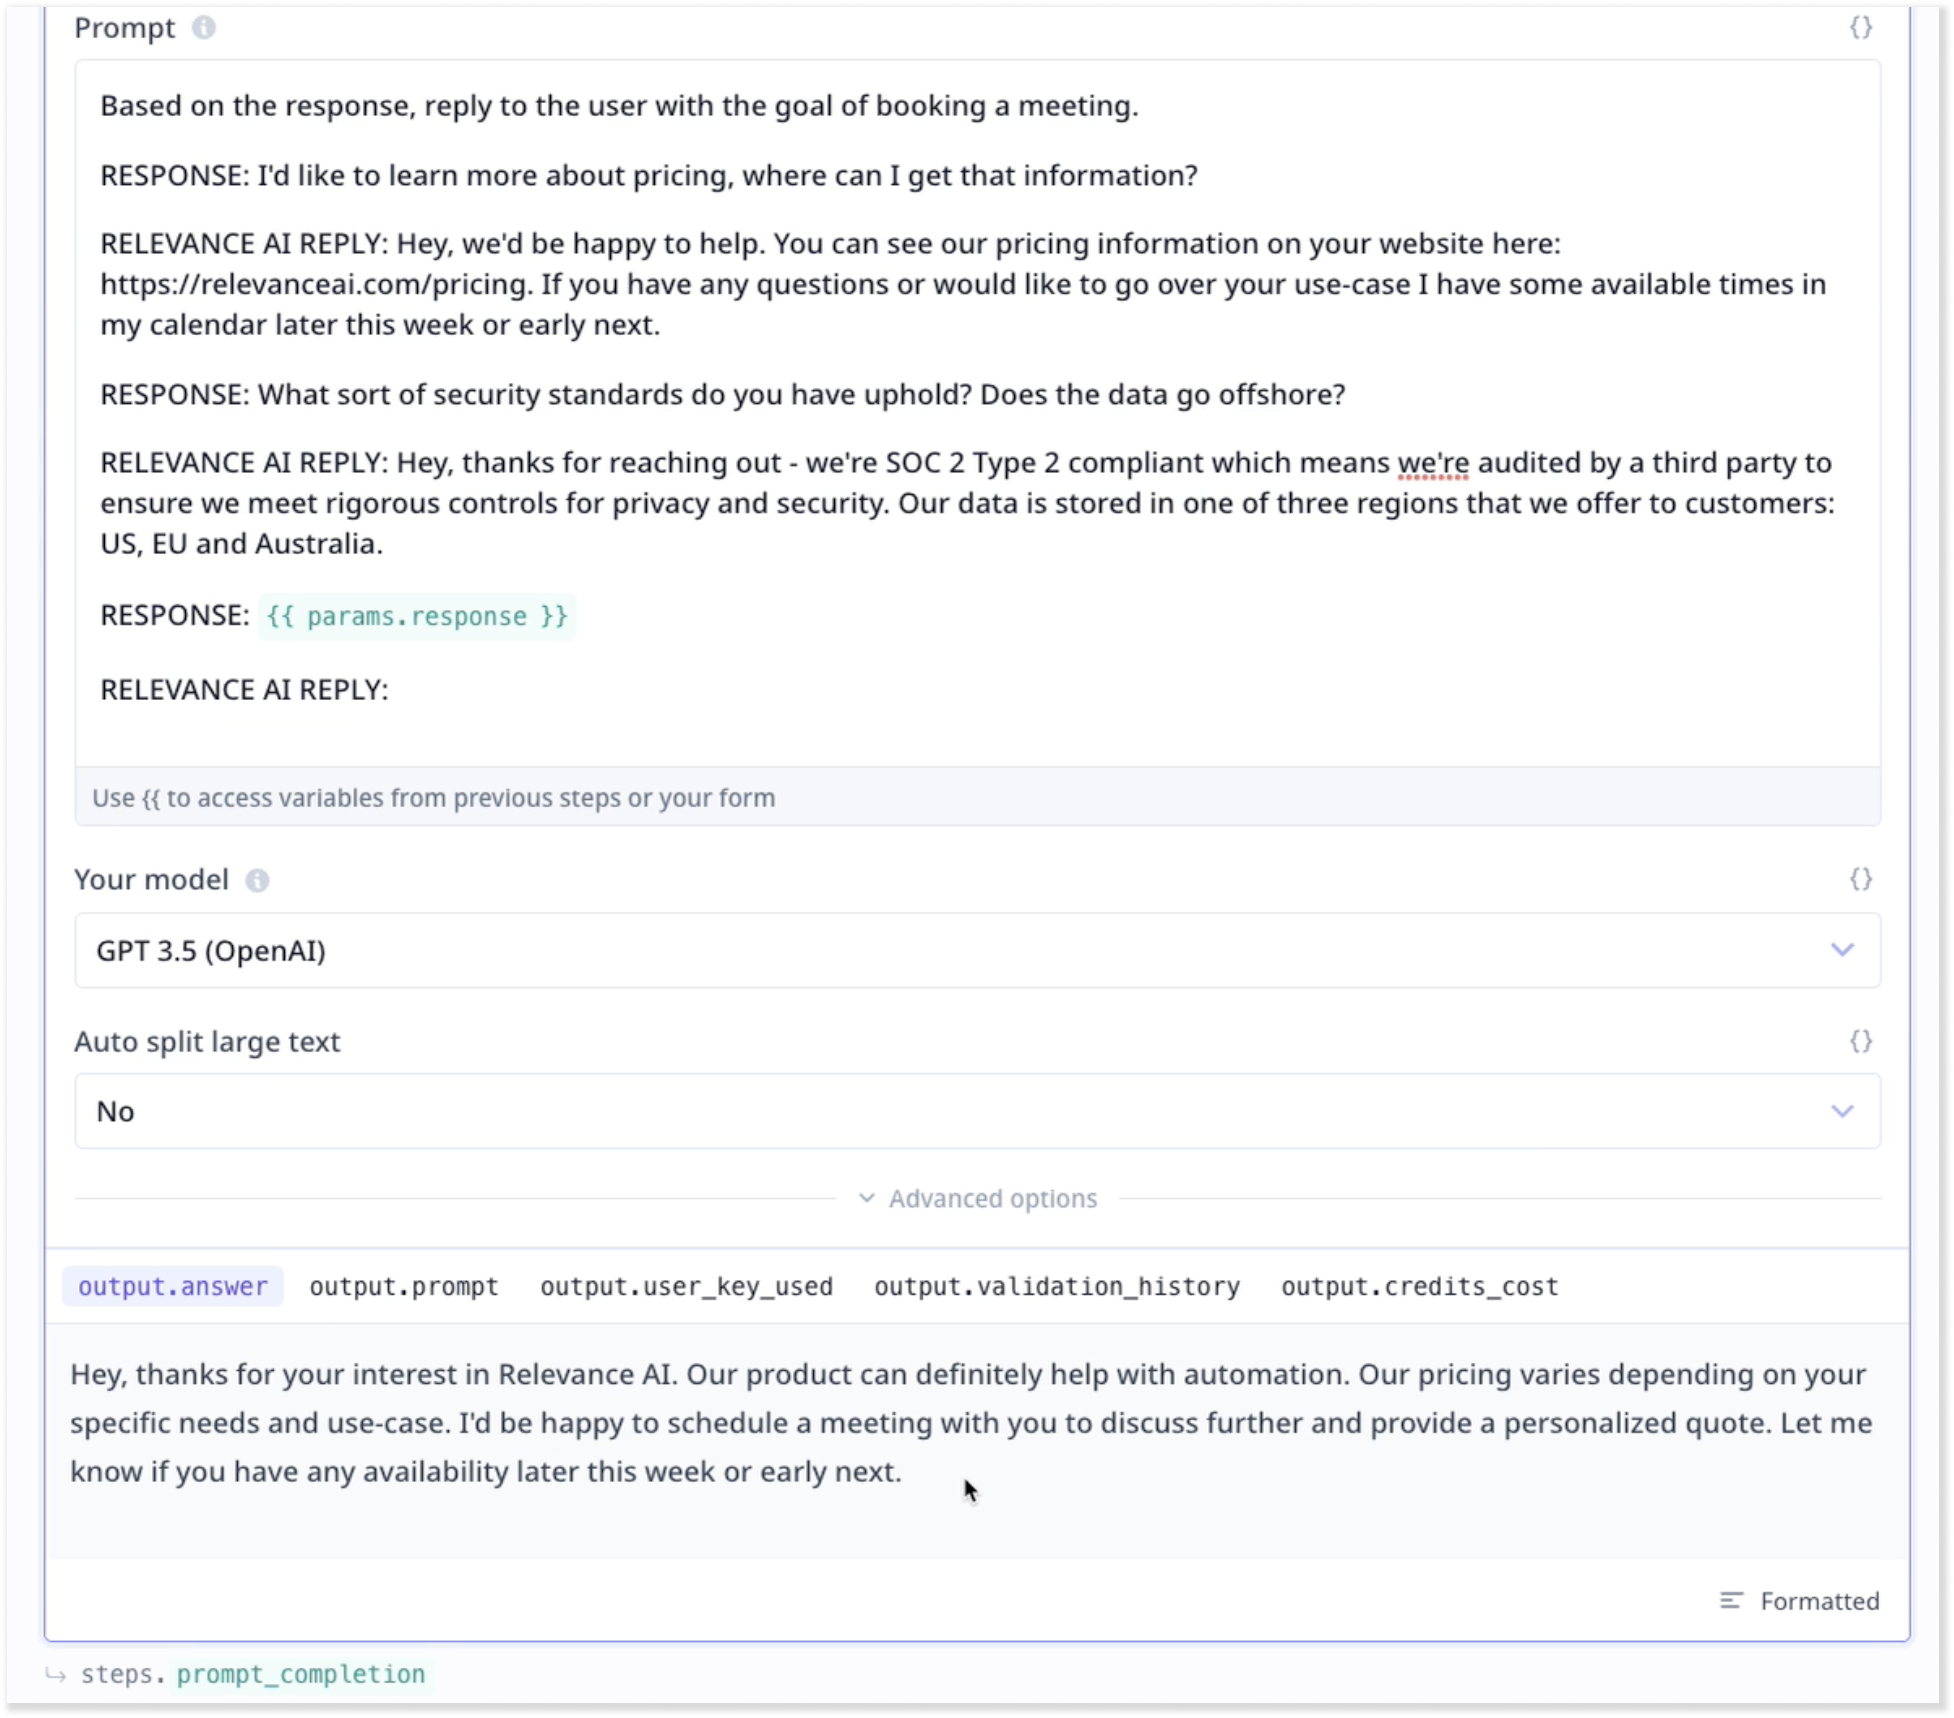 As can be seen in the result section, the LLM is mimicking our style, the length and the tone of voice.
3. Use a training database
A few samples are beneficial in altering how the LLM produces messages. But what if we go a few steps further by providing a dataset of samples?
By using a database of responses and replies that have been proven to be effective in the past, you can train your LLM to generate similar responses.
4. Search in knowledge
We want to create our own few-shot prompting technique based on an entire dataset. This can be achieved by using a search step to find the most similar
past response(s) to the current input. So, we need to add a Knowledge search component to our Tool and
configure the step:
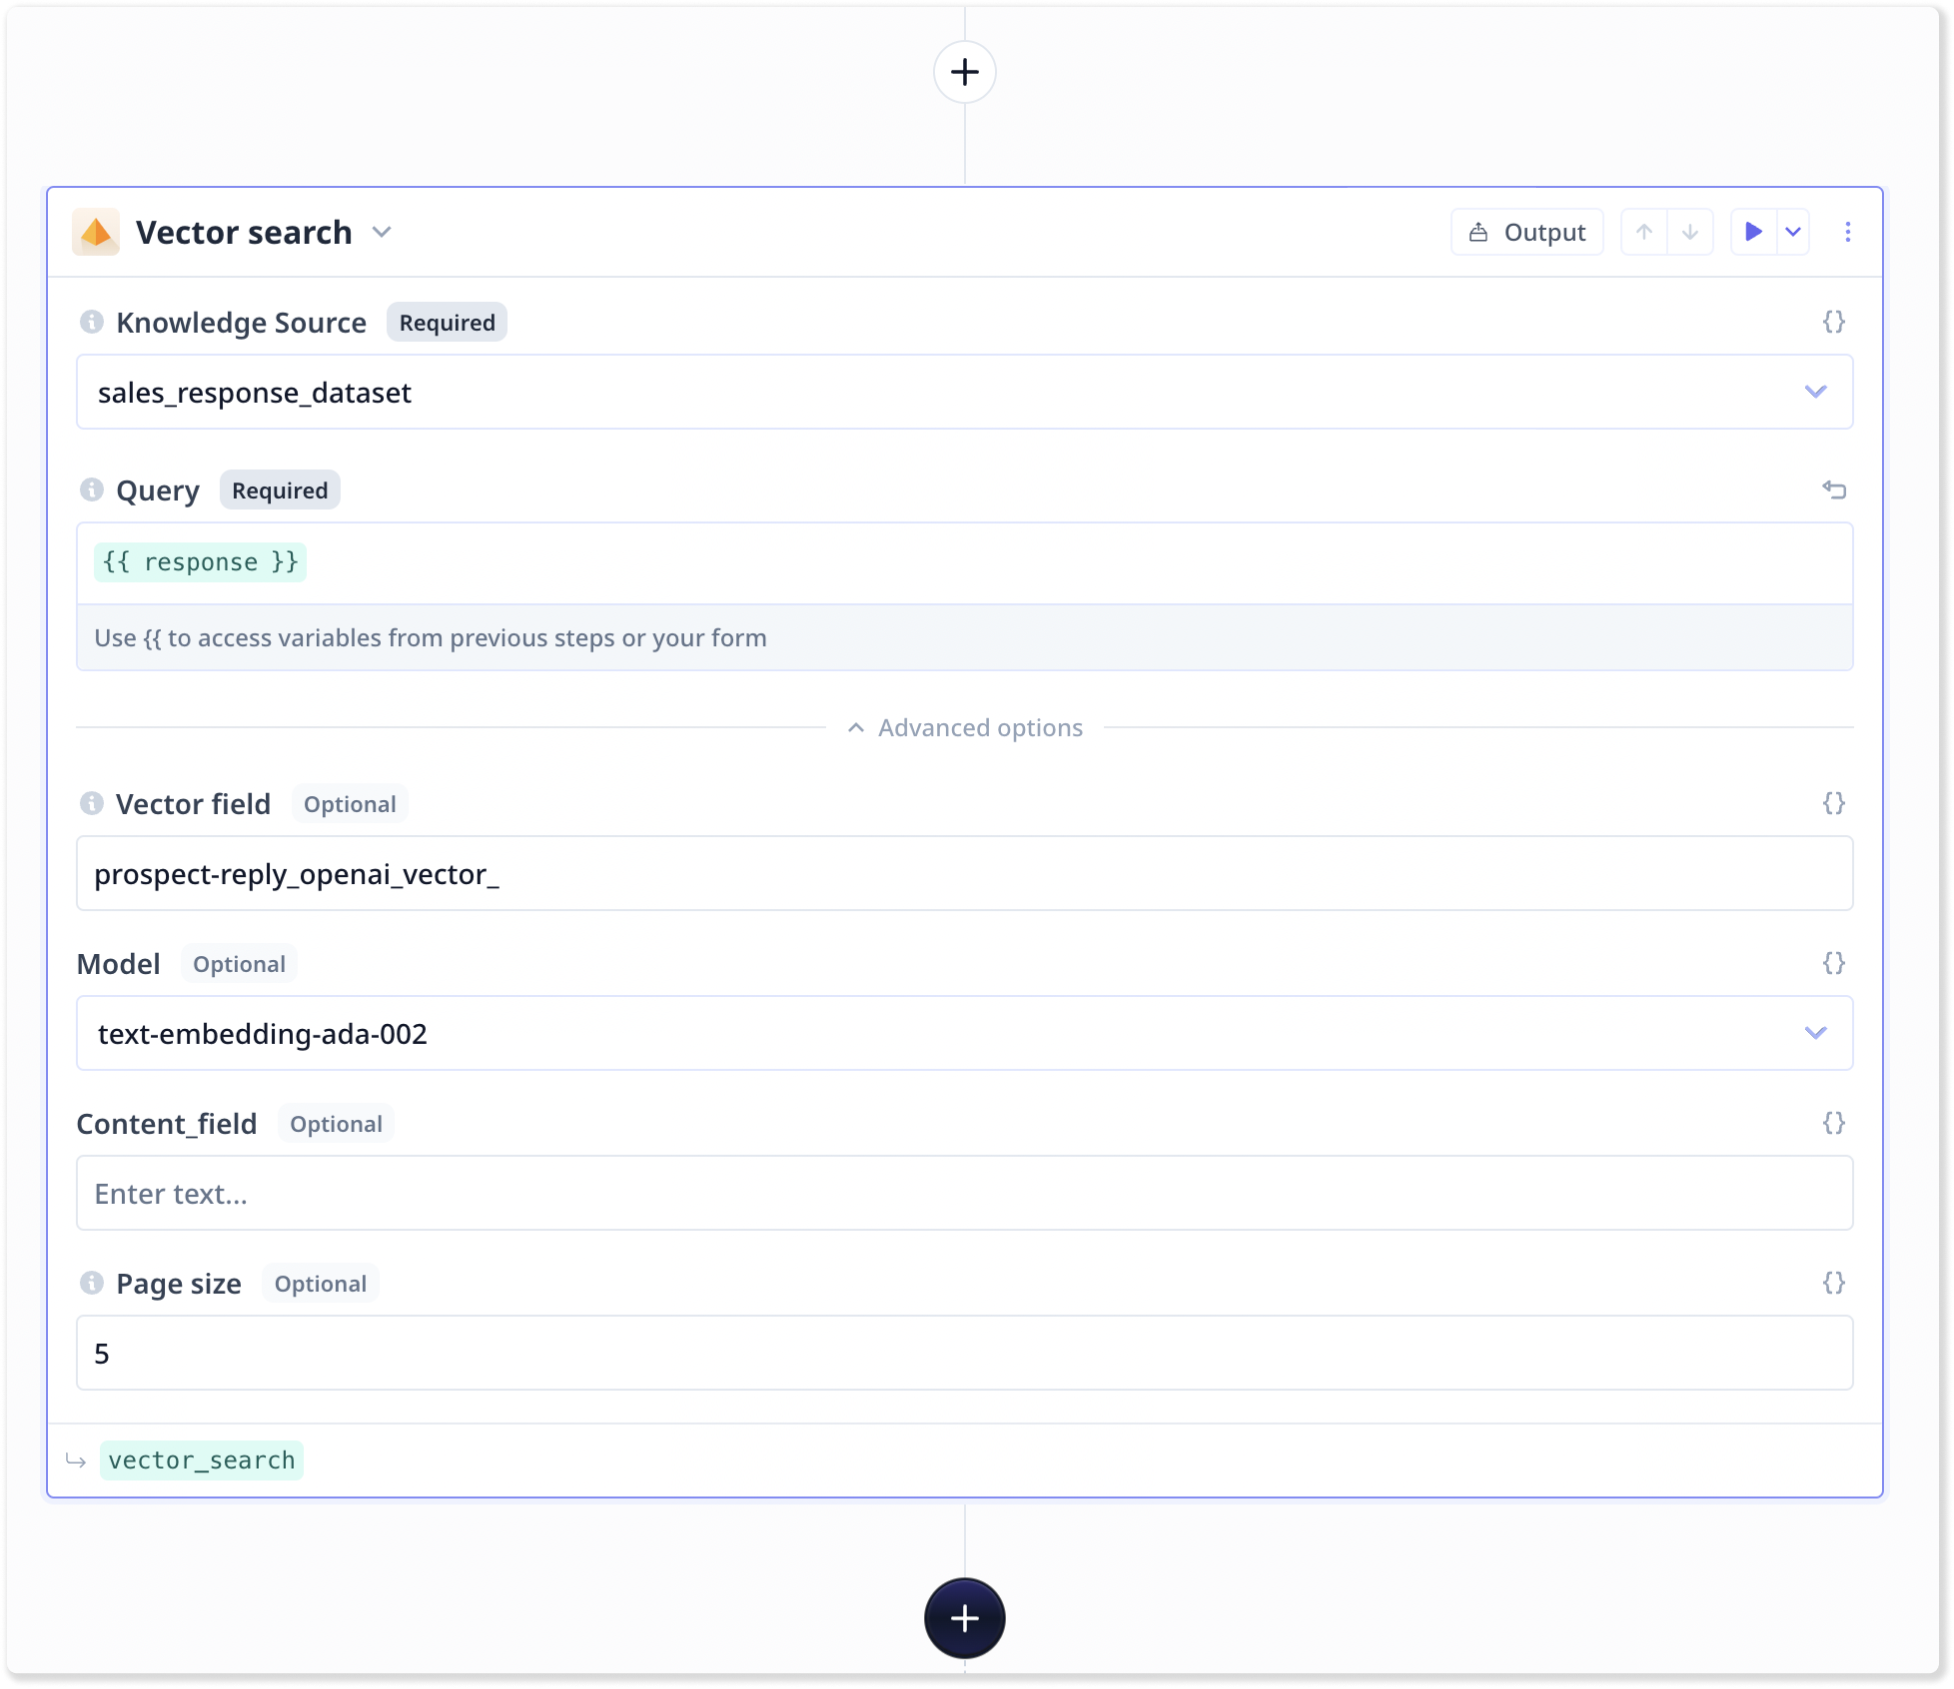
- Select your dataset from the first drop-down
- Use
{{}} to set up the query to the input component (e.g. {{response}}) that we want the LLM to provide an answer to.
- Specify the name of the vector field corresponding the incoming messages in your dataset.
- Increase the number of results to 10+ (e.g. 15, 30)
Running the step, we will get a set of responses that we’ve previously received and that are most similar to your input.
5. Add a ‘Truncate text’ step
We need to add a truncate text step to truncate the results. This allows us to specify an array, which is derived from the result
of our previous search step, and limit the size of objects within the result to a certain number of tokens. Tokens can be
roughly defined as words and LLMs have limitations on the number of tokens they can receive.
In this example, we set it to 2000.
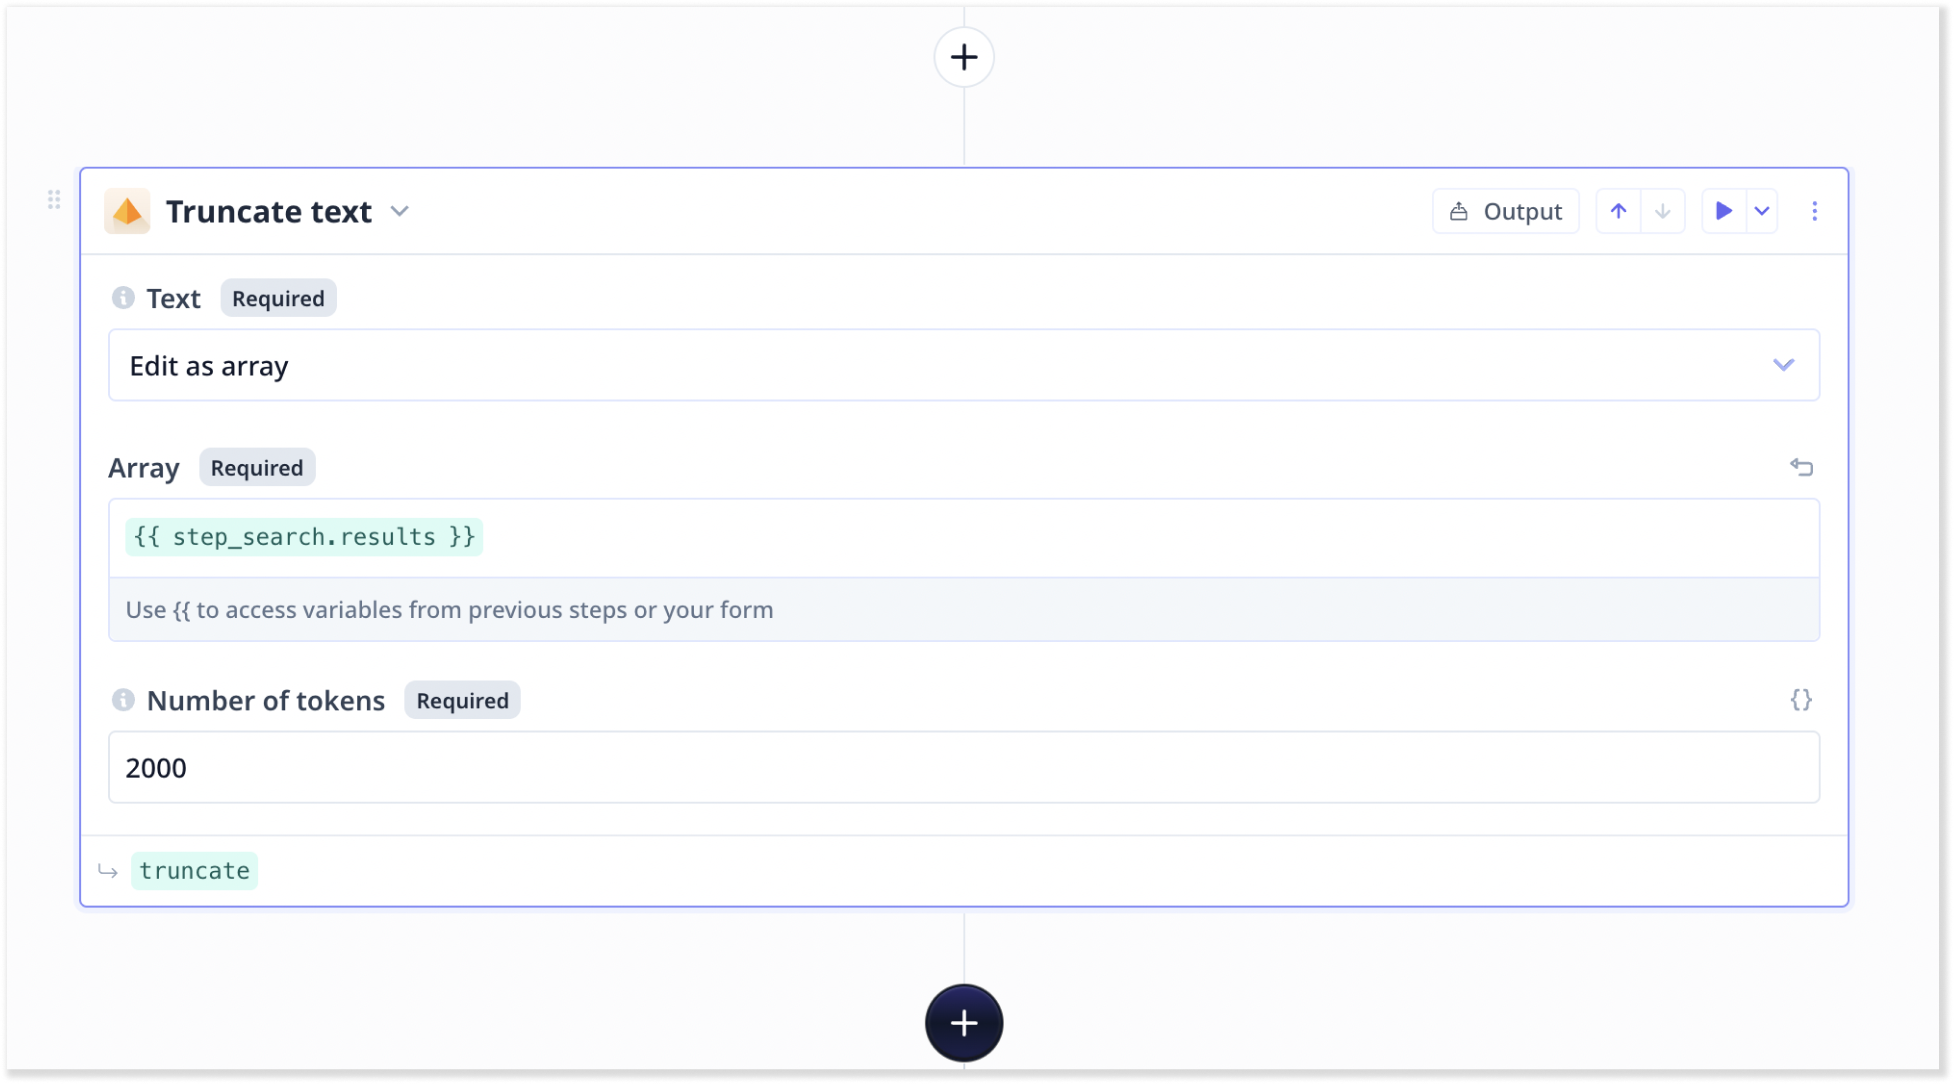
Truncate text ensures we never have more than the specified tokens worth of data in the LLM prompt.
6. Feeding the truncated results into the LLM
Instead of entering examples manually, we can now include the output from the chunks of the previous ‘Truncate text’ step in our LLM.
Access to step outputs is via {{}} and the name of the step. A sample is shown below:
Our final LLM prompt:
Based on the responses create a response for the prospect.
The following data shows examples of the prospect sending a message in "prospect-reply" and the Relevance AI sales rep replying in "relevance-reply".

{{ steps.truncate_text.output.chunks }}

RESPONSE: {{ response }}

RELEVANCE AI REPLY: