Introduction
Welcome to the documentation for the Categorize Text Tool!
This Tool is designed to help you categorize text data based on predefined categories or taxonomies.
Whether you are a marketer, data analyst, or researcher, this Tool will assist you in efficiently organizing and analyzing your text data.
Overview
The Categorize Text Tool utilizes advanced artificial intelligence algorithms to categorize text based on a predefined list of categories.
By inputting a text sample and a taxonomy, the Tool will automatically assign the appropriate categories to the text.
This allows you to quickly and accurately categorize your text data, saving you time and effort.
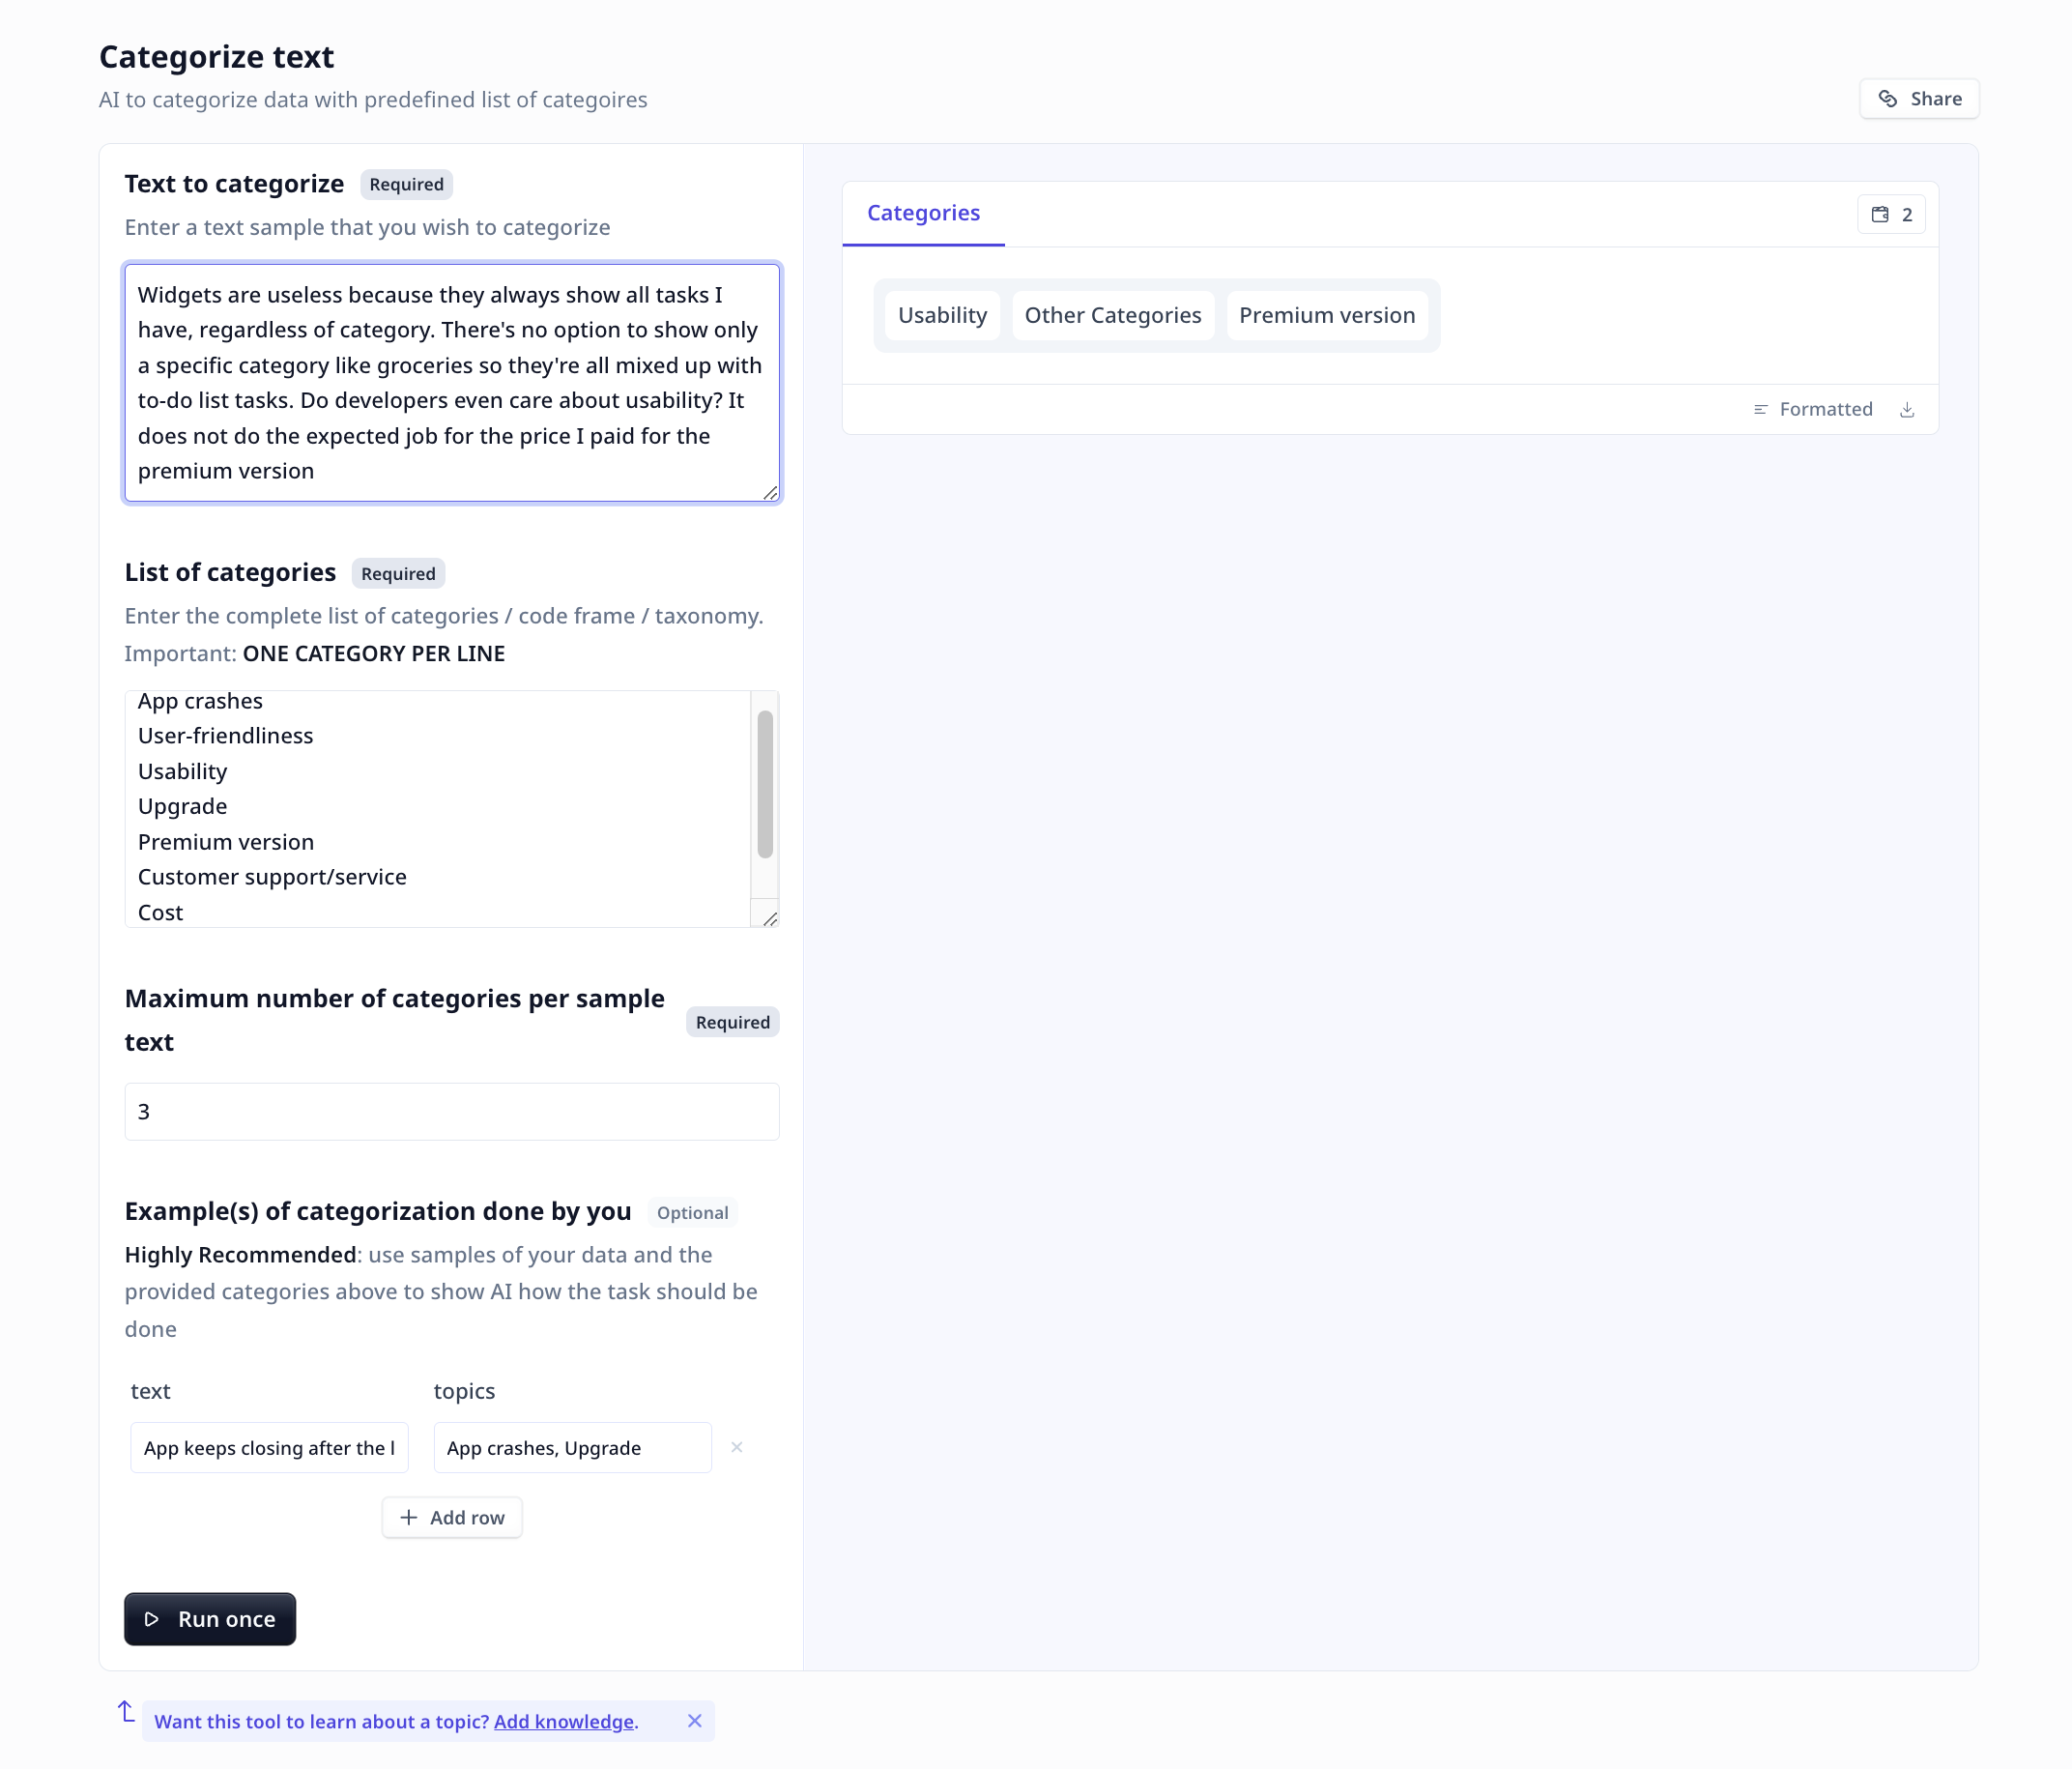
You can bring your own list of categories/themes/topics (BYO) or use
Suggest category Tool as the first step of text categorization flow. Key Features
-
AI-powered Categorization:
The Categorize Text Tool utilizes cutting-edge artificial intelligence to categorize text data.
The advanced algorithms analyze the text and match it with the predefined categories, ensuring accurate and reliable categorization.
Say goodbye to manual sorting and welcome the speed and accuracy of AI-powered categorization.
-
Customizable Taxonomy:
Tailor the Tool to your specific needs with the customizable taxonomy feature.
You can define your own list of categories or code frame by simply entering them into the Tool.
This flexibility allows you to categorize text data according to your unique requirements, making the Tool adaptable to any industry or domain.
-
Tagging per Sample:
Achieve more nuanced categorization with the tagging per sample feature.
Specify the number of tags or categories you want to assign to each text sample, enabling you to capture the complexity and richness of your data.
This feature is particularly valuable when dealing with diverse or multi-dimensional text data.
-
User-Friendly Interface:
With its intuitive design, you can effortlessly input text samples and taxonomies, allowing you to focus on the analysis rather than the technicalities.
Locate the Tool in the template page and click on Use template.
You can use the Tool as is or
clone it.
Follow these steps to categorize your text data effortlessly:
-
Text to categorize: Enter the text sample that you wish to categorize into the “Text Input” field.
-
List of categories: Specify the complete list of categories or taxonomy by entering them into the “Taxonomy” field.
Each category should be on a separate line. Customize the taxonomy to align with your specific categorization needs.
Good Categories
- Clear: AI is not an expert in your domain. Keep the categories simple and clear as if you are helping an intern with zero domain knowledge.
- Near-synonym: Hallucination is a known LLM issue. To prevent such cases, we have pushed the model to avoid self-interpretation.
- Meaningful combination: Use
/ (with space on both sides) to combine two relevant categories (e.g. Customer Service / Support)
- One category per concept: Avoid including overlapping categories
- How LLM sees/applies categories: Keep in mind that LLMs see the data under general English, not within any specific context. Categories are applied when
there is a near synonym found. For instance, “Making property prices go down” is a near synonym for “Property value decline” or “Drop in value” but not a
good map for “Inflation effect”.
-
Maximum number of categories per Sample: Determine the number of tags or categories you want to assign to each text sample by specifying the “Tag per Sample” value.
This allows for more granular categorization, capturing the nuances of your data.
-
Example (Optional): Provide a few samples using samples similar to your existing data as well as matching items in your taxonomy
Near-synonymy is the keyExamples are to cover your coding style not to teach the LLM about your specific data related categorization.
For instance, if in a survey, topics such as tidiness, cleanness, noise, bills are all considered “Amenities”,
we cannot expect an LLM to tag “I wish they cleaned the kitchen more frequently” with “Amenities”.
Since “Amenities” is not a near-synonym for any of those categories.
-
Run the Tool: Once you have entered the text and defined the taxonomy, click the “Run Tool” button (on the App page) or use the run options
on your data table (bulk/single run) to initiate the categorization process. Sit back and let the Tool do the heavy lifting.
Tools and templates can be
-
tested on individually provided inputs:
-
set to fetch the data from a dataset and apply the analysis on the whole dataset:
-
View Results: The Tool will analyze the text and assign the appropriate categories based on the predefined taxonomy.
The results will be displayed in a clear and organized format, enabling you to easily review and analyze the categorization.
If you clone
a template, or make a Tool from scratch, you will have access to the
Build tab. Build is where one put together different components to build a Tool suitable for
their needs.
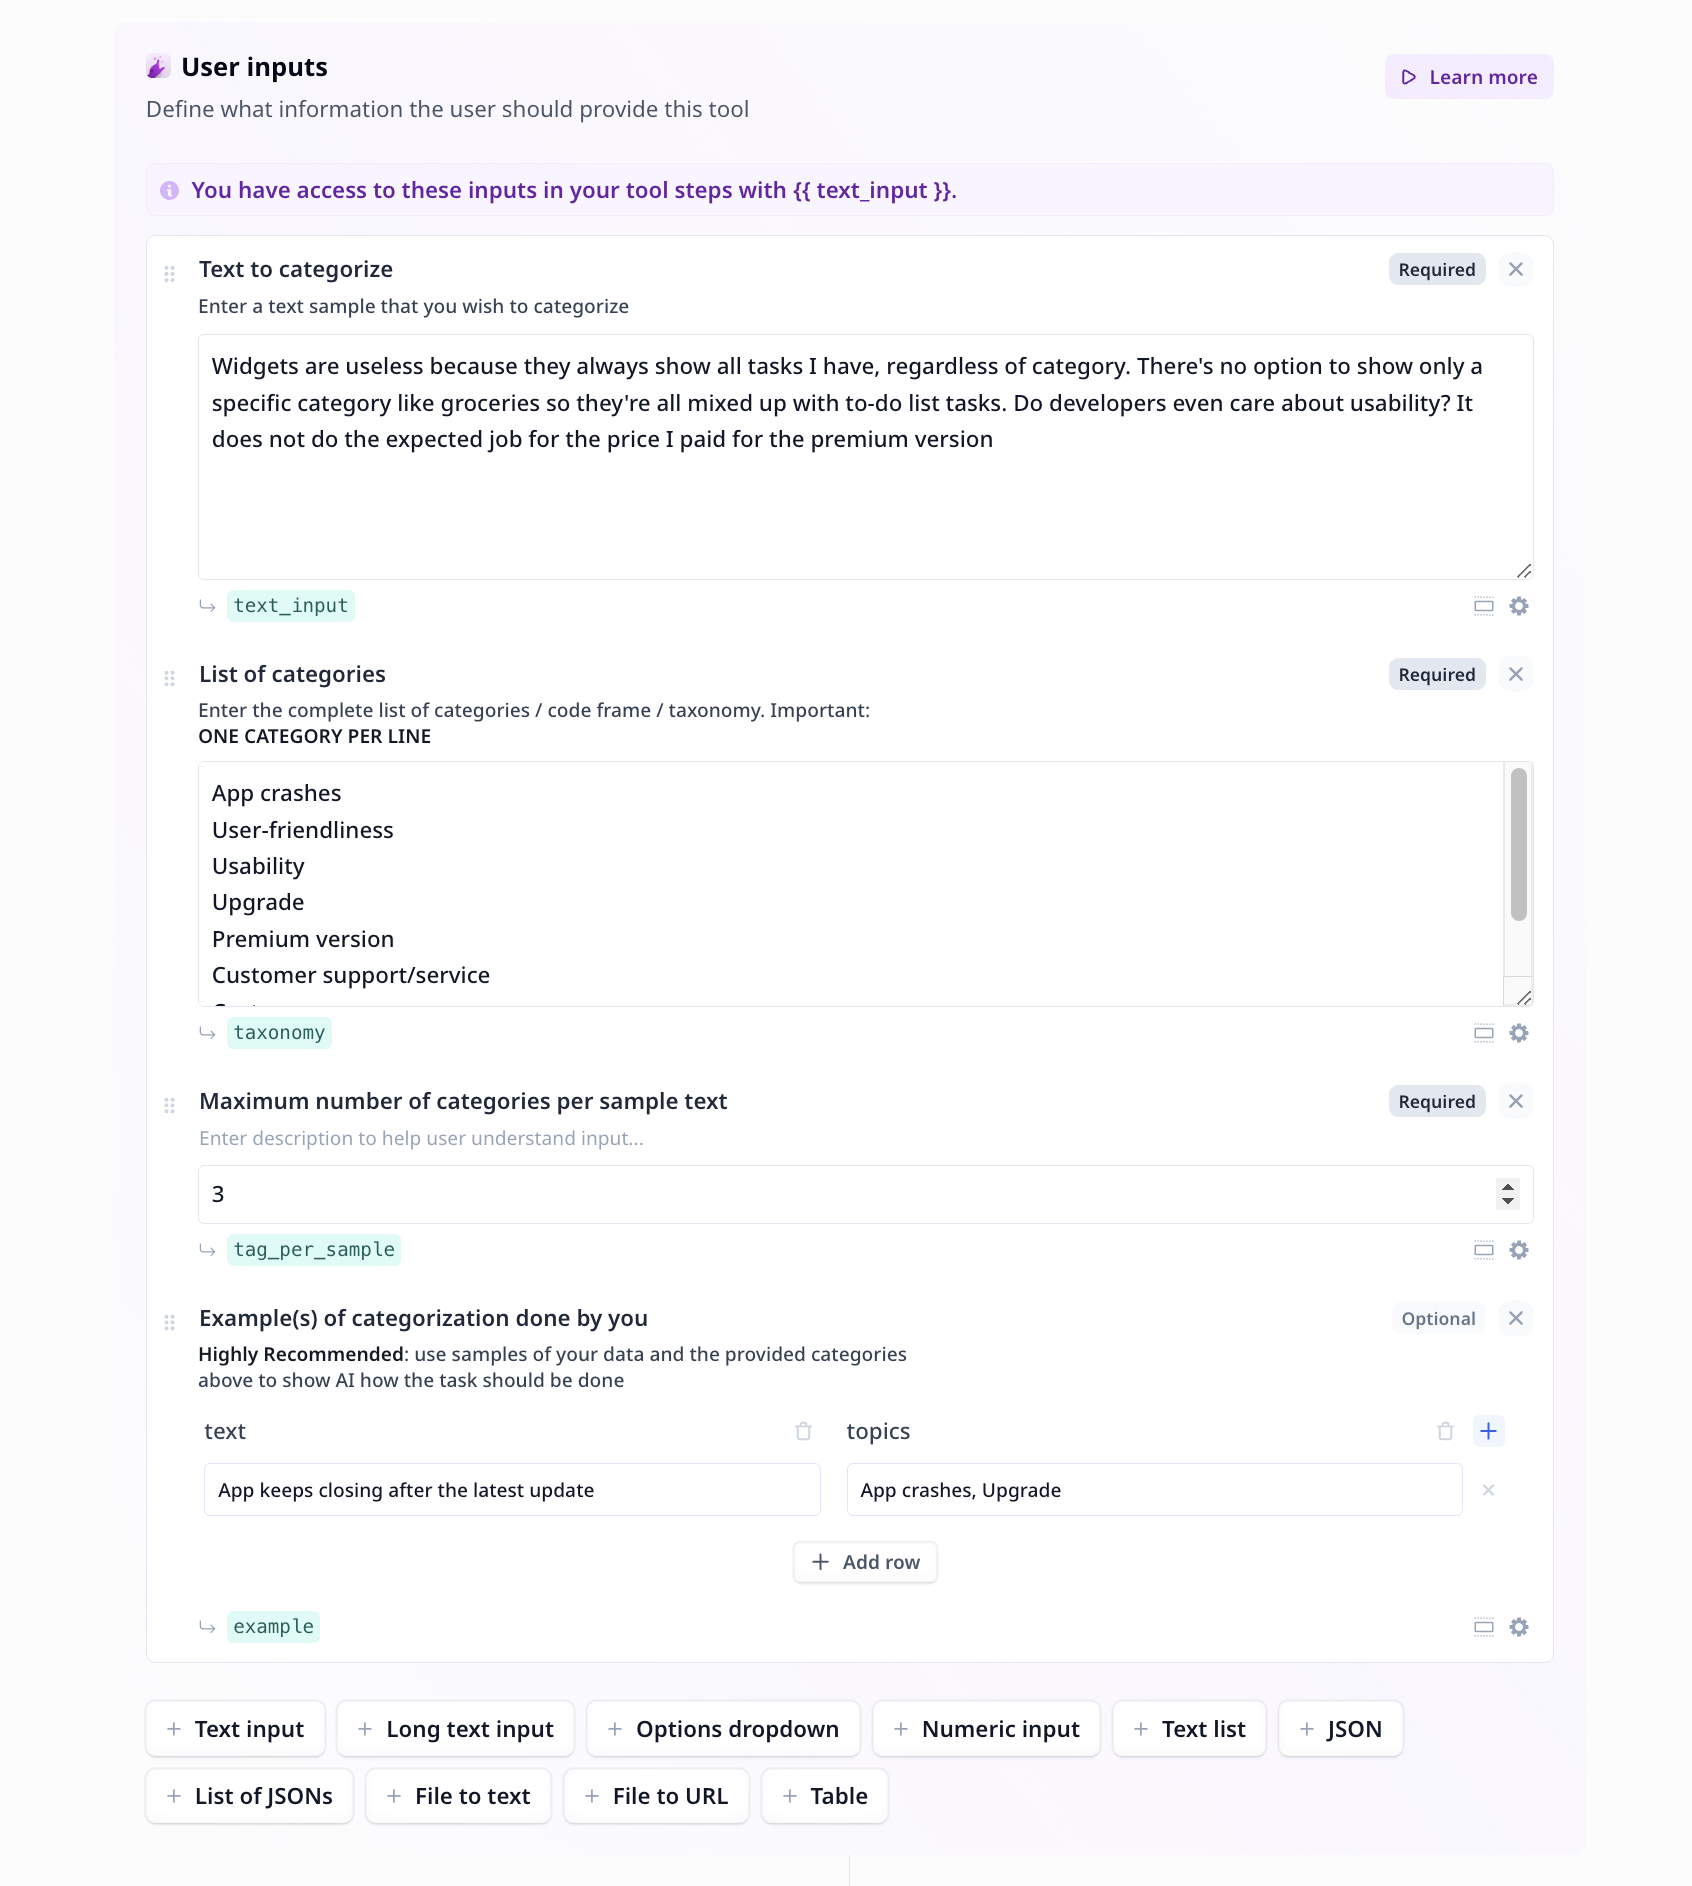
-
Long text input:
An input text component suitable for long text pieces (more than one line), such as
answers to a question, reviews, a text to summarize.
This component is used twice in this Tool. Both input text (Text to categorize) and
the list of categories (List of categories) are of long tex inputs.
-
Numeric input:
An input component suitable for providing numeric values, such as scores,
age, maximum or minimum required values.
Use the default value (3) or enter your preferred maximum number of categories to be assigned to each input.
-
Table:
A component for entering structured data as input,
for instance, rows of samples, each containing fields such as name, last name and age.
This component allows you to provide samples of text categorization done by you.
- Enter the input sample under “text”
- Enter matching categories under “topics”
- Use categories/themes/topics from the list you provided with the exact same spelling
- Use
, when multiple categories/themes/topics apply
There are 4 components under the Tool steps in this analysis flow. These components take care of three
tasks: properly formatting the provided categories/themes/topics, the LLM step and formatting the output.
String to List formatting
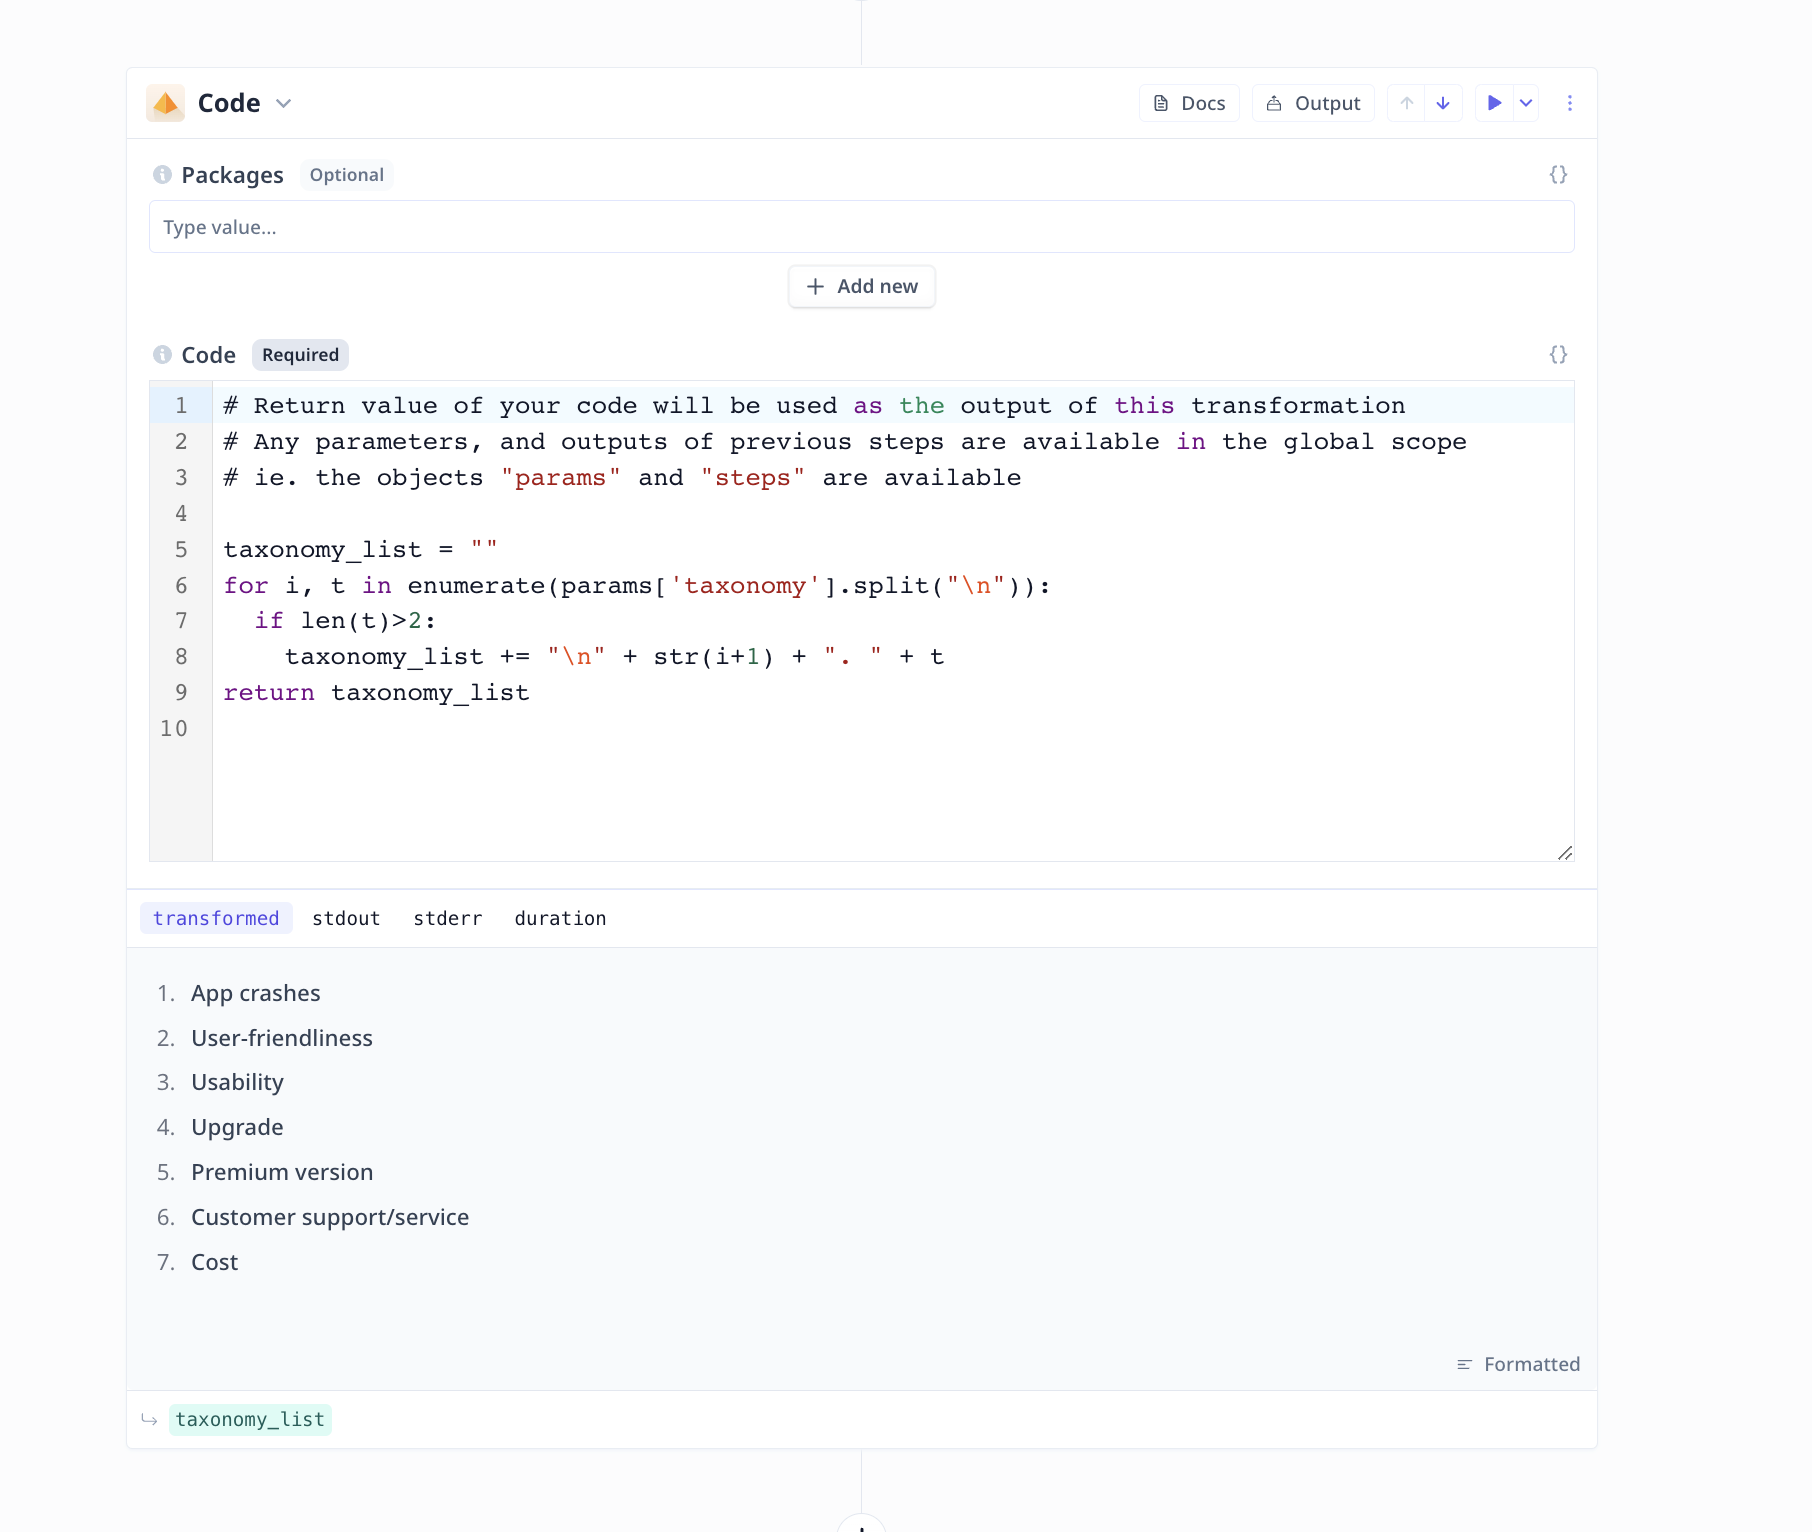 In this case, the Python code, filters out empty lines and creates a list of
categories/themes/topics from the provided text.
Large Language Model (LLM)
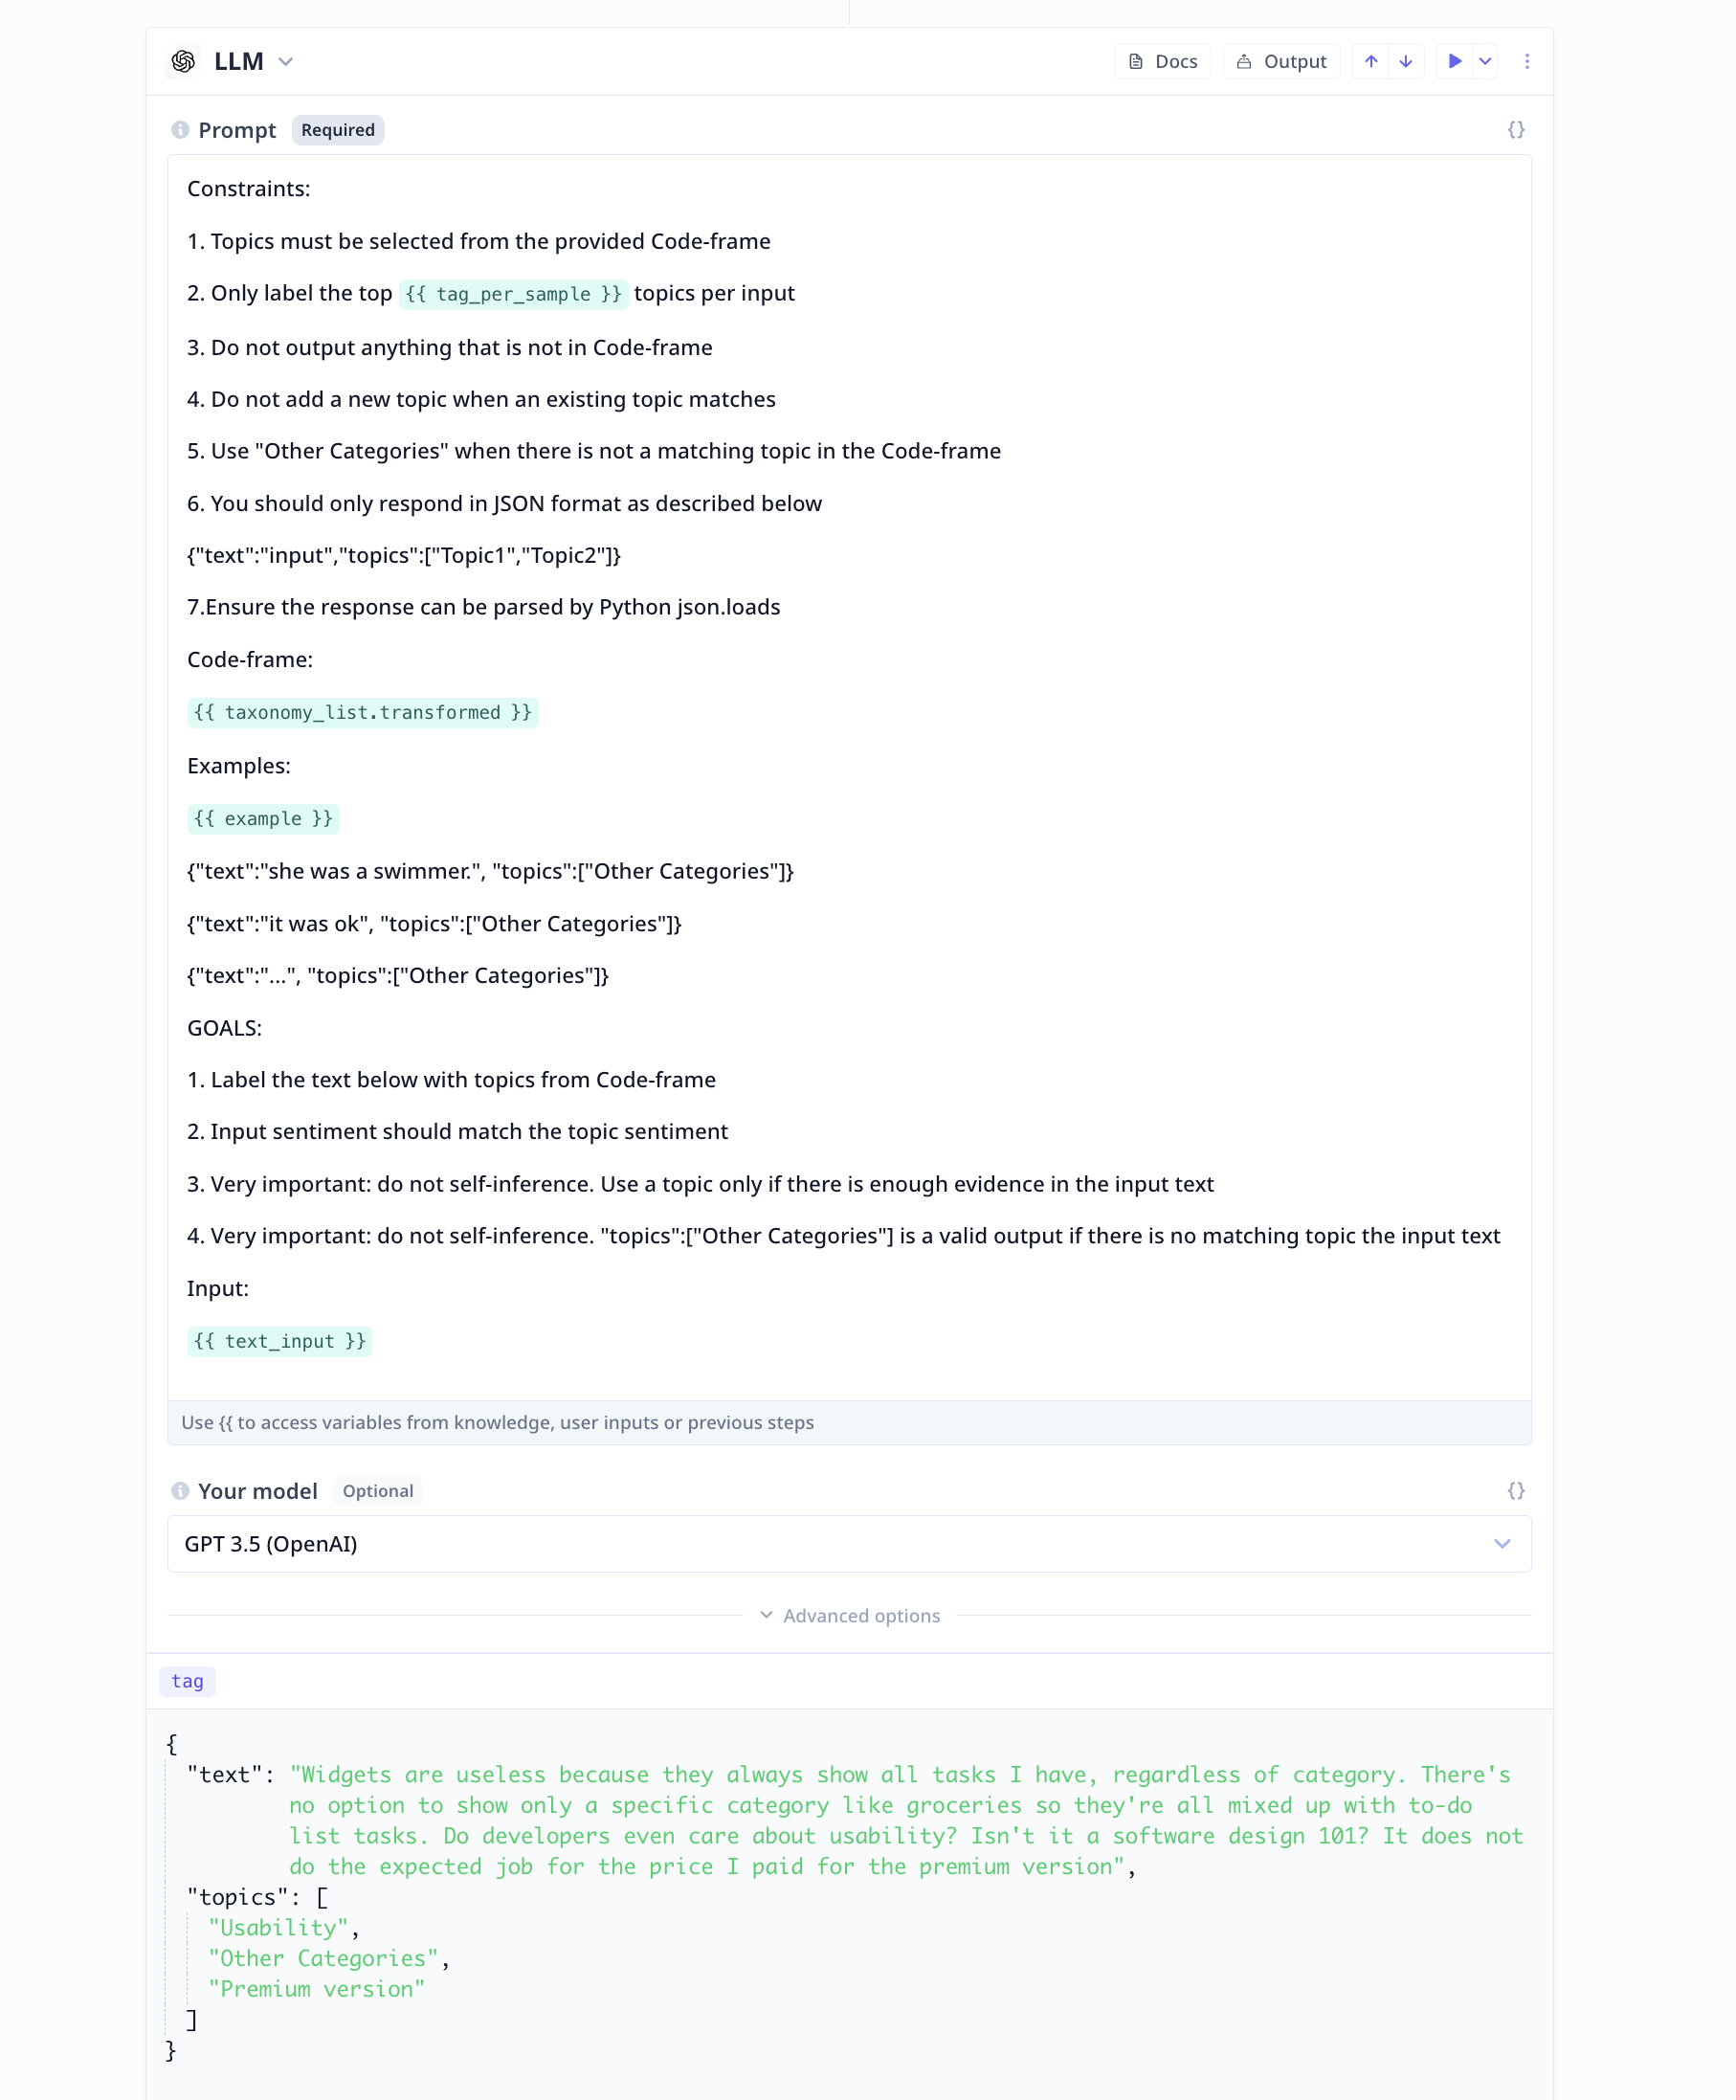 A Good Prompt
- Be short and precise with your instruction/request from the LLM
- Stick to one term when referring to the same concept throughout the prompt
- Note the goals and important instructions closes possible to the end of the prompt
- Explicitly note constraints and goals
- Specify a data scope using
", """ or similar identifiers
- Include formatting instruction when necessary
-
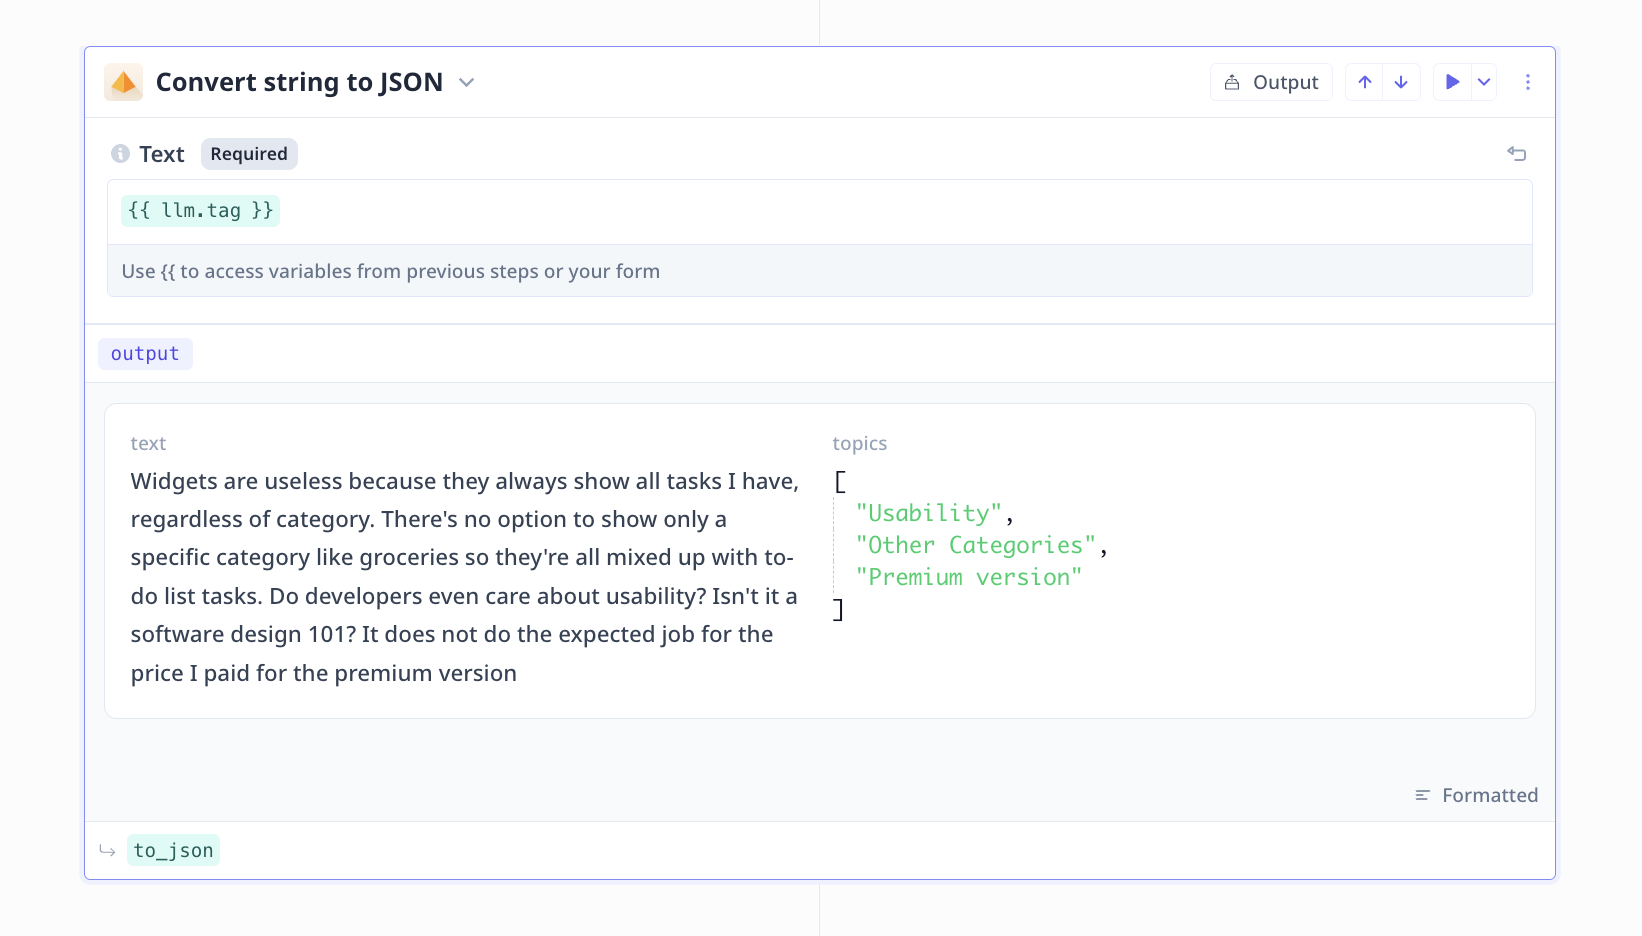 This is to make sure we can properly save the results in the desired structure.
-
Filtering out unwanted categories/themes/topics
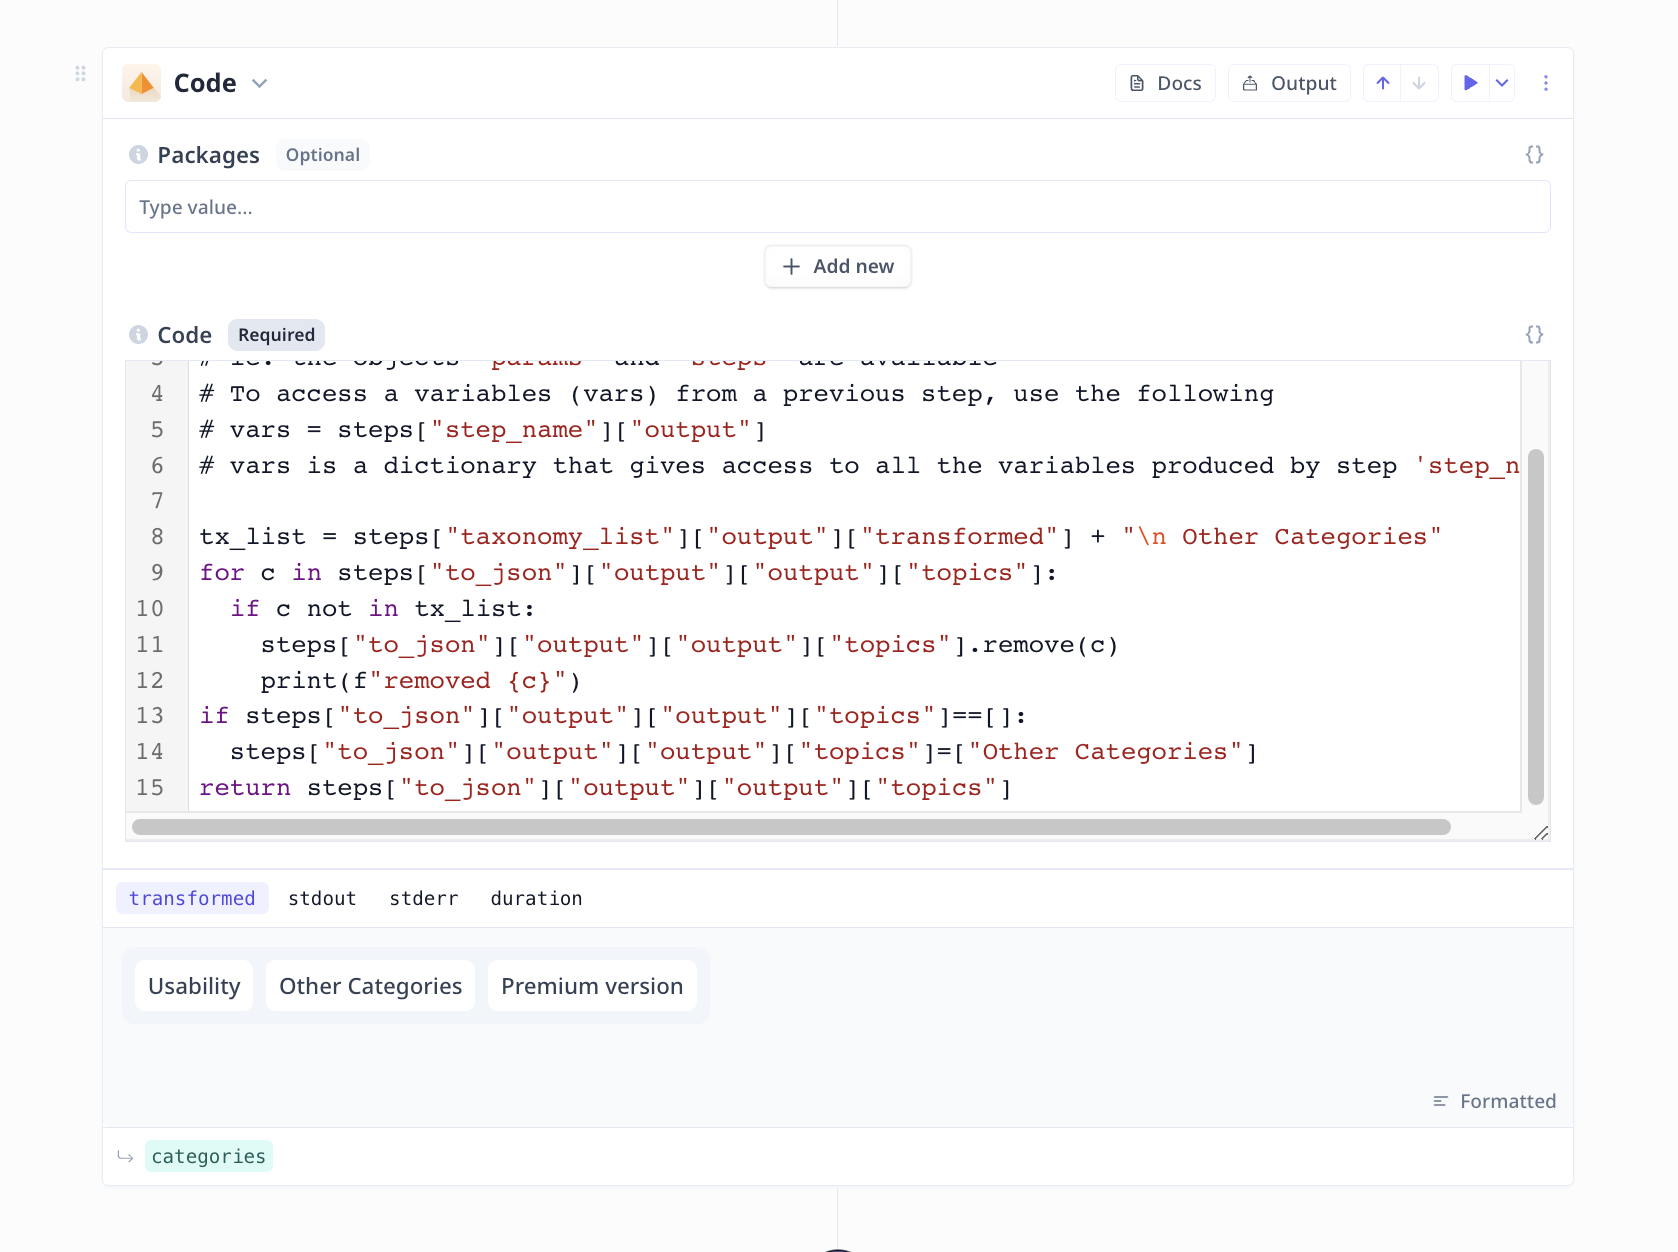 Occasionally the LLM might output categories/themes/topics that are not in the pre-specified list.
This is taken care of using a simple Python code snippet in this Tool.


