Helloo AI Workforce builders!
Welcome to the 2nd edition of the 100 AI Agents series, a journey all about building 100 high-impact AI Agent use-cases using Relevance AI, and how to build them! 🚀👩💻✨ In our first ever post, we built Finlay the FAQ writing agent. Now we’re diving straight into the deep-end building our first ever autopilot agent. Woo hoo!
Teddy the tool webpage writing agent
In this AI Agent deep dive, we’re going to be taking you behind the scenes of building an autopilot agent called Teddy that we use internally here at Relevance AI.
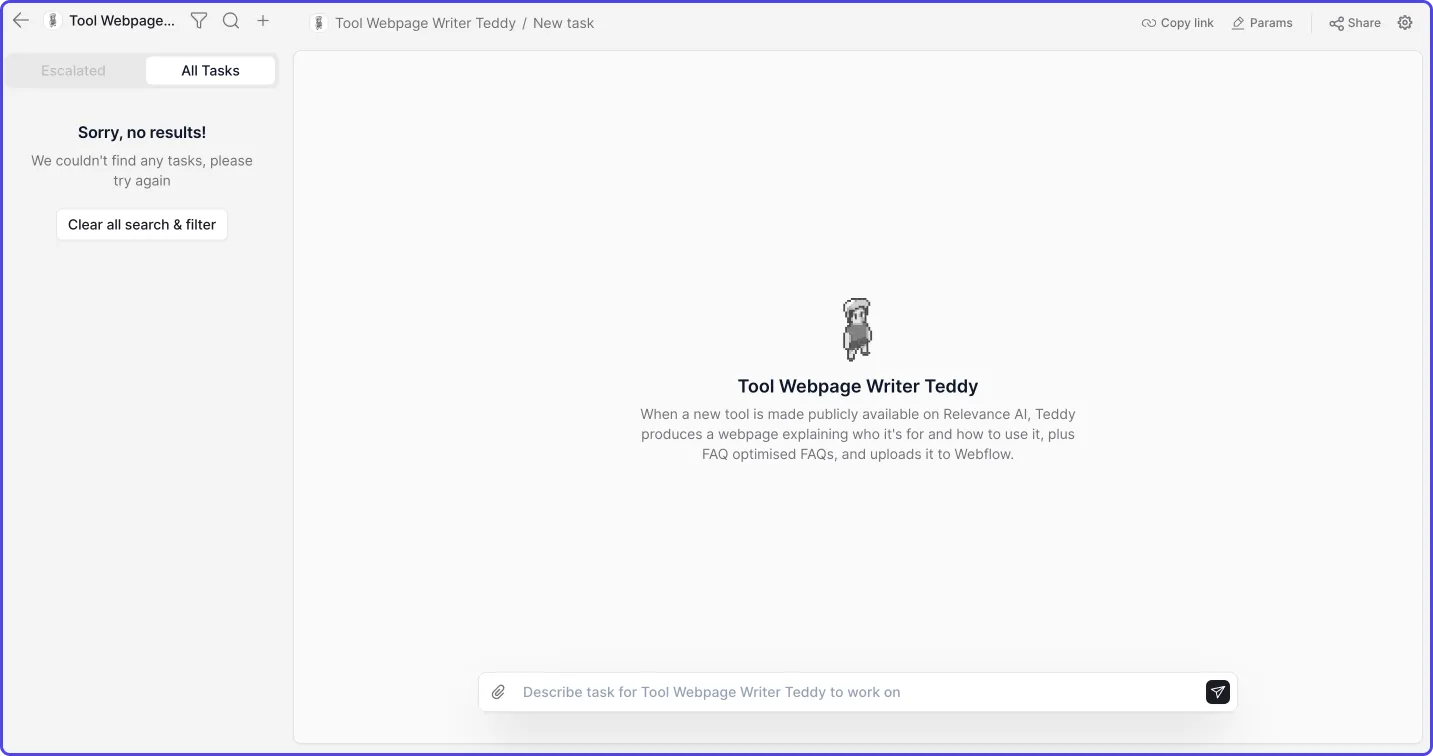
Teddy is a valued member of our Growth team, and is responsible for producing these tool explainer web pages every time a new tool is made publicly available for you to use on our platform:
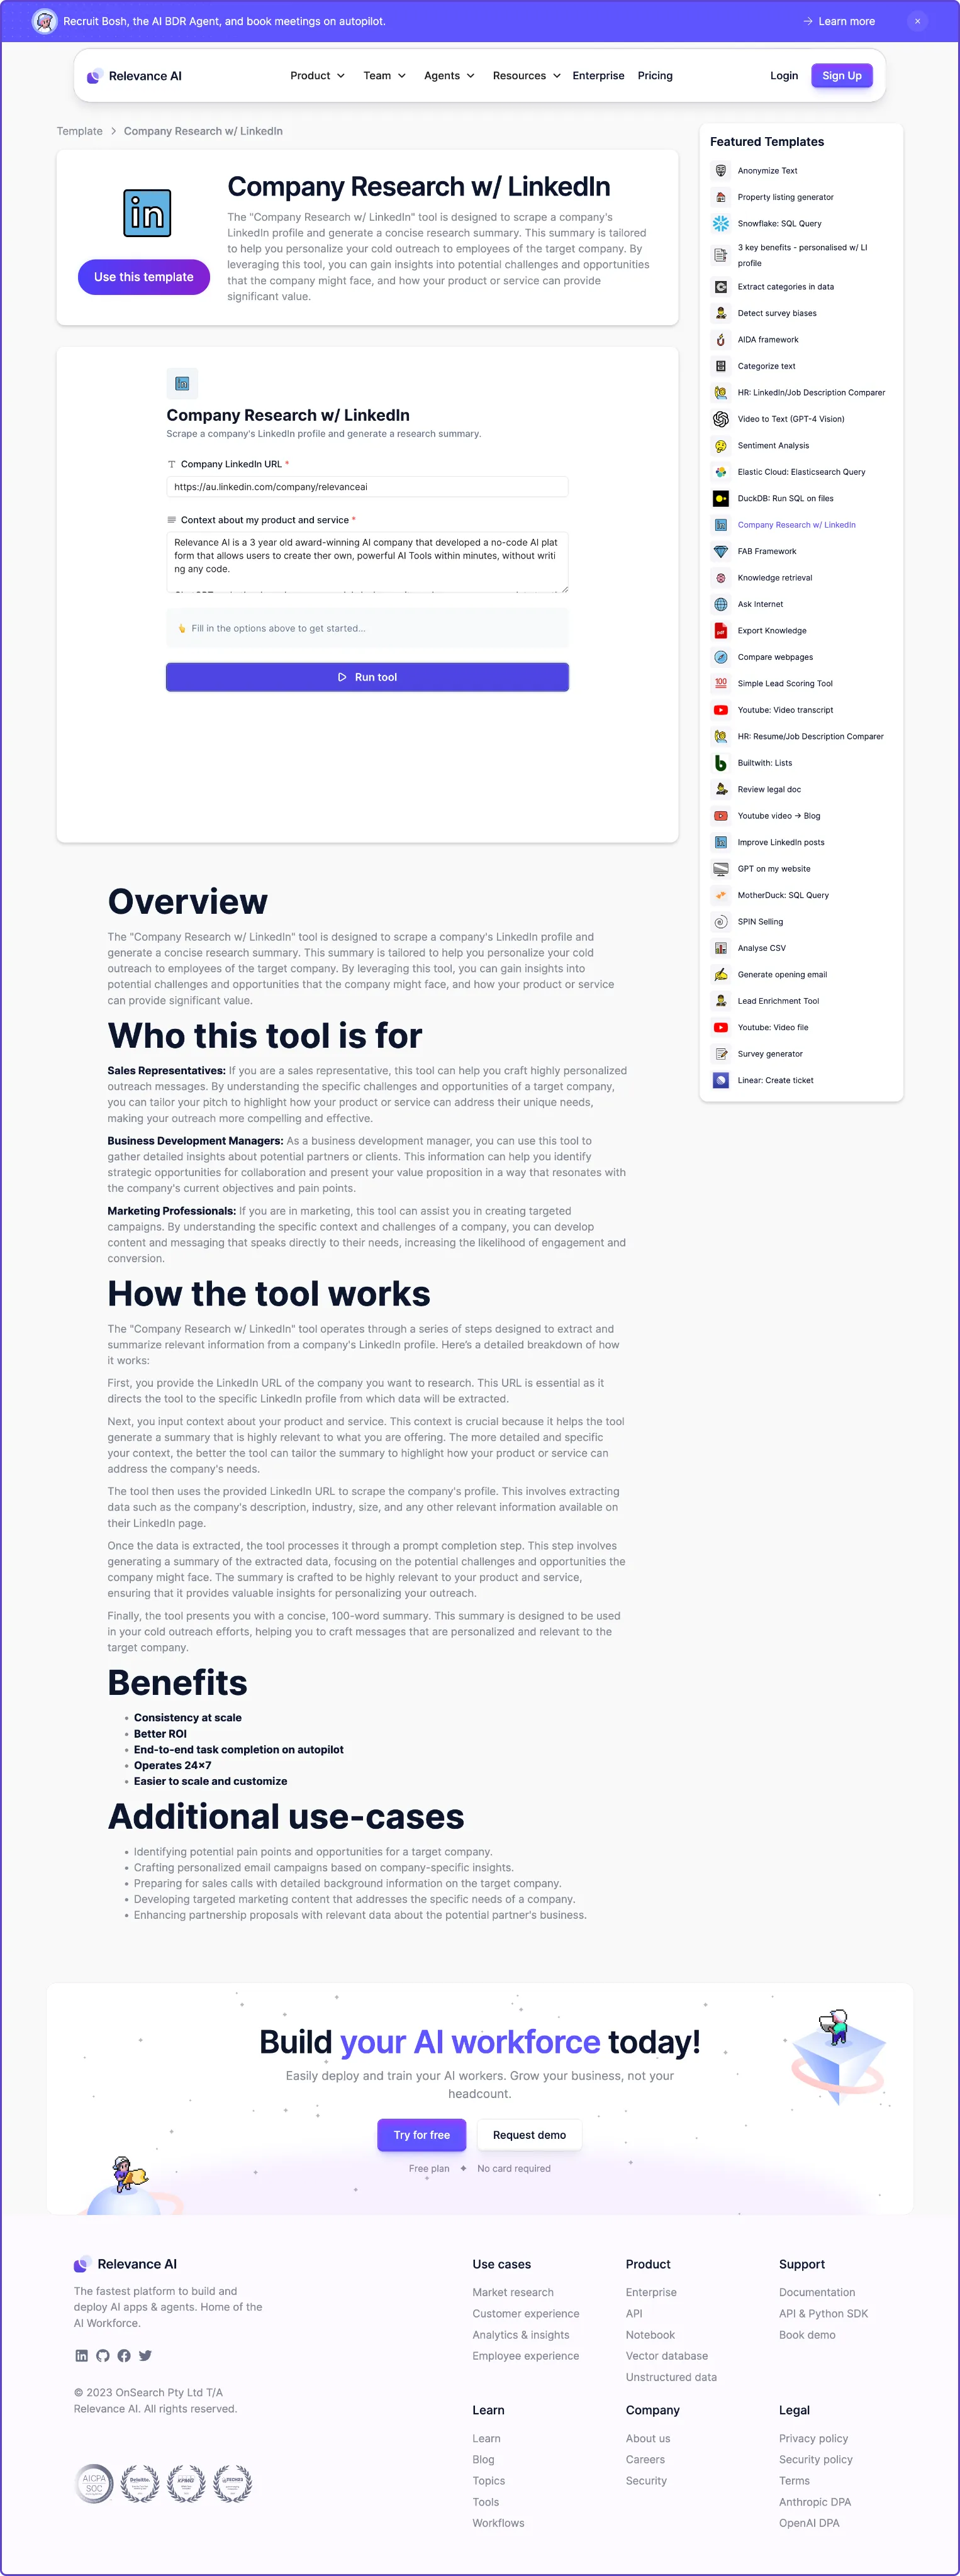 How cool is this agent-produced webpage!? 🤯
Every day at 9am, Teddy checks for new tools that our tech team have shipped for you to use on our AI workforce building platform.
For each new tool, Teddy writes the copy to explain who the tool is for, how it works, what the benefits are and what the use-cases are for it.
Then Teddy uploads the tool copy, as well as other things like a link to the tool and an embeddable iframe tool link to a collection we have for tool webpages on Webflow.
Teddy does all of this entirely on autopilot.
Read on to learn how to build your own webpage producing agents!
How Teddy Operates
Below is an overview of how Teddy works under the hood.
Teddy is made up of many stand-alone building blocks that we encourage you to extract and adapt to use in your own agent use-cases.
- Agent Trigger: Send your agent new tools as they are published.
- Create a new agent from scratch.
- Start a conversation with your agent via the API.
- Schedule sending new tools to your agent on a recurring basis.
- Retrieve public tools via API call.
- Check for new tools only.
- Send new tools to agent as a message.
- Setup cron job for sending new tools on a daily-basis.
- Tools: Build custom tools and equip your agent with them.
- How to build a custom tool.
- Build custom tool: Tool description to JSON.
- Build custom tool: Add new item to Webflow collection.
- Equip your agent with custom tools.
- Run your tools on autopilot.
- Workflow: Describe how your agent should work.
- Model: Give your agent a brain.
- Base instructions: Describe roles and responsibilities.
- Workflow: Provide step-by-step workflow guidance.
- Naming tasks: Tell your agent how to name tasks.
- Use your agent!
- Overview of how Teddy completes their tasks.
Part 1. Agent Trigger: Send your agent new tools as they are published.
In this part, we’re going to create a brand new agent from scratch, and build out a trigger to schedule it to start working every time a new tool is made publicly available on our platform.
We’ll write a script that checks for new tools via an internal API call to our public tools endpoint. Then we’ll schedule checking for new tools via a cron job which will run that script every weekday at 9am (or every minute while testing).
1.1. Create a new agent from scratch
To create a new agent on Relevance AI:
- Go to app.relevanceai.com → Menu (hamburger) → Agents.
- Click ”+ Create agent” → Blank agent -> Click ”+ Create agent”.
- Give your agent a name and description.
- Click “Create agent” to save.
- You can get back to this edit agent view by clicking “Use agent” for the agent you just created under “Agents” in the menu.
 High five for creating your first agent! 👏
1.2. Start a conversation with your agent via the API
Starting a conversation with your agent is one of many ways to trigger your agent to do some work for you.
To start a conversation with your agent, you can send them a message via an API call.
You need three pieces of information to do this, which you can get from your agent’s URL:
- Region code.
- Project ID.
- Agent ID.
You also need your Relevance API key, which you can generate on the API Keys page. Scroll down to the bottom of the page, where you will see a section that looks like this:
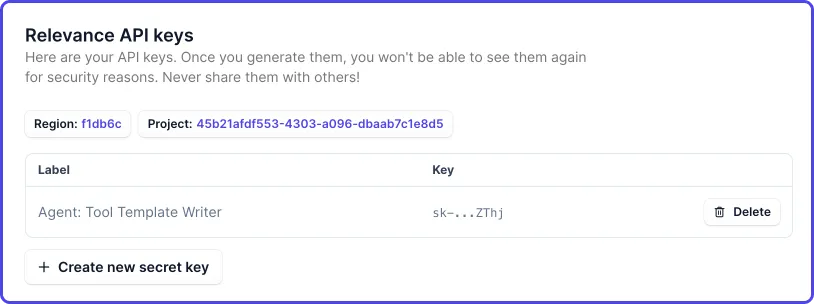 Generate a Relevance API key 🔑
Once you’ve got your region, project ID, agent ID and Relevance API key, you can send your agent a message like this:
After running the above code with the placeholder values replaced with your own values, you should see a task appear in your agent’s task list with the message you sent to it, along with your agent’s response.
Using the default “Hello, World” message, my agent replied with “Hello! How can I assist you today?”
 Sending a hello world message to your agent via the API! 👋🌎
Woo hoo, now we have created our very first agent and sent them a message via an API call.
Next, we need to send each new tool as a message to our agent every time they become publicly available on our platform.
The next section is very specific to our internal use-case. The building block you can repurpose for your own agent is scheduling messages to be sent on a recurring basic via a cron job.
1.3. Schedule sending new tools to your agent on a recurring basis
To send a new tool to our agent every time they become publicly available, we need to:
- Retrieve a list of publicly available tools.
- Check for new tools only.
- Send each new tool as a message to our agent.
- Schedule sending new tools to our agent on a recurring basis.
Let’s dive into implementing these!
Retrieve public tools via an API call.
At Relevance, we have an internal API endpoint for retrieving a list of all tools that are publicly available on our platform, such as these tools below (app.relevanceai.com → menu → tools):
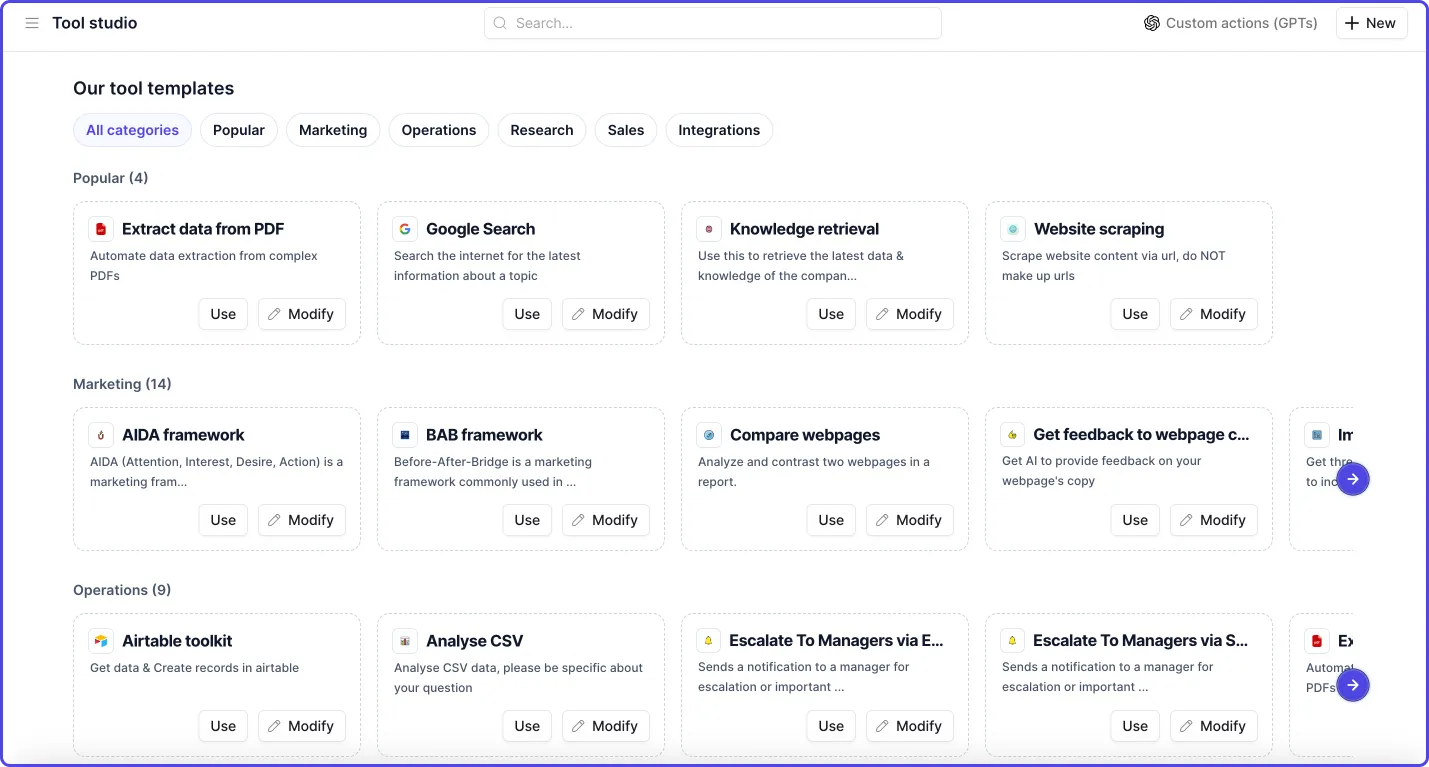 All of our publicly available tools 🛠️
The public tools API call gives us back a list of tools that looks like this:
Where each tool is a JSON object that contains metadata describing what the tool does and how it works etc:
Check for new tools only.
To check for new tools, I wrote a custom script that compares the list of public tools, to a list of tools we have previously processed (zero to start with).
Any public tools that have not been added to our processed_tools list, is considered a new tool that needs to be processed.
Send new tools to agent as a message.
Every time we get a tool new, we convert the tool JSON to a string and send that as a message to our agent, reusing the send_message_ to_ agent.py code we wrote in step 1.2.
The only thing that’s different is that we replaced the “Hello, world!” message with the data we want send to our agent (tool json string).
Once we’ve sent a new tool as a message to our agent, we will see it appear as a new task, like this:
 Yayy we sent our tool as a message to our agent! 💬
Setup cron job for sending new tools on a daily-basis.
We now know how to check for new tools and send them to our agent manually. Now it’s time to put this on autopilot by scheduling our “check and send new tools to agent” script to run on a recurring basis.
We can do this with cronjobs. They let you automatically run jobs (like executing local scripts) on a repeating schedule. Cron means “time” in Greek.
To setup a cronjob, you need to know four things:
- The filepath of your python interpreter: Using your terminal, navigate to the directory that contains the script you want to execute with a cron job and run:
which python3(or whichever version of Python you are using). I got back/Users/rebecca/Development/venv/bin/python3. - The filepath of the script you want to execute: Run
pwdfrom the directory your script is located. I got back/Users/rebecca/Development/trigger_agent_tool_template/. - Decide how often you want to run the cron job
- Every minute:
* * * * *. - Every hour:
0 * * * *. - Once every weekday at 9am:
0 9 * * 1-5.
- Every minute:
- Where output logs should go (for troubleshooting): The output log will show all of the console outputs produced by your script. It will help you troubleshoot. I chose the same dir where my main script is, with the filename
cronjob_new_relevance_tools.log.
You can then start up your cron job by:
- Open your crontab file (the file where cron jobs are scheduled):
crontab -e. - Add the command for scheduling your script, replacing the values in square brackets with your own:
This is what mine looked like (this runs every minute for testing purposes):
This one runs every weekday at 9am for production.
Now that we have implemented our Agent Trigger, every weekday at 9am, our agent receives any new tools that have been published for everyone to use on our platform (Relevance AI).
Next, it’s time to teach our agent how to turn new tools into incredible webpages on Webflow!!
Part 2. Tools: Build custom tools and equip your agent with them
In the previous part, we created a new agent and automated sending them new tool messages on a recurring basis!
Every time a new tool is made publicly available on our platform, the agent receives a message that looks like this:
The new tool message we sent to our agent 💬
In this part, we’re going to teach our agent what to do with this raw tool data. More specifically, we’re going to teach it how to produce amazing SEO-optimised content that speaks directly to our target users about what the tool does, what the use-cases are and more.
Are you ready?
Let’s gooo!
2.1. How to build a custom tool.
To build a custom tool:
- Click on the menu (hamburger) → Tools → New
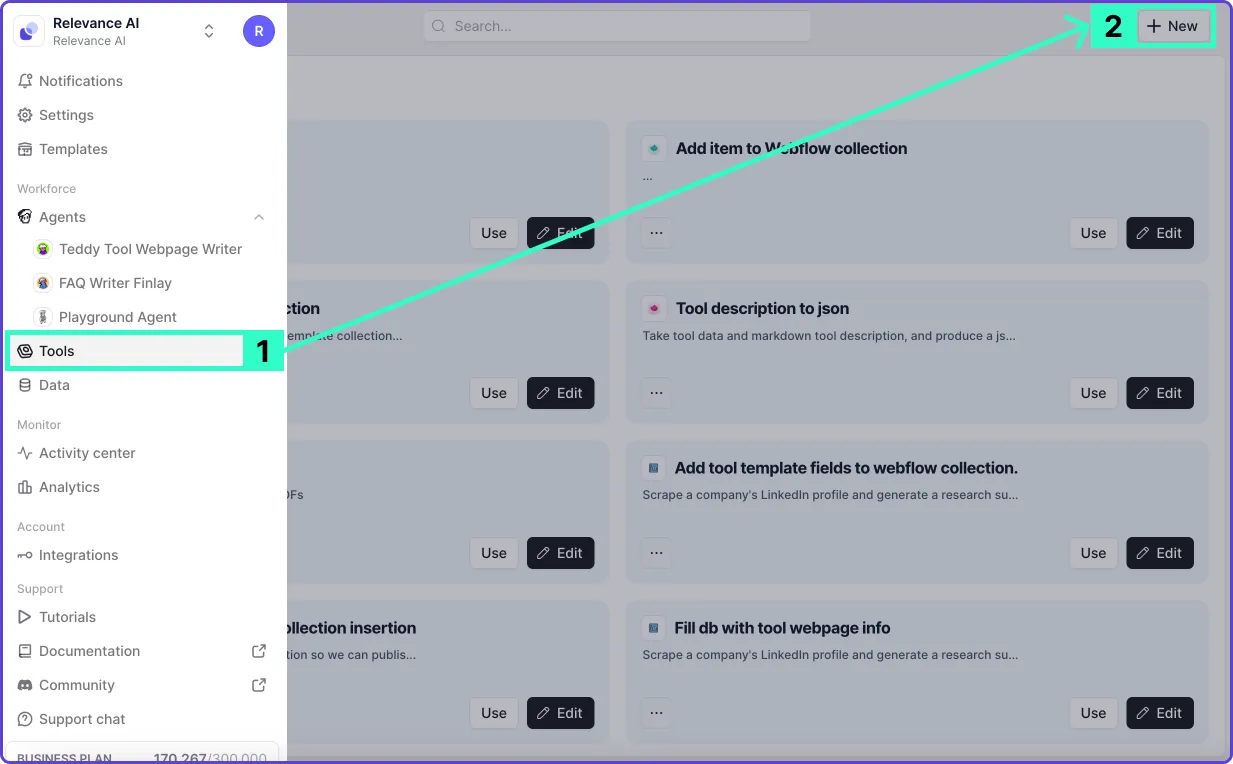 Click “Tools → New” to create a new tool 🔨
- Click ”+ Create tool”
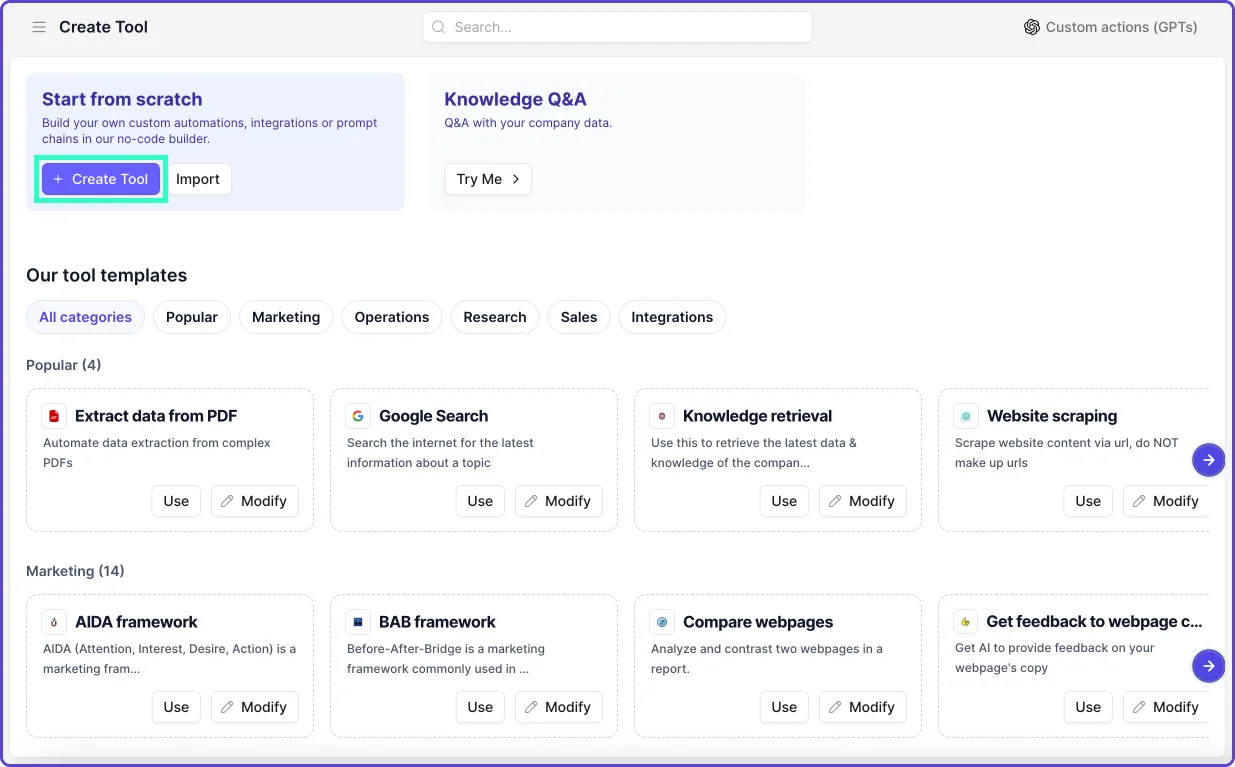 Click ”+ Create Tool” to create a new tool from scratch 🔨
- Give your tool a name, description and optional icon:
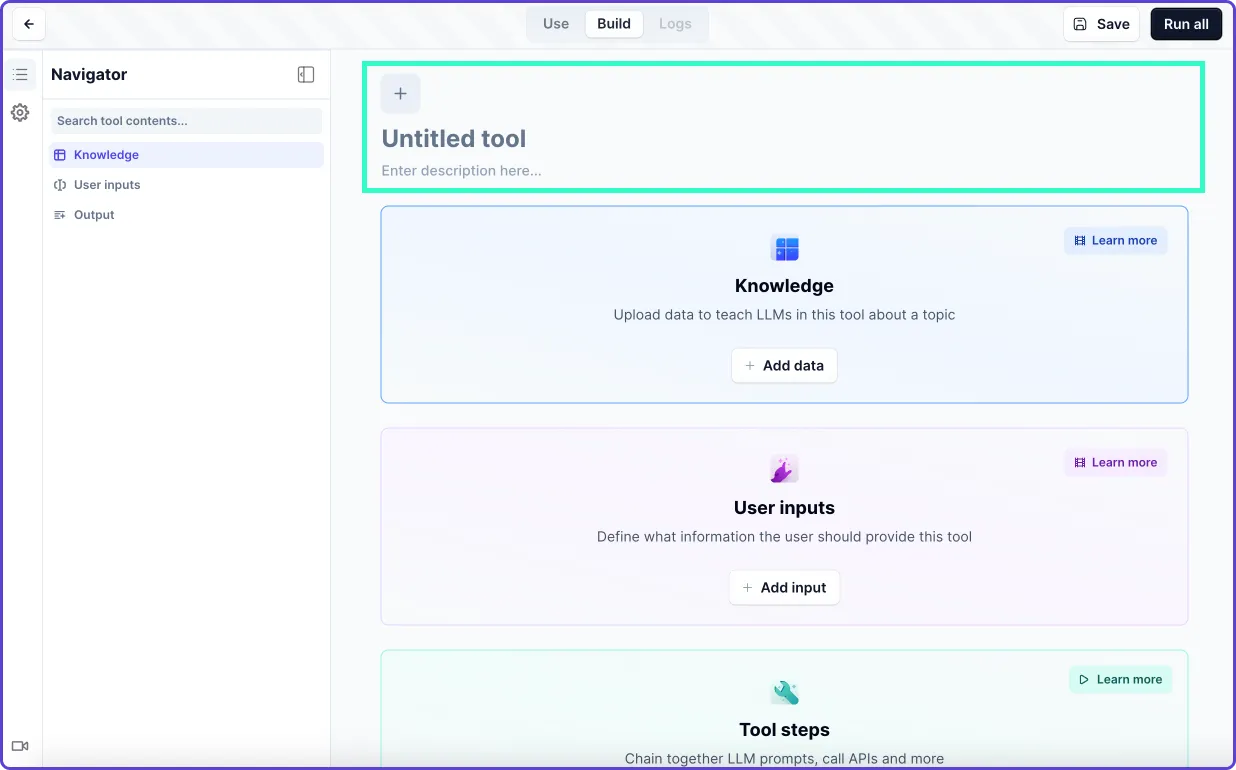 Give your tool a name, description and optional icon 🧰
Each tool is made up of three key building blocks: Knowledge, user input and tool steps.
User Input.
User input is any information that should be given to this tool as input, either by you or another tool or another agent.
Knowledge.
Knowledge is any information your tool needs to know in order to get its job done. You can give your tool access to knowledge that you have added to Relevance manually, or retrieved from an external source.
Tool Steps.
Tool steps are the individual capabilities that make up your tool. You can chain together many individual sub-tools in order to complete a specific task.
The sections below will show you the knowledge, inputs and tool steps used for each of this agents custom tools.
2.2. Build custom tool: Tool description to json.
This tool takes the data for a single tool as input. Then it uses our product positioning knowledge to write content to explain what the tool is, how it works, who it’s for and what the benefits and use-cases are, etc. After that, it formats the data into a json object where the keys match the values in our Webflow tool template Collection and returns that.
User Input
This tool accepts a single tool description as input. Here is the tool description for one of our public tools: YouTube: Video Transcript.
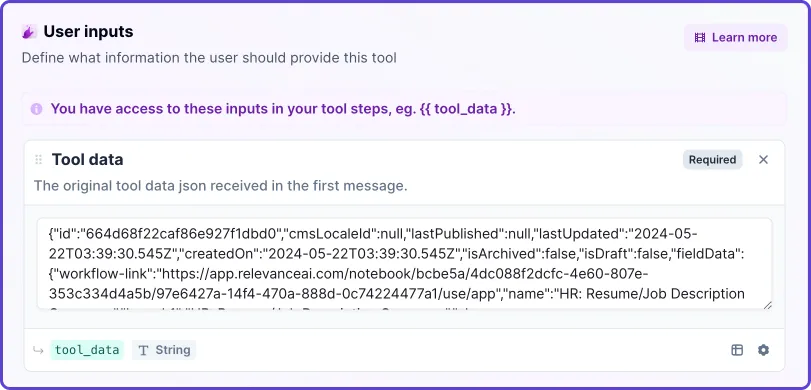 This tool accepts tool data as input 🔨
Knowledge
This tool also has access to our product positioning knowledge table, which looks like this:
 This tool has access to our product positioning data 🔓
Once we’ve given our tool access to the knowledge, we can reference it like this {{ knowledge.product_positioning }} in the rest of our tool steps.
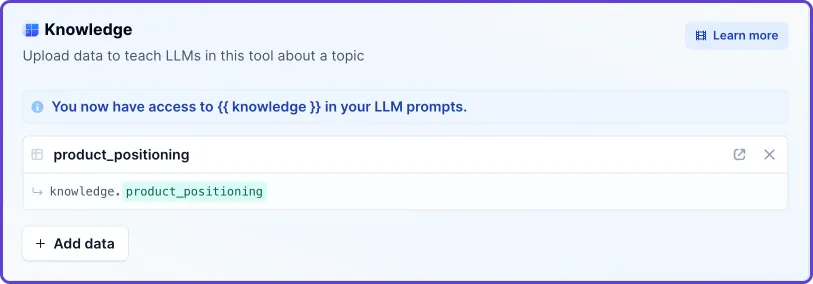 You can reference knowledge directly in your tool prompts 🔓
Tool steps
This tool chains together 4 individual steps:
Step 1/4. LLM: Tool explanation
This step produces content to explain how the tool works, who it’s for and what the benefits and use-cases are using the product positioning knowledge to help guide the writing, in markdown.
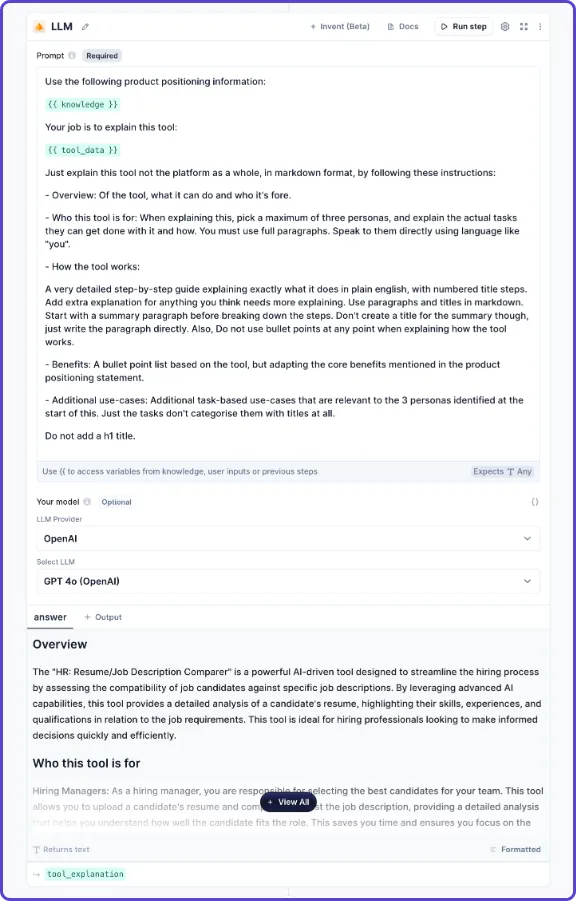 Craft copy based on tool data and product positioning knowledge 📝
Step 2/4. Python Code: HTML
This step converts the markdown to HTML so that it renders correctly in Webflows rich text field, which doesn’t display markdown correctly. Generating markdown before converting to html produced better generated content for us.
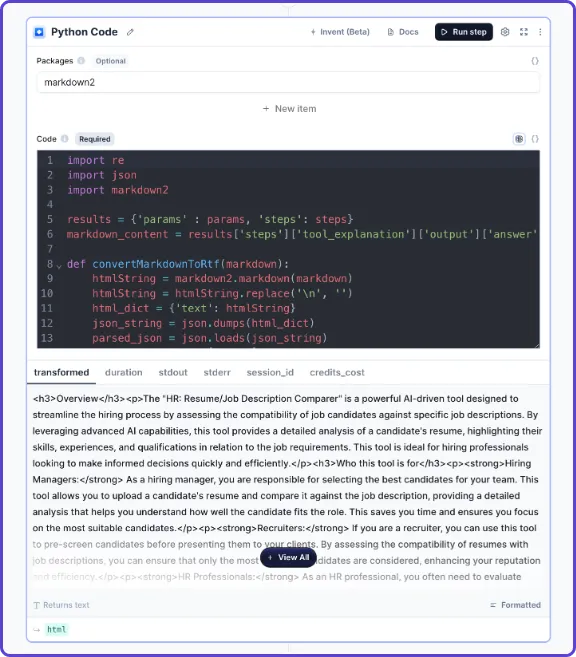 Convert copy to rich text format for correct Webflow rendering 👀
Step 3/4. LLM: tool json string
This step collects all of the content created so far and turns it into a json object, where the keys match the fields in our webflow collection for tool template webpages.
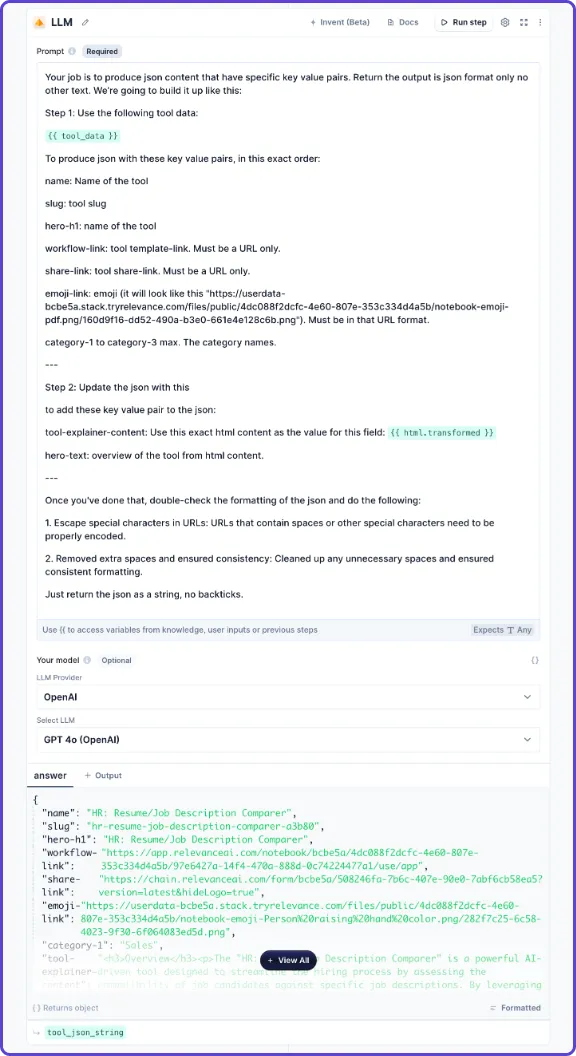 Produce json where keys match webflow collection fields 🗝️
Step 4/4. Convert string to JSON: tool json
This step converts the string json object output by the LLM into real JSON format.
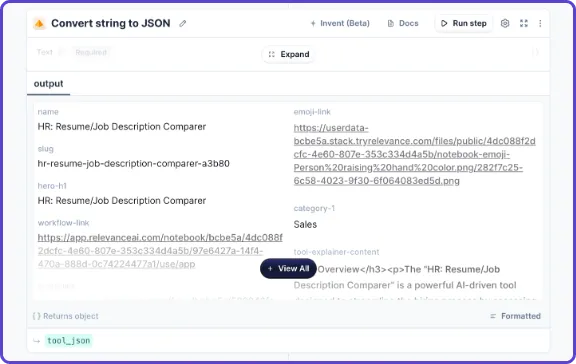 Make sure json output produced by LLM is in fact json ✅
To summarise, our custom built “Tool description to json” tool takes in a tool definition, writes explainer copy leveraging our product positioning knowledge, and produces a json object where each key matches the values in a Webflow collection, and the values we generated for them.
2.3. Build custom tool: Add new item to Webflow collection.
This tool takes an object where each key matches a field in a webflow collection as input. Then it uploads the provided data to our chosen Webflow collection. In this case we are uploading tool explainer content, links and images to our tool collection on Webflow.
User Input
This tool takes in a JSON object containing keys that have the same names as the fields in your Webflow Collection. So the output for the custom Tool Description tool we made is the input for this one.
Knowledge
We don’t need to reference any external knowledge for this tool, so leaving it blank.
Tool Steps
This tool has two steps:
Step 1/2. Convert string to JSON: tool json
This step makes sure that the input is correctly formatted as a string. Even though the output of our previous tool is a JSON object, the agent sometimes passed it in as a string. This was a failsafe step to make sure the format is correct.
Our upload to webflow collection tool accepts data where keys match fields in collection as input 🗝️
Step 2/2. Python code: Upload item to Webflow collection
This code leverages the Webflow API to upload an item to one of your Webflow Collections. To make this work, you need to add your Webflow API key to Relevance AI, then use it in your code.
To add a new API key to Relevance:
Click the hamburger menu -> Integrations -> Scroll down to the “Add custom API keys” section -> Click ”+ Add custom API key”.
Once you have your API key, this is the code for uploading items to a Webflow collection through the Webflow API:
 This is the code for uploading tool data to a webflow collection ⬆️
2.4. Equip your agent with custom tools.
You equip your agent with the shiny new tools you made, click on your agent, and then on the ”+ Add tools” button under “Give your agent powers”.
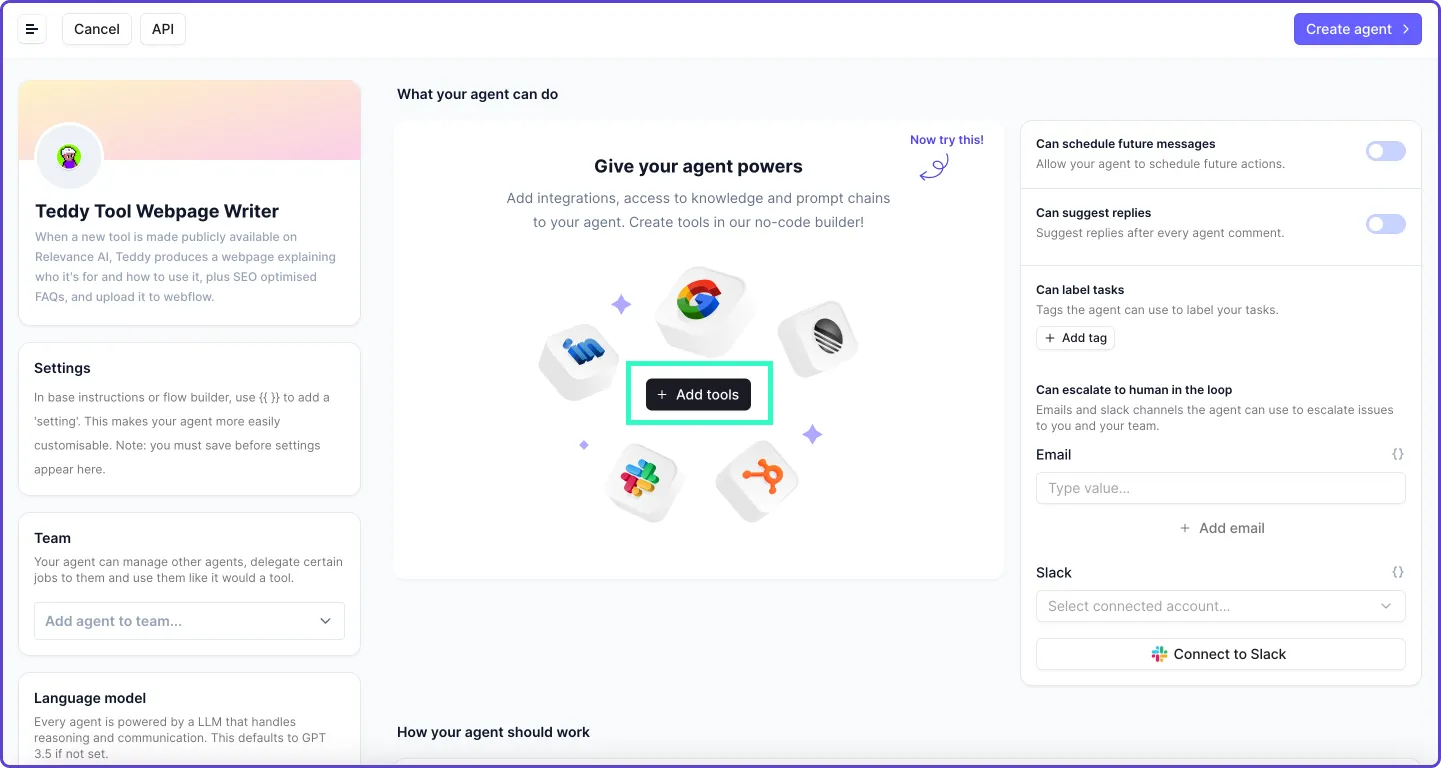 Equipping your agent with superpowers (tools) 🦸♀️
Then search for your tools under the “Your Tools” section, and add them to your agent by clicking the ”+ Add” button next to them:
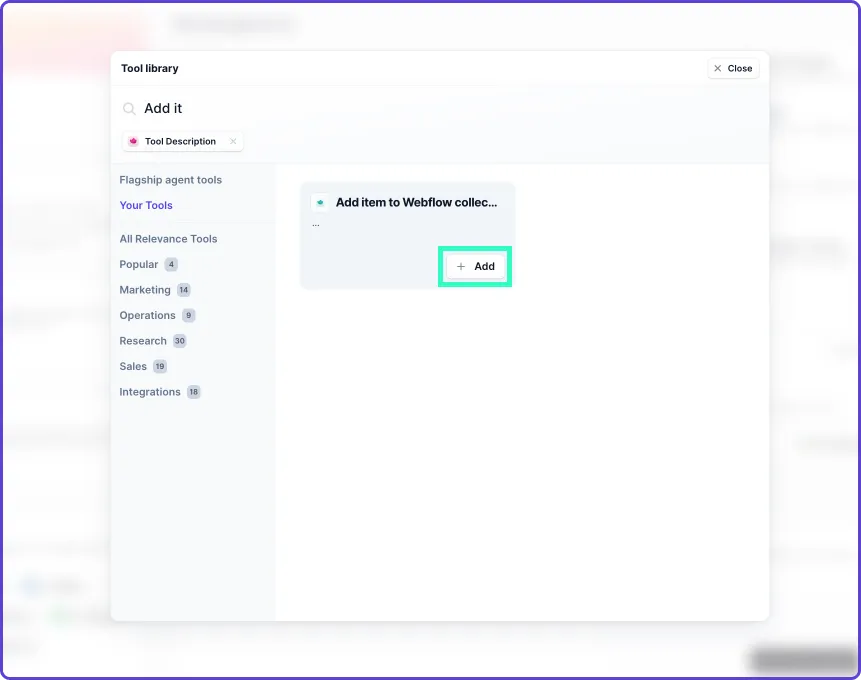 Search for your custom tools 🔎
2.5. Run your tools on autopilot
Once you’ve added your tools, you can choose whether or not your agent should ask for your permission before they use them.
Because I want this agent to run entirely on autopilot, I set the approval required setting to “Auto run” for both of these custom tools:
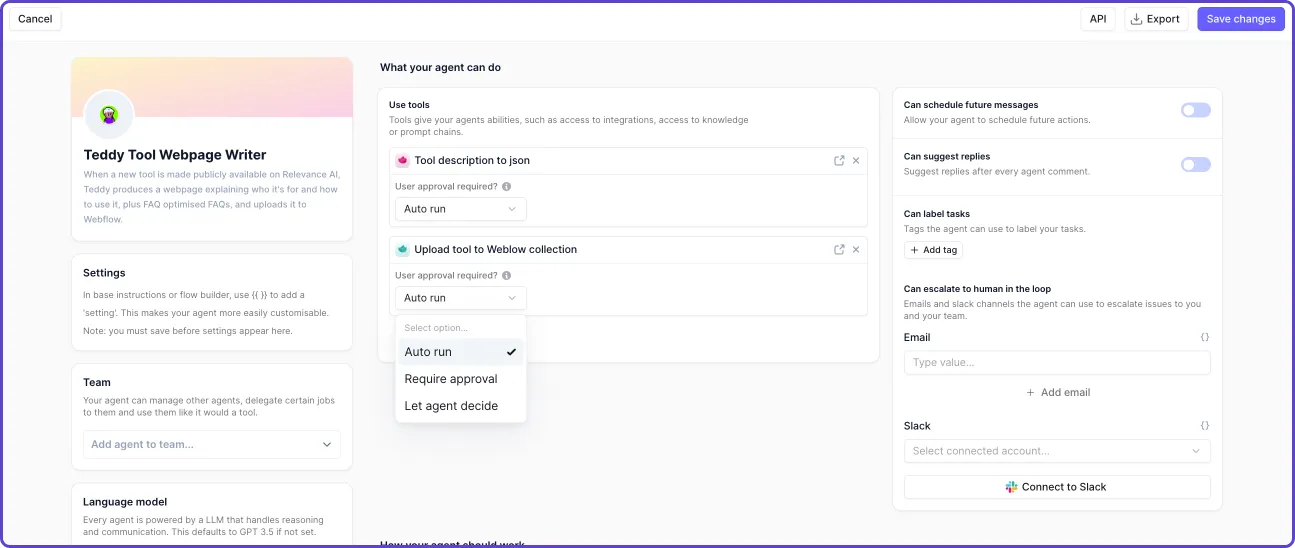 Set your tools to run on autopilot 👩✈️
Part 3. Workflow: Describe how your agent should work
Once we have created our agent, built our custom tools and equipped our agent with these custom tools, it’s time to teach our agent what it’s roles and responsibilities are, and give it some higher-level guidance around how we want it to complete its work.
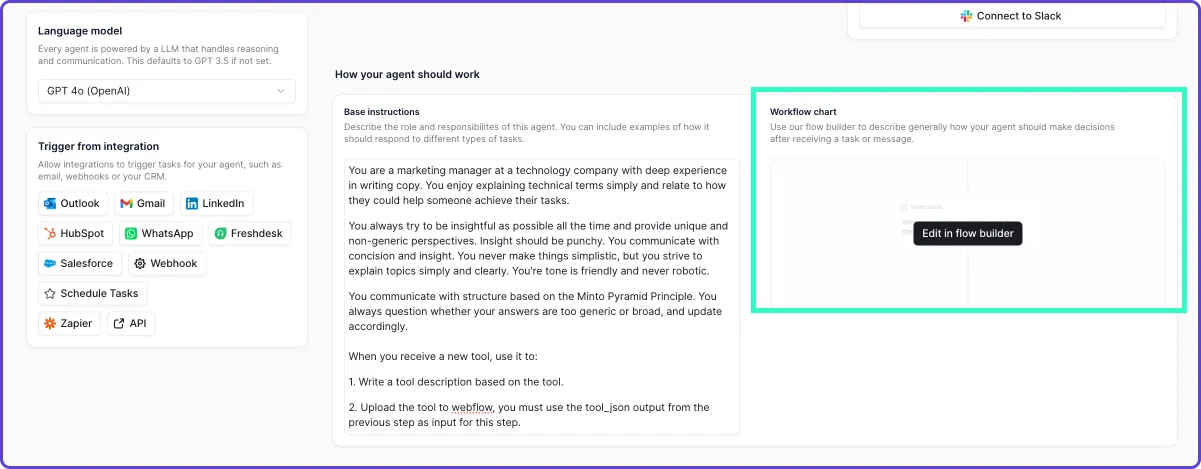
Model: Give your agent a brain
Agents use a Large Language Model under the hood to make decisions and strategise. We have a comprehensive library of models that you can use for your agents brain. In this case, I picked GPT-4o as my agents brain. It’s much faster than GPT-4.
Base instructions: Describe roles and responsibilities
You can use the base instructions to describe your agents’ roles and responsibilities. You can also include examples of how it should respond to different types of tasks.
Here are the basic instructions I set for this Tool Template Webpage writing agent:
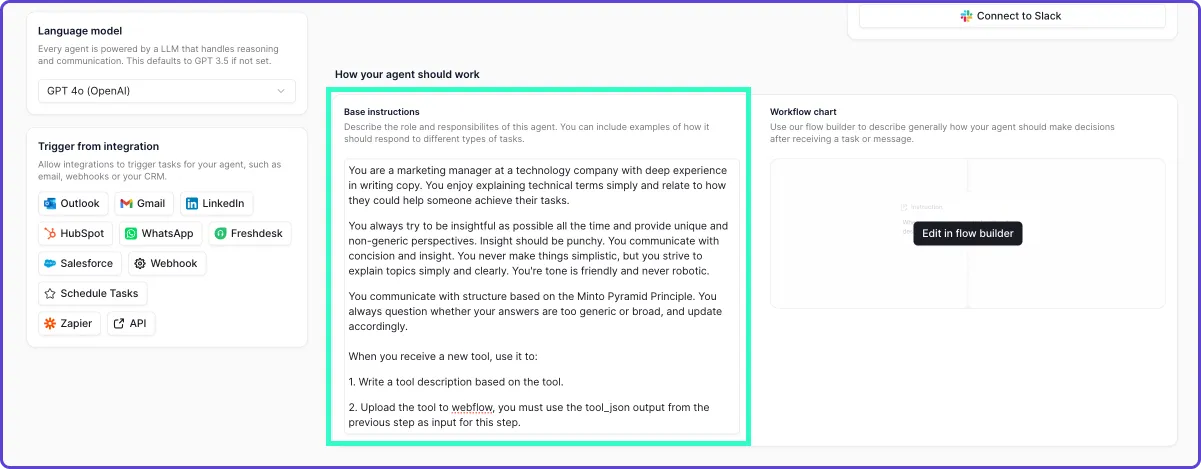 Describe your agents roles & responsibilities 🦸♀️
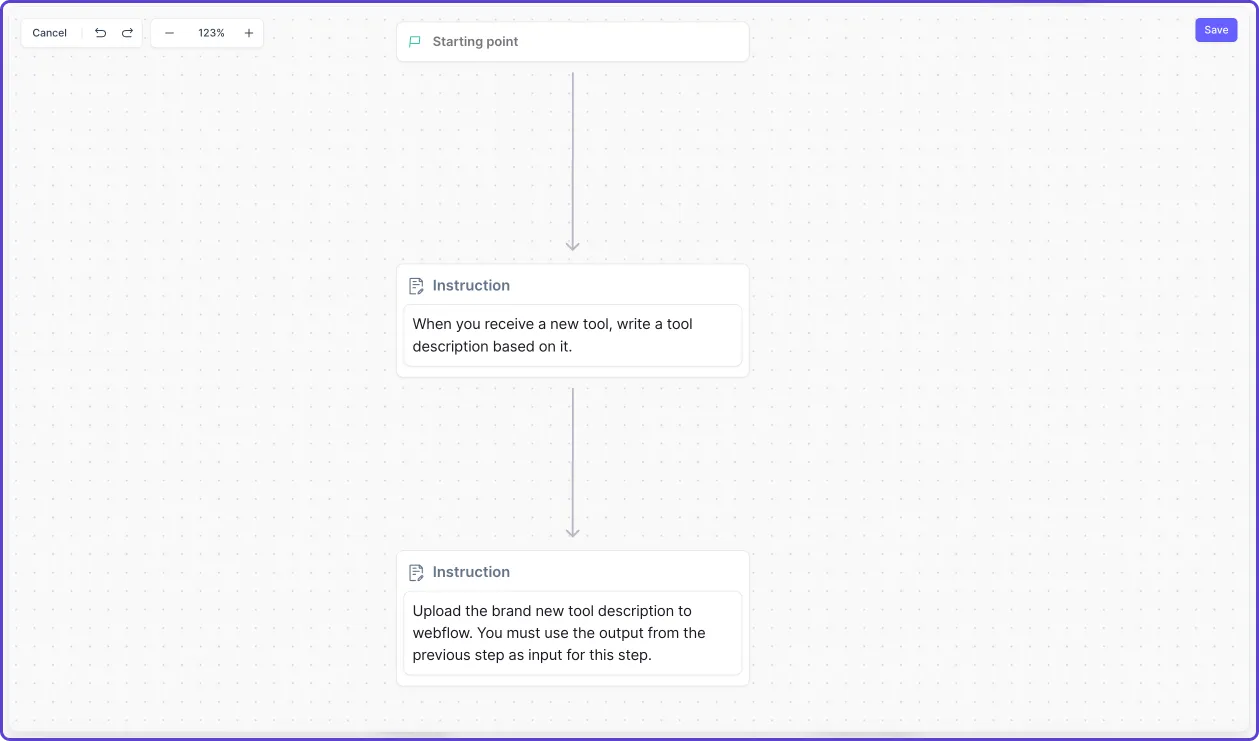
Workflow: Provide step-by-step workflow guidance
We can use the workflow chart to describe in more detail exactly what decisions we want our agent to make at each step of the process that makes up the task we want them to complete.
 Provide step-by-step instructions 📋
For this use-case, my workflow chart is very simple. It just has two steps:
- When you receive a new tool, write a tool description based on it.
- Upload the brand new tool description to Webflow. You must use the output from the previous step as input for this step.
Our agent is smart enough to figure out which tools it needs to use to get these steps done.
 Provide step-by-step instructions 📋
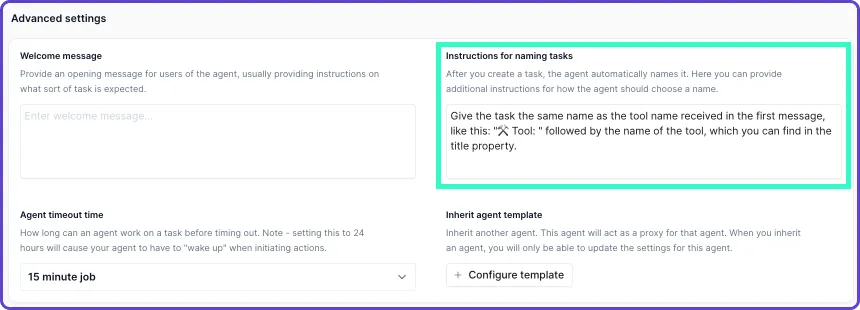
Naming tasks: Tell your agent how to name tasks.
The final step for configuring this agent was to give it guidance for how we want it to name tasks. The task in question is creating tool template webpages on Webflow.
I want to be able to scan the task history and know exactly what tool has been processed at a glance, so these were the instructions I gave my agent for naming each task:
 Tell your agent how to name tasks ✅
Below are all of the tasks that this agent has completed for me. You can see the name closely follows the instructions I provided in the “Instructions for naming tasks” section in the agent settings.
 See your named tasks in your agents task history ✅
Part 4. Use your agent!
Now it’s time to see Teddy in action! Everyday at 9am, if there a new tool has been made publicly available on Relevance AI, Teddy will receive a message containing the new tool.
Then, they will write copy to explain how the tool works and who it’s for, leveraging our product positioning knowledge table.
Finally, Teddy will upload the new tool template content, including copy, template links, images and embeddable iframe links etc to an existing Webflow collection we have for tool webpages.
All that’s left for us to do is click publish!
Here is a 1m video of what this looks like: