We’re excited to dive in and introduce you to building and deploying AI chains on Relevance using our notebook experience. There are a few key concepts and terminology that you should get comfortable with:
Term
Description
Chain
Technique for building powerful features by combining AI (LLMs like GPT) with each other, external data sources and other transformations.
The editor in Relevance AI for creating, testing and deploying a chain.
A step or link in the chain, many of these make up a full chain as they process some data and provide an output.
Each transformation will output data into a variable, this variable can then be referenced from other transformations.
A form with inputs which are provided to the chain when running it. This can be deployed to a URL or embedded.
The chain deployed as an API endpoint that can then be triggered
Getting started
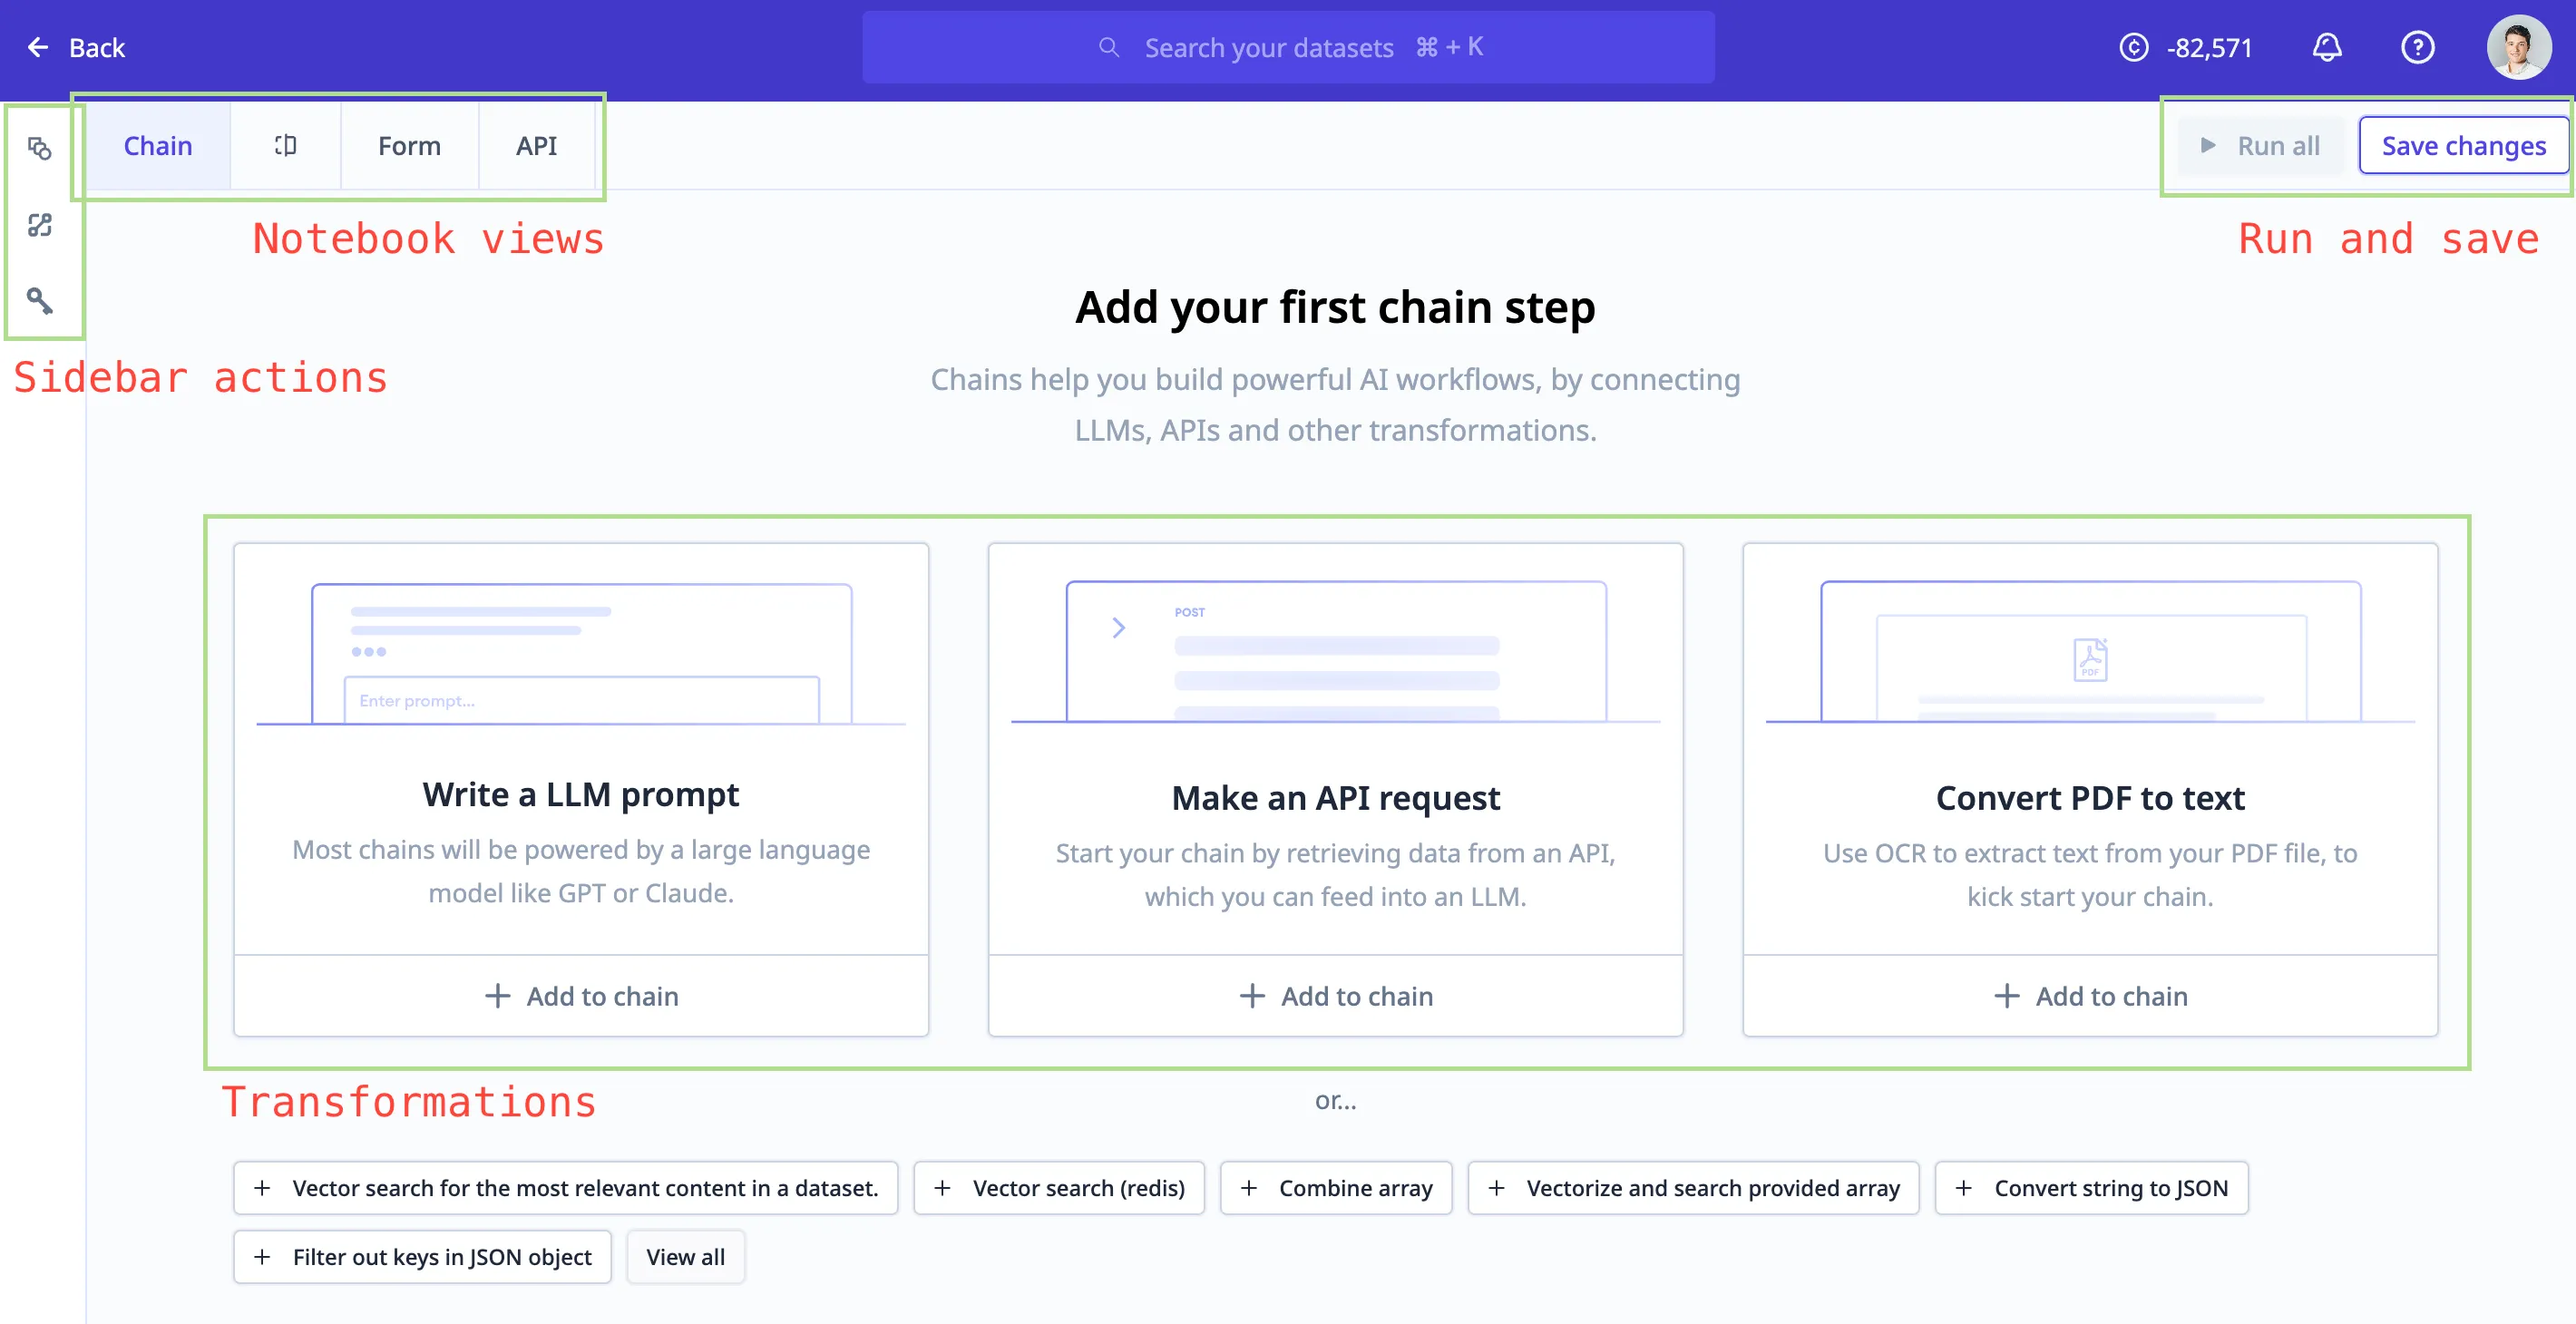
To get started, head to “build AI chains” and click “create new chain”. You’ll then be presented with the Notebook. From here you’ll be able to add new steps, change the view, save and run.
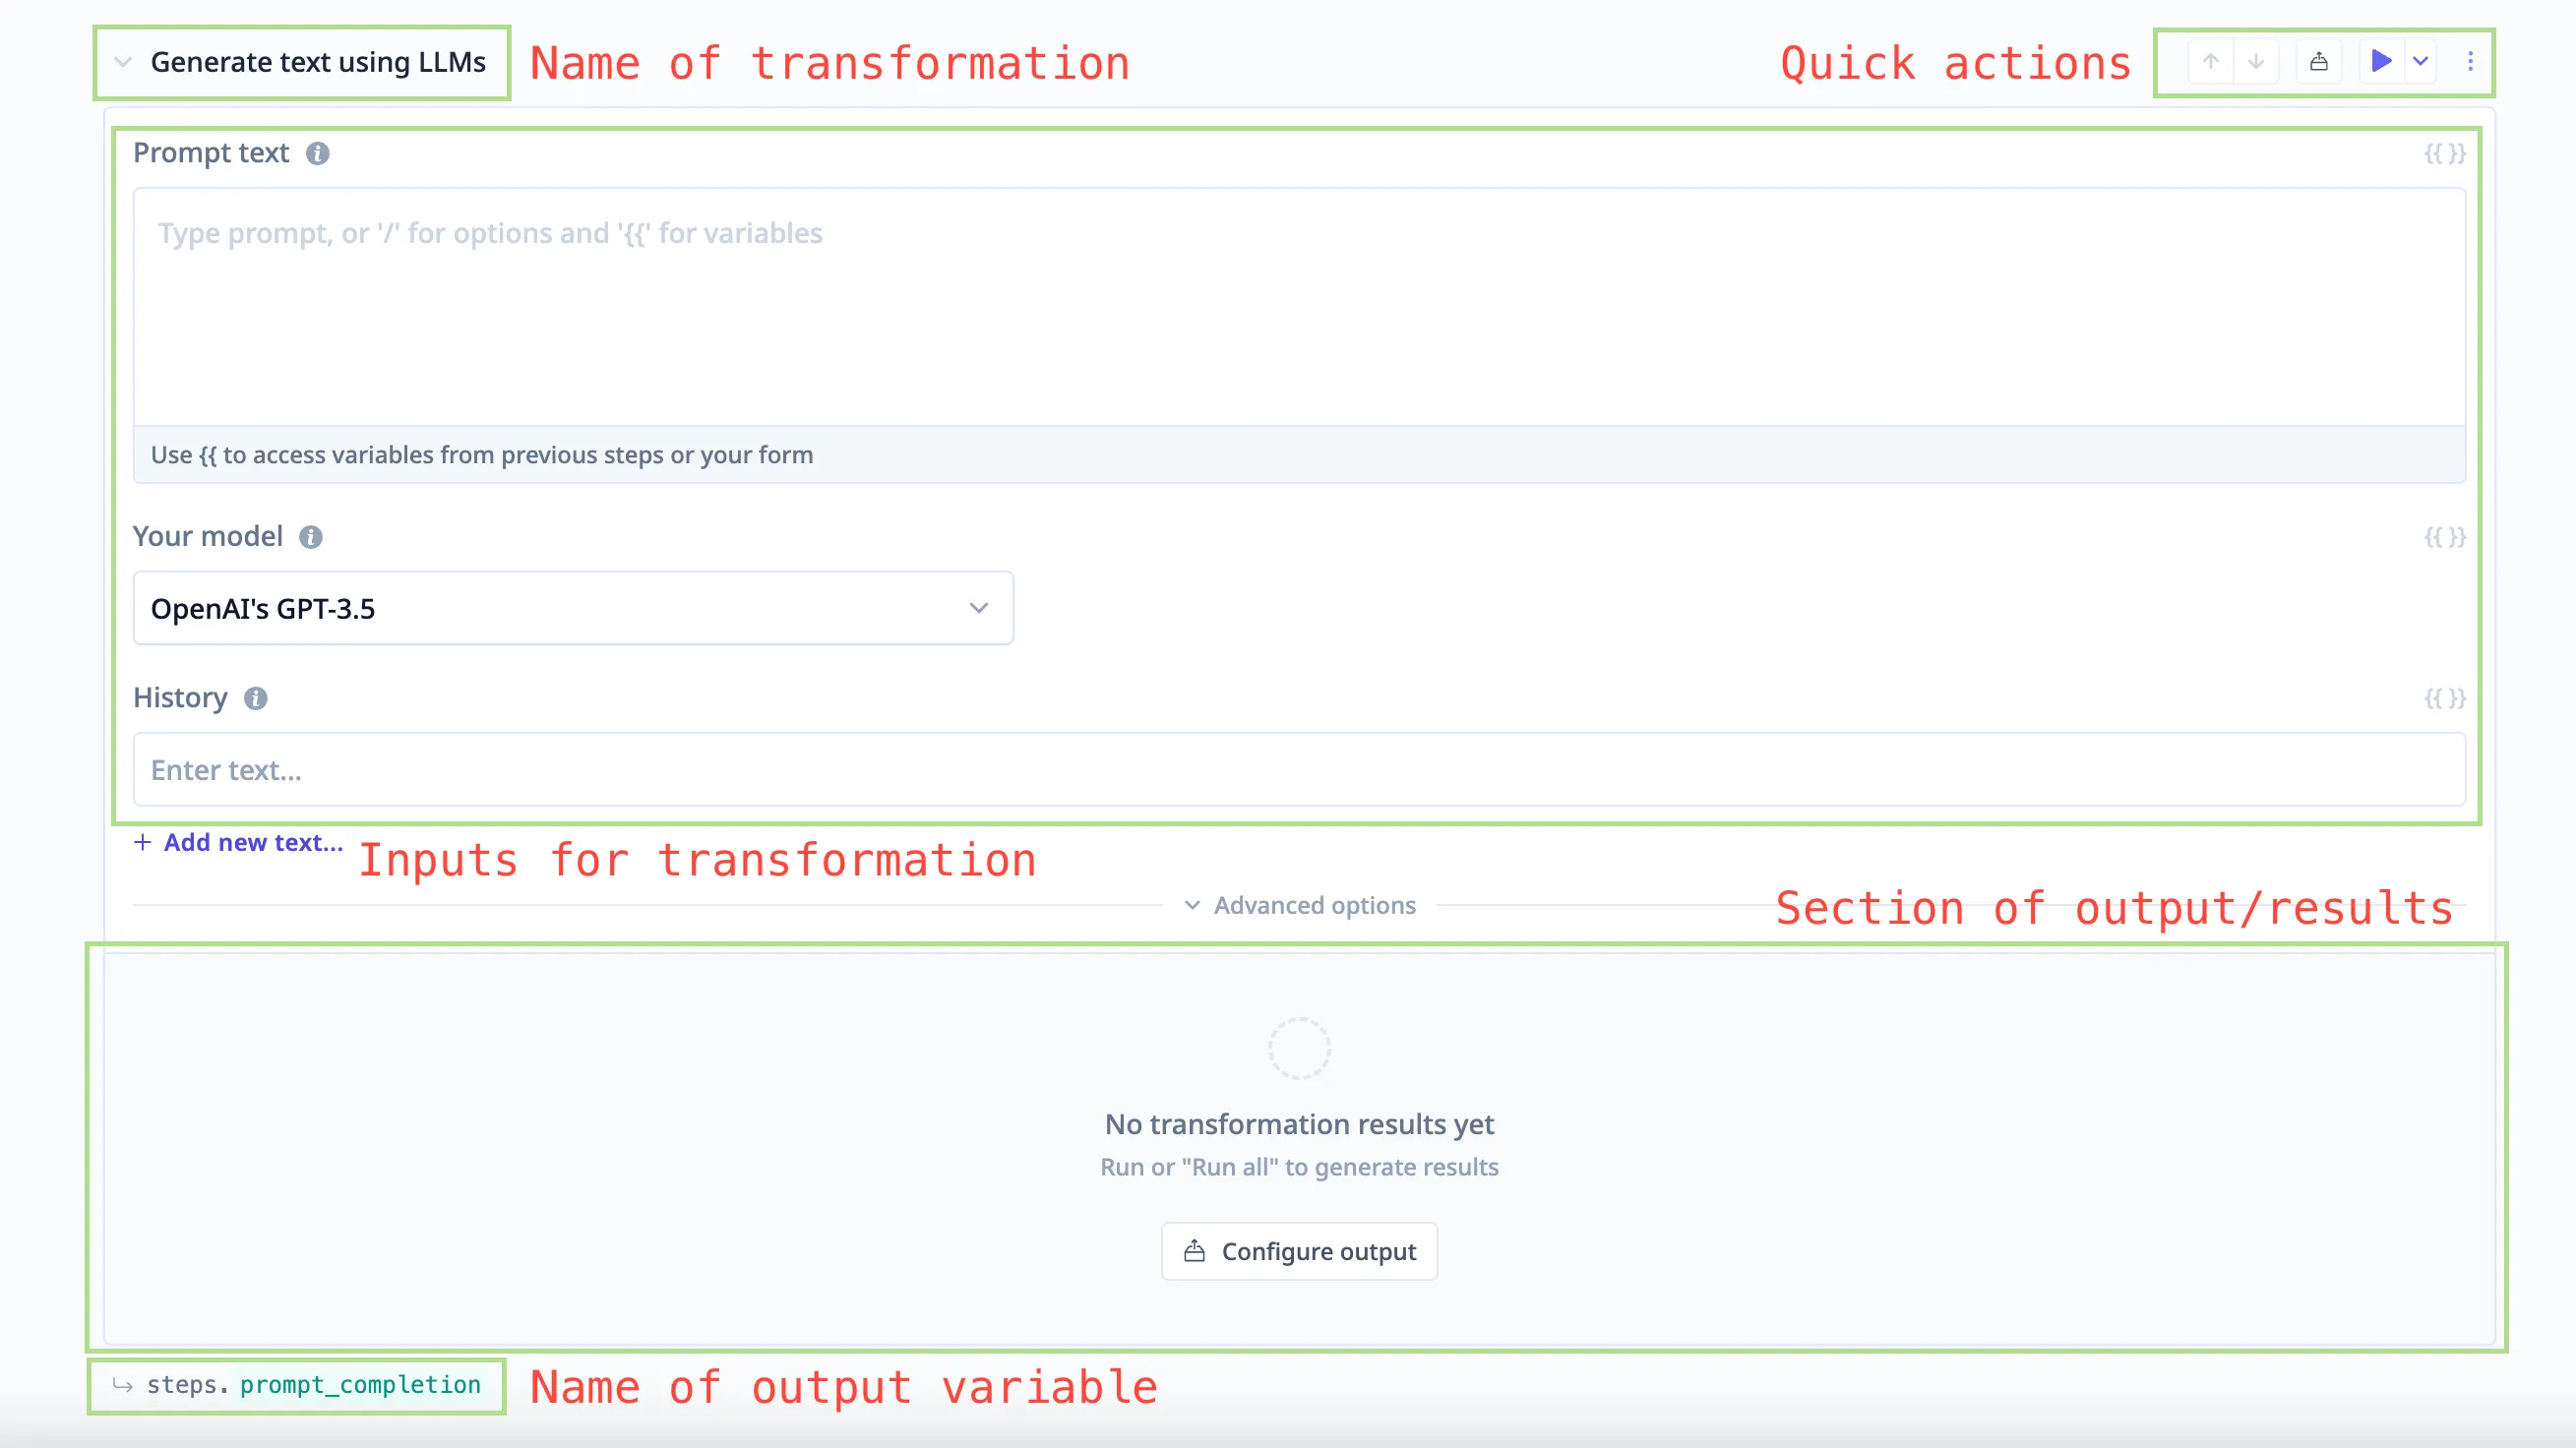
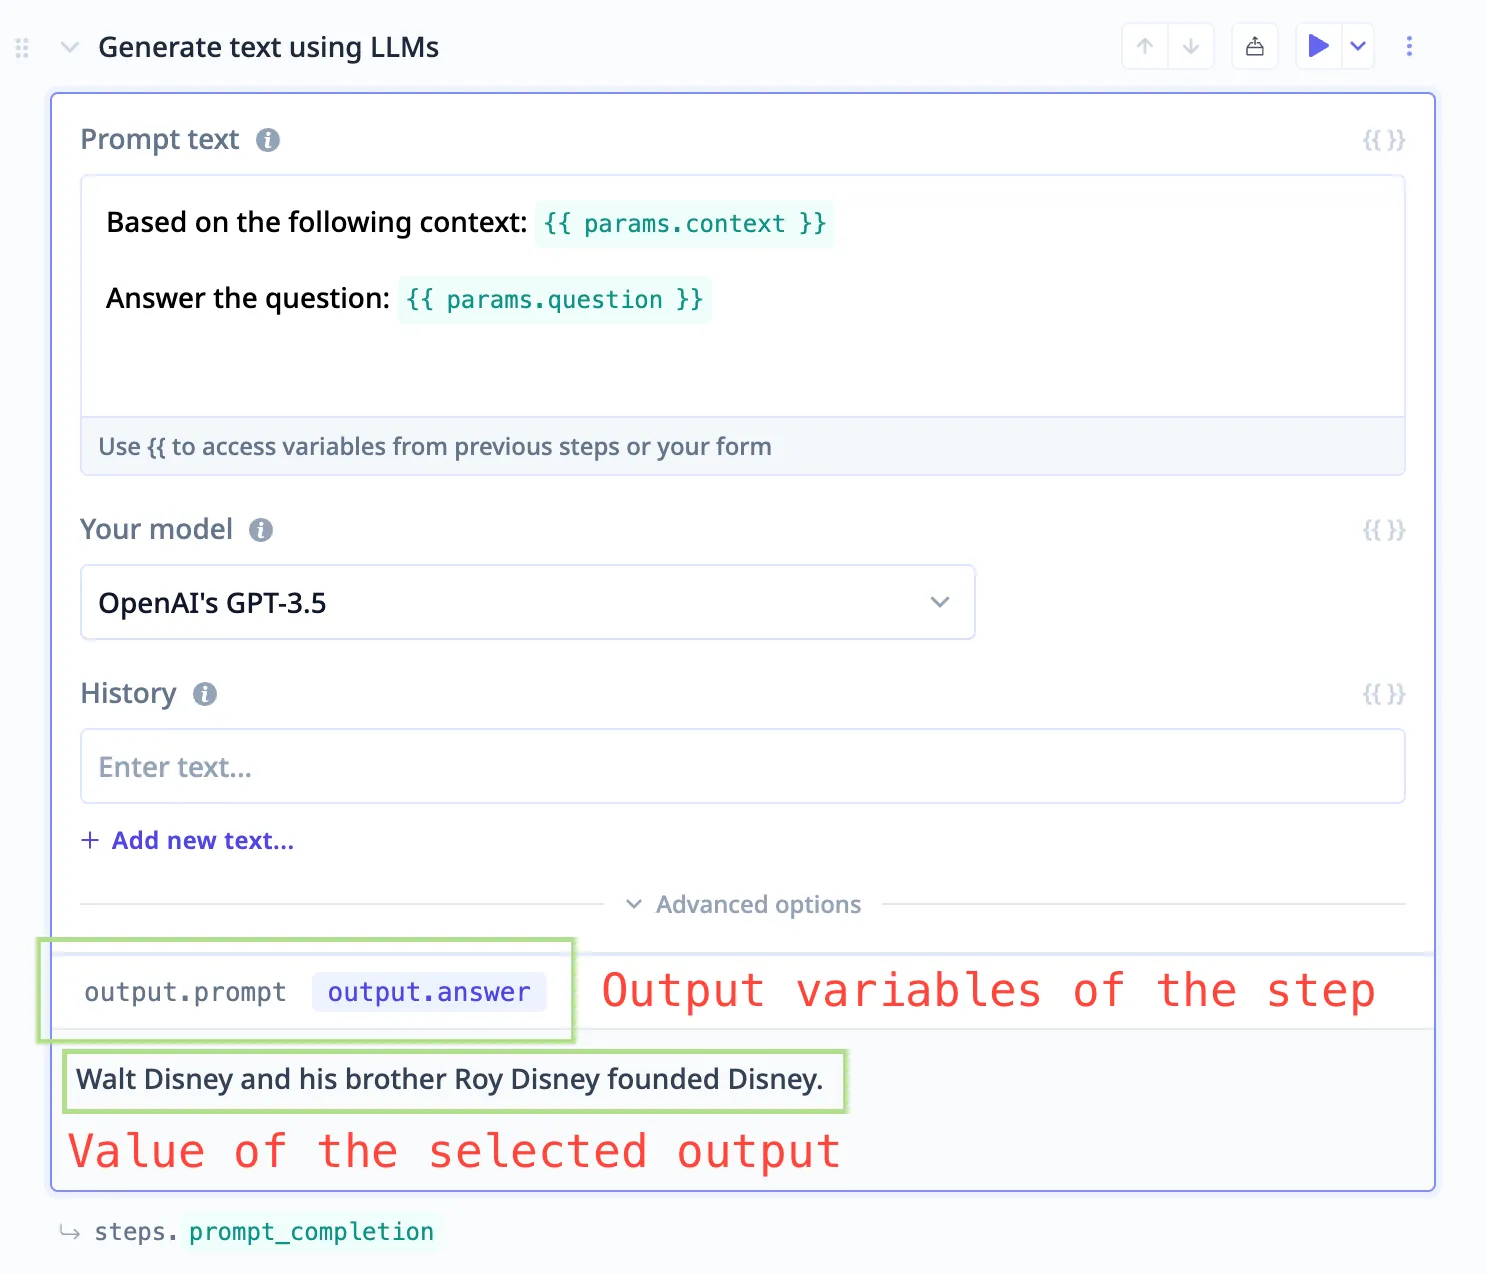
Once you select a transformation, you’ll then see the following view. Every step in the chain has the following components. The key areas to keep in mind that for each one you can specify inputs. With the LLM/GPT prompt completion step, you can provide an input for your prompt. Once ran you’ll then see the output of that below and can then reference it in following steps based on the name of the output variable.
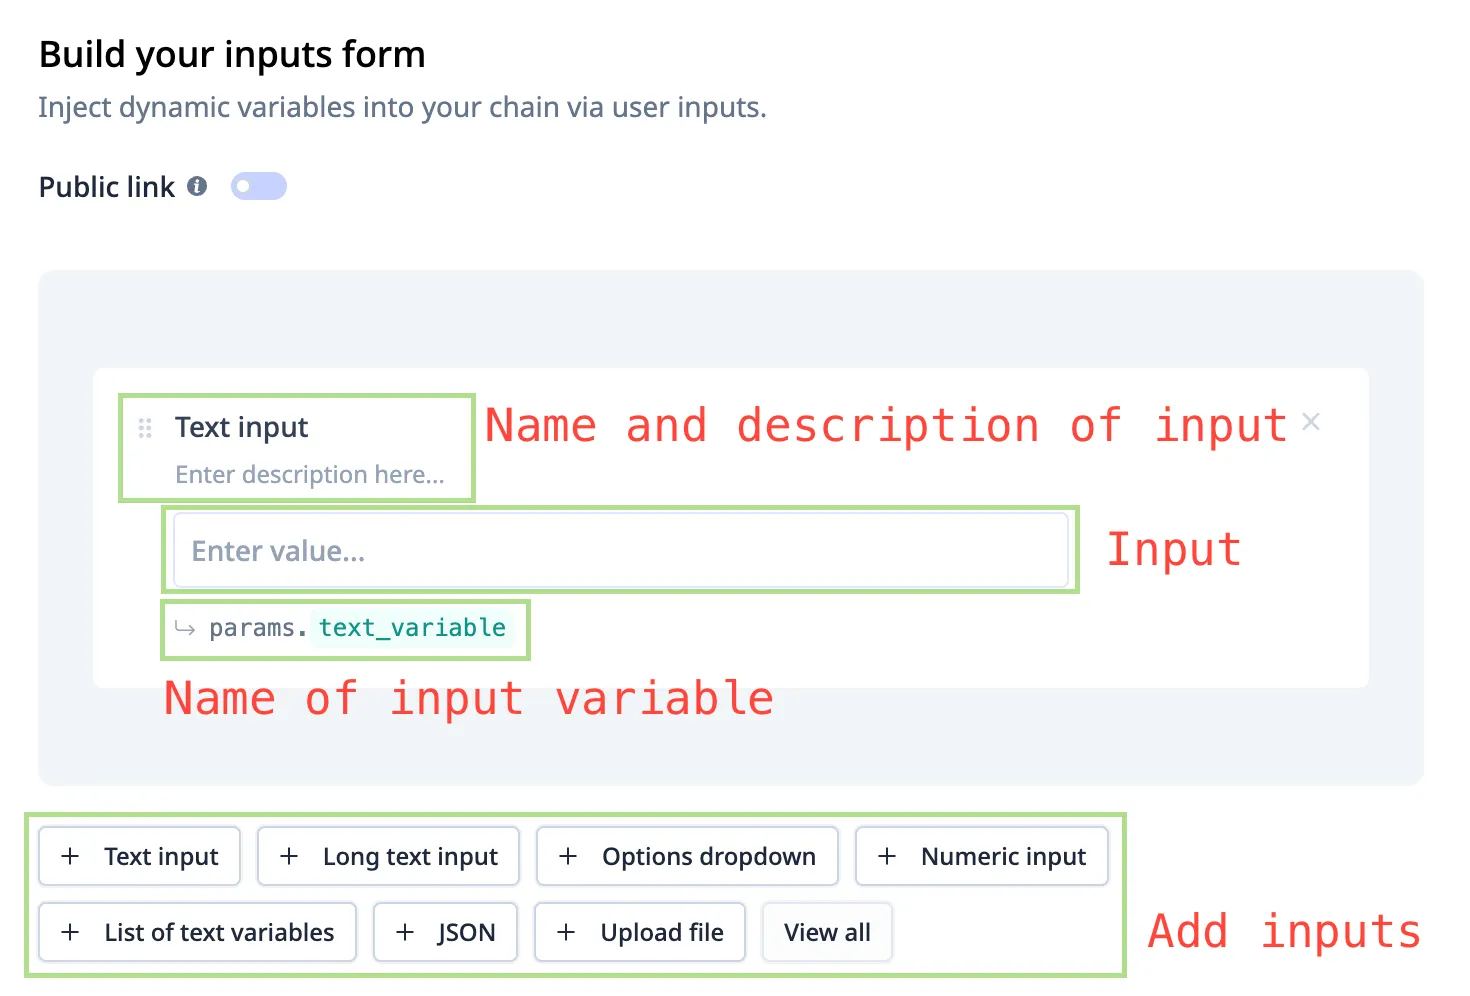
Once you’ve gotten your first step in the chain, one of the things you might want to do is specify input variables. To do that you want to to select the split view or the form view from the top-left. You’ll then see the following form where you can add inputs to your form, these can be simple text inputs, file uploads etc. For each one you can specify a title, description and the name of the variable which you can use to reference in the chain.
Now that we have some input variables, we can reference the inputs in our chain. For example, in our LLM step we can start write {{ (two curly brackets) and that will open up a variable selector where you can select the input variable from the form. When you then run the chain it’ll replace that variable with the value from your form. This is also the same process for referencing output variables from a previous step in the chain, the only difference being that it starts with “steps”.

To run the chain, you can press the “run all” button in the top-right. This will then show you an output at each step and one at the end. For each step you’re able to “configure output” to specify which variables you’d like to surface (you can leave this default). You can also press the “run” button on each step to just run that single step - keep in mind that if you’re referencing the steps of other outputs you need to have ran those steps before running this single step.
For loops and if conditions
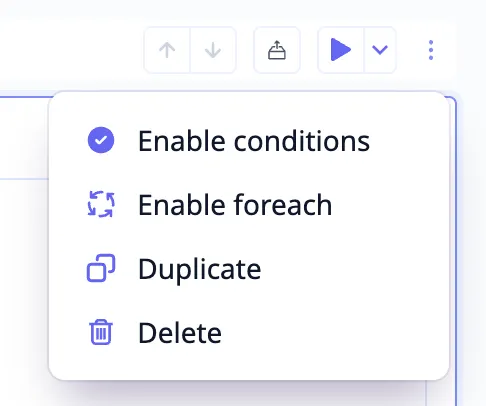
For more advanced use-cases you can leverage loops and ifs to better control the output. To add foreach or if to a step, just select the three dots button in the top-right.
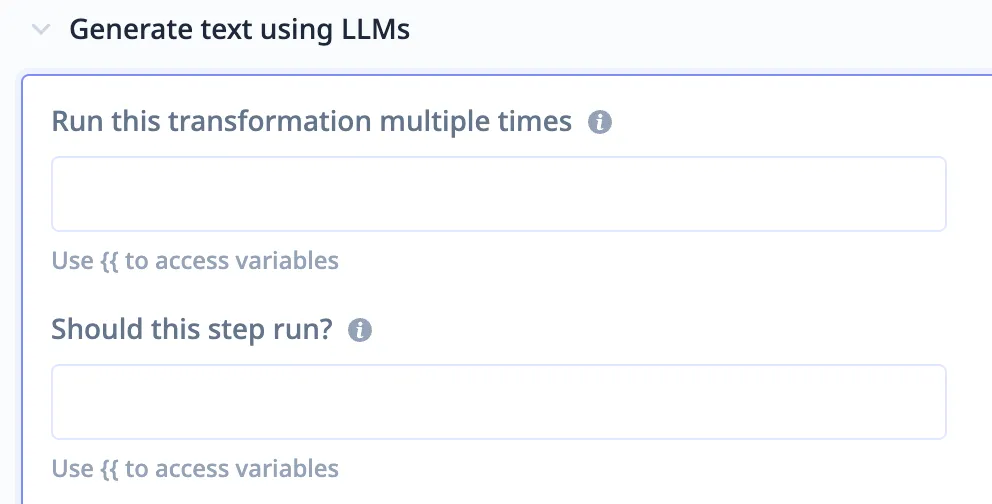
Once you’ve enabled foreach or conditions, you’ll see the following inputs appear at the top of the step. The array that you specify in the first input will be used to loop through each item. Each item will then be available through the variable “foreach.item”. With the conditions, the if check you specify will determine whether the chain has ran.
Deployment options
Each chain can be deployed as a form or an API. The form provides a no-code interface for interacting with the chain. The API can be embedded directly into a product to send an input and receive the output of the chain.
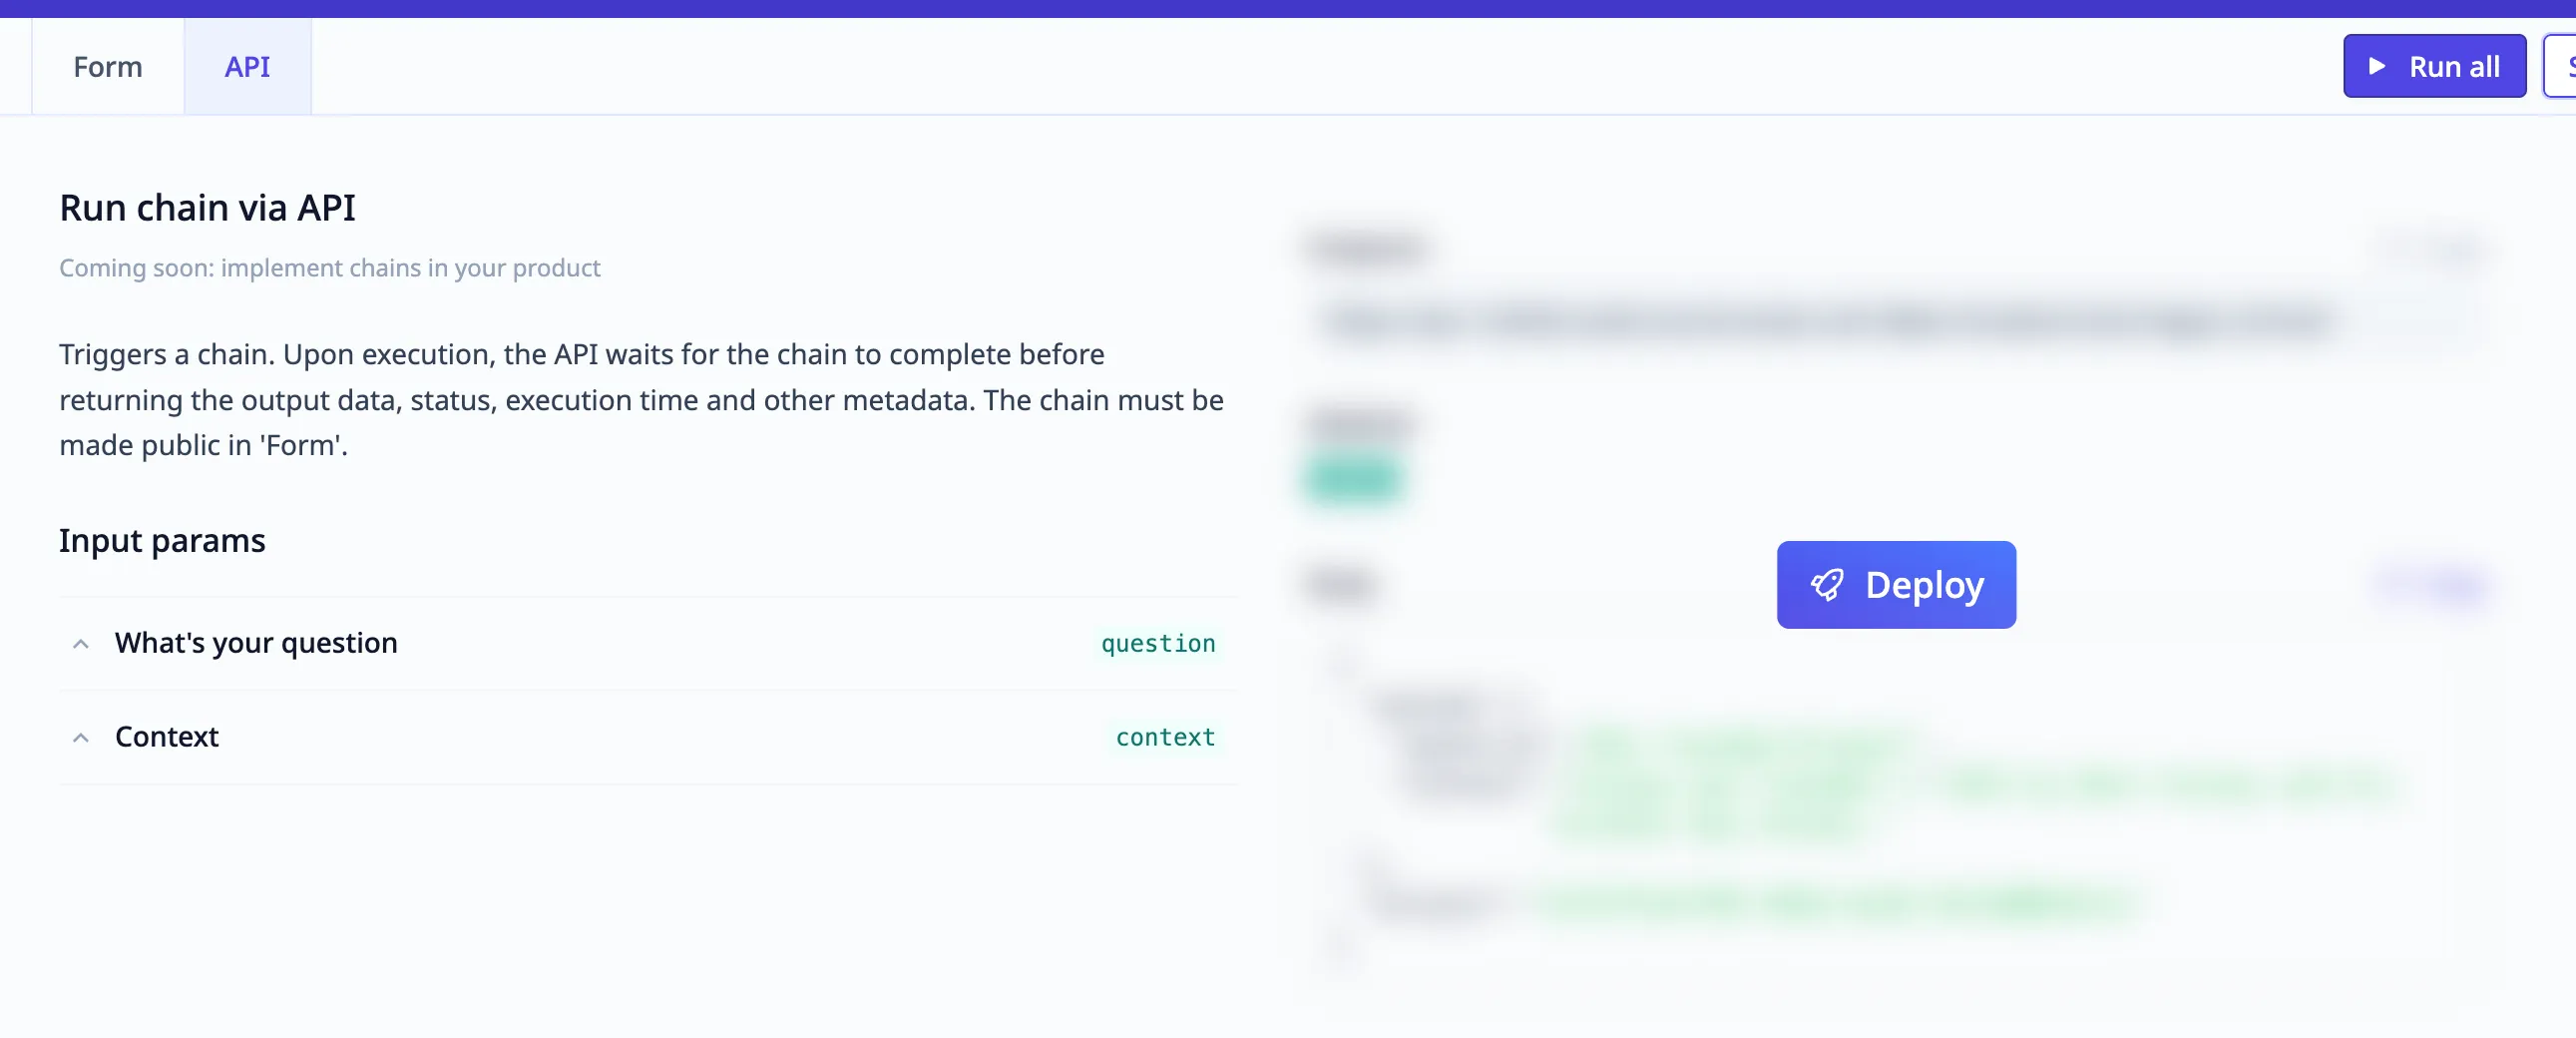
Select API from the notebook views to deploy it and see documentation for the endpoint, authorization header and body.
Summary
There’s a whole lot more to explore with transformations that make API requests and execute Javascript code. You can even call chains from each other to create more complex functionality and even build AI agents that can problem solve. Keep your eyes open for more articles on how to create this functionality.